laser 73 toyostove manual

The Laser 73 Toyostove is a versatile, compact device designed for precise laser applications. Its ergonomic design, integrated safety features, and user-friendly interface make it ideal for hobbyists and professionals alike. This manual guides you through setup, operation, and care.
Safe use daily.

Safety Precautions
Always wear protective eyewear when operating the Laser 73. Keep the unit away from children, pets, and flammable materials. Ensure proper ventilation and avoid pointing the laser at reflective surfaces. Follow all local regulations for laser use. Never expose to skin!.
General Safety Guidelines
Before operating the Laser 73 Toyostove, read all instructions carefully and understand the potential hazards associated with high‑intensity laser beams. Always wear certified laser safety goggles that match the wavelength of the device. Keep the operating area free of reflective surfaces such as mirrors, polished metal, or glass that could redirect the beam into the eye or skin. Do not point the laser at any person, animal, or reflective object. Maintain a safe distance from the beam path; the manufacturer recommends a minimum of 2 meters for most applications. Ensure the unit is placed on a stable, level surface to prevent accidental tipping or movement during use. Keep the device away from flammable materials and avoid operating it in damp or humid environments, as condensation can damage internal components. Use only the supplied power adapter or battery pack, and never attempt to modify the power source. If the device emits a visible plume or sparks, immediately shut it off, disconnect power, and inspect for damage. Never leave the laser on unattended; use the built‑in safety interlock if available. Store the unit in a dry, dust‑free location when not in use, and keep the protective covers intact. In case of eye exposure, seek immediate medical attention and do not attempt to self‑treat. By following these guidelines, you can enjoy the Laser 73 Toyostove safely and responsibly. Always ensure the laser is operated in a well‑ventilated area and keep a fire extinguisher nearby for added safety. Check the troubleshooting guide for operational errors!

Product Overview
The Laser 73 Toyostove delivers precise, high‑power output in a lightweight chassis. Built with durable ABS, it features adjustable focus, a safety interlock, and a user‑friendly interface. Ideal for prototyping, engraving, and educational projects.
Certified for safety.
Key Features and Specifications
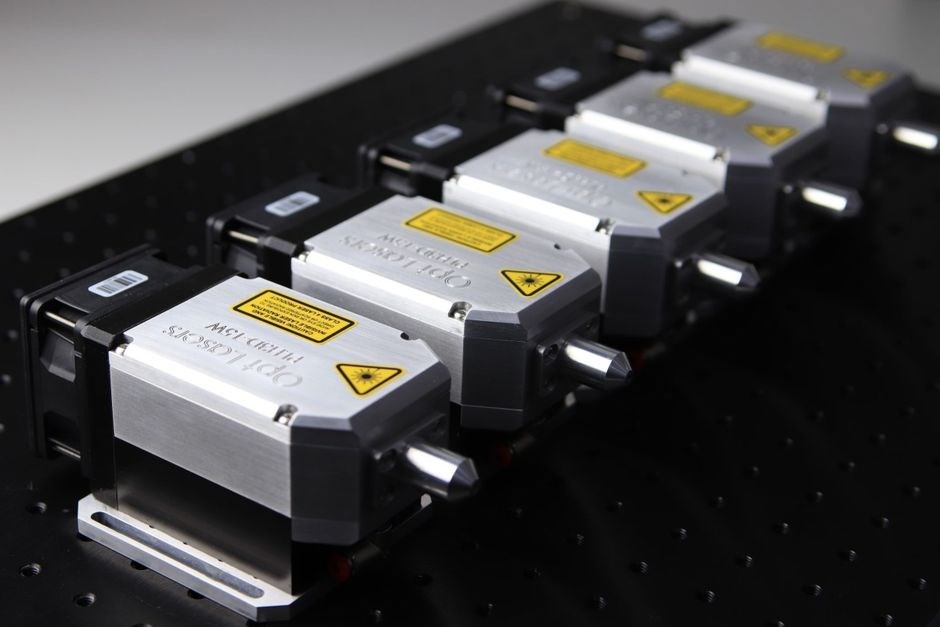
Key Features and Specifications of the Laser 73 Toyostove are designed for both beginners and advanced users. It uses a 30 W fiber laser module that delivers a clean, focused beam with a 0.1 mm spot at 1 m. The laser head mounts on a precision XY‑stage with 0.01 mm resolution and 200 × 200 mm travel. Powered by 48 V DC, it runs from a standard outlet via the included AC‑to‑DC adapter. A 4‑inch color touchscreen displays real‑time power, focus, and temperature data. Users can program patterns via USB or optional Wi‑Fi, supporting FTP and cloud file transfer. The safety interlock includes a laser‑proof enclosure, beam‑stop sensor, and an emergency stop button that cuts power instantly. The enclosure is polycarbonate, 3‑mm thick, shielding the 30 W beam. An air‑cooling fan (120 CFC) keeps internal temperature below 45 °C during continuous use. The head can swap to a 50 W module for higher power. Firmware supports updates via USB. The overall dimensions are 350 × 250 × 200 mm; weight 12 kg, portable for field use. It complies with IEC 60825‑1 Class 2 safety standards and meets CISPR‑22 EMC guidelines. A 2‑year limited warranty covers manufacturing defects and includes a comprehensive user manual. The device’s ergonomic design ensures comfortable handling, while the robust build protects against dust. A built‑in safety sensor detects obstructions and automatically pauses operation to prevent accidental exposure. The controller’s firmware can be updated via a USB connection, allowing for features and fixes. Users can calibrate focus manually or use the auto‑focus function for precise work. The laser’s power can be in 5 % increments, giving fine control over cutting and engraving.

Unpacking and Inspection
Open the box, verify the laser head, power supply, control panel, safety goggles, and user manual. Check for visible damage, ensure all screws and mounting brackets are present, and confirm the enclosure is intact before proceeding. Check cable integrity safety lock now
What Should Be Included
When you receive your Laser 73 Toyostove, the packaging should contain the following items in a secure, organized manner. First, the main unit – a matte‑black chassis with a precision‑machined aluminum frame, a removable laser head. The laser head is a 650 nm diode module, housed in a thermally‑conductive block with a built‑in heat sink and a small fan for cooling. The power supply is a 12 V DC adapter rated at 10 A, with a detachable cable and a safety fuse. Second, a set of mounting hardware: a 4‑inch steel bracket, four M4 bolts, two washers, and a rubber gasket to prevent vibration. Third, a safety kit: a pair of laser‑grade goggles (ISO 12312‑2 compliant), a reflective safety shield, and a warning sticker for the operating area. Fourth, a comprehensive user manual that includes safety guidelines, installation instructions, troubleshooting tips, and a warranty card. Fifth, a quick‑start guide printed on a durable card stock, featuring a diagram of the control panel, a list of key functions, and a short FAQ. Finally, a small, sealed plastic bag containing spare parts: an extra laser diode, a replacement fan, a set of 10× optical lenses, and a small toolkit with a Phillips head screwdriver, a hex key, and a pair of tweezers. All items should be free of scratches, dents, or any manufacturing defects. Please keep all parts in packaging now!
Assembly Instructions
Attach the laser head to the chassis using the supplied M4 bolts. Tighten evenly, then secure the bracket with the rubber gasket. Connect the power cable to the adapter, ensuring polarity. Finally, mount the unit on a stable surface and test the indicator lights. Verify alignment, tighten screws now
Step‑by‑Step Assembly Guide
All parts must be present: chassis, laser head, bracket, M4 bolts, gasket, power cable, safety shield. Keep the area clean.
- Mount the laser head: Align holes, insert M4 bolts, tighten to 0.5 Nm.
- Attach bracket: Place gasket, slide bracket, secure with bolts (0.5 Nm).
- Install safety shield: Clip over aperture, ensure flush.
- Connect power: Plug cable, verify green LED.
- Position unit: Place on stable surface, level feet.
- Initial test: Power on, check LEDs, run short burn on safety board.
- Final checks: Tighten all fasteners, confirm shield, record serial number.
Unit is ready. Store manual and documentation.
After assembly, perform a quick visual inspection to ensure all components are seated correctly. Check that the laser head is centered and the safety shield is secure. Verify that the power cable is not pinched and that the unit’s label is legible. This final check guarantees safe operation.
Store manual in a dry place. Note serial number and calibration data for future reference. Review steps before use.
Operating Instructions
Turn on the unit by pressing the main switch. Adjust the focus knob until the beam is sharp. Set the desired power level using the dial. Verify the safety interlock is engaged. Monitor the indicator LEDs for status. Turn off by pressing the switch again. Ensure beam path is clear operator wears eyewear !!
Powering On and Off
Before powering the Laser 73 Toyostove, verify that the power cord is firmly connected to a grounded outlet and that the unit rests on a stable, heat‑resistant surface, ensuring the ventilation slot is unobstructed. The main power switch, located on the front panel, is the first point of contact for turning the device on, and its tactile click confirms the action. To power on, press the switch until the green indicator light illuminates, signaling that the unit has entered standby mode and is ready for configuration. Adjust the power dial to the desired level, then fine‑tune the focus until the beam is sharp and centered, ensuring optimal alignment before activation. Only after the safety interlock is engaged and the safety cover is removed will the laser emit a visible beam, at which point the device is fully operational. When you wish to shut the device down, press the power switch again until the green light turns off, ensuring the laser head is safely powered down and no residual power remains in the system. If the unit does not respond to the power switch, first check the outlet, reset the circuit breaker, or consult the troubleshooting section for guidance. Always keep the laser cover closed when the device is not in use to prevent accidental exposure, and ensure the ventilation remains clear for optimal cooling For prolonged use, the device will automatically enter a low‑power standby mode after a period of inactivity, conserving energy and reducing heat buildup to extend lifespan.

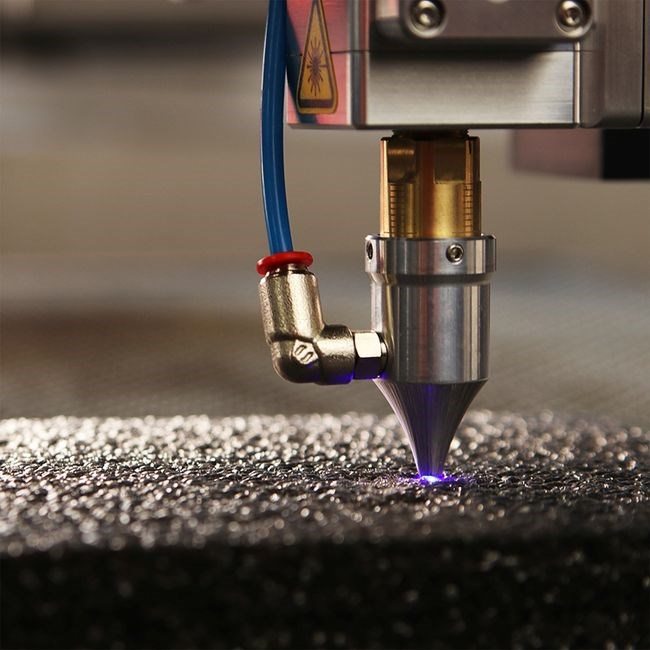
Laser Functionality
The Laser 73 Toyostove emits a focused, adjustable beam for engraving, cutting, or marking. Dual‑mode operation offers continuous or pulsed settings, giving precise power control. Built‑in safety interlocks and cooling keep the device safe and reliable. It also offers real‑time power monitoring now.
Setting Up the Laser
Before you begin, place the Toyostove on a stable surface. Connect the power cord to an outlet and verify the voltage matches the device rating. Attach the laser head to the carriage with the supplied screws, tightening them evenly to avoid wobble. Align the optical path by sliding the head until the beam is centered on the target surface. Use the built focus ring to bring the beam to a sharp point; a test mark on paper will confirm focus accuracy.
Next, calibrate the laser power. Open the control panel and select the desired mode—continuous mode. Adjust the power slider to the recommended setting for the material you will process. The display will show the wattage; keep it within safe limits to prevent overheating. If the Toyostove includes a laser safety shield, install it now and test the beam’s path to ensure it does not exit the enclosure.
Set the motion parameters: input the desired speed, feed rate, and repetition frequency. The device’s firmware will calculate the optimal pulse duration for the selected material. Verify the coordinate system by performing a quick test run on a scrap piece; the tool should return to the origin without collision. Finally, run a short test pulse on a non‑critical area to confirm that the beam behaves as expected.
After the initial setup, perform a dry run to confirm that the laser head moves smoothly along the X and Y axes. Check for any binding or misalignment by observing the head’s motion on a test pattern. Adjust the carriage screws if necessary to eliminate wobble. Once verified, you can proceed to full‑scale operations with confidence. All safety interlocks must be on. OK please

Maintenance and Cleaning
Regularly inspect the laser head, remove dust with a soft brush, and clean the optics with lint‑free wipes. Lubricate moving parts with grease, check alignment, and replace worn seals. Store in a dry, cool place when not in use. Keep optics. Use parts. Check alignment.
Routine Maintenance Tips
To keep the Laser 73 Toyostove operating at peak performance, follow these routine maintenance guidelines. First, power down the unit and disconnect it from the mains. Use a soft, lint‑free cloth to wipe the outer casing. Inspect the laser head and optical path for dust or debris. Gently remove any particles with a compressed‑air duster or a dedicated optics brush. Use a microfiber pad gently. Always keep the unit on a stable surface.
Lubricate all moving components—such as the focus wheel, rotation mount, and any sliding rails—using recommended grease quickly. Apply a thin film and rotate parts. Regularly inspect the power cord for fraying. Connect the device to the companion app or PC utility, and check for updates. Installing latest firmware can improve safety features. Inspect the power supply and cables for signs of wear or fraying; replace any damaged components immediately
Periodically verify the firmware and software versions. Connect the device to the companion app or PC utility, and check for updates. Installing latest firmware can improve safety features. Check fan.!! Inspect the power supply and cables for signs of wear or fraying; replace any damaged components immediately
Store the Toyostove in a clean, dry environment when not in use. Keep it away from extreme temperatures, humidity. Use a protective cover to shield the optics from dust accumulation. Finally, document each maintenance session in a log, noting date, performed tasks, and any observations.

Troubleshooting Guide
When the Laser 73 Toyostove behaves unexpectedly, use the following systematic approach to identify and resolve common issues. Begin by verifying the power connection and ensuring the unit is properly grounded. If the device fails to power on, check the mains supply, the fuse, and the power cord for damage. Replace any faulty components immediately.
- Laser not emitting: Confirm that the laser module is correctly seated in its housing. Inspect the optical path for obstructions or misalignment. Clean the lens with a microfiber cloth and ensure the focus wheel is set to the correct position.
- Overheating: Verify that the ventilation slots are unobstructed. Clean the fan and heat sink with compressed air. If the unit continues to overheat, reduce the duty cycle or use an external cooling solution.
- Erratic focus: Adjust the focus wheel slowly while observing the beam. If the focus jumps, check for mechanical binding and lubricate the wheel with the manufacturer‑approved grease.
- Software communication errors: Ensure the USB or Bluetooth connection is stable. Update the firmware via the companion app. Reset the device to factory settings if persistent errors occur.
- Beam misalignment: Use a target sheet to align the beam. Tighten all mounting screws and recalibrate the angle using the on‑screen controls.
- Intermittent power cycling: Check the internal power regulator. Replace the capacitor if it shows signs of bulging or leakage.
For persistent problems, consult the error codes displayed on the device’s LCD. Refer to the error code table in the appendix for specific solutions. If the issue remains unresolved, contact technical support with the serial number, firmware version, and a detailed description of the symptoms. When performing cleaning, avoid abrasive materials that could scratch the optics; use only non‑abrasive cleaning solutions recommended by the manufacturer. Always disconnect power before cleaning or servicing. If after performing all these steps the device still fails to operate correctly, a factory reset or professional repair may be necessary. Keep a record of all troubleshooting steps for warranty claims.