laser guided machine using machine learning

Laser-guided machines, enhanced by machine learning, optimize industrial processes through precise automation, enabling real-time data-driven decisions and transforming manufacturing efficiency across various sectors.

What are Laser-Guided Machines?

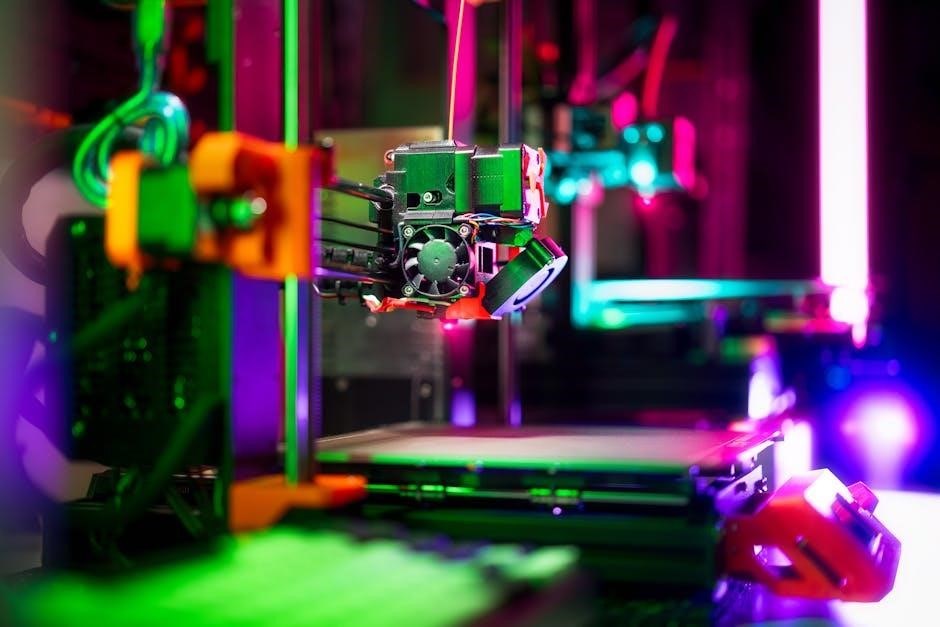
Laser-guided machines are advanced systems that combine laser technology with machine learning to enhance precision and automation in industrial processes. These machines use lasers to guide operations, such as cutting, welding, or 3D printing, ensuring high accuracy and consistency. By integrating machine learning algorithms, they can analyze real-time data from sensors, adapt to changing conditions, and optimize performance. This synergy enables laser-guided machines to improve manufacturing efficiency, reduce errors, and handle complex tasks dynamically. They are widely used in industries like aerospace, automotive, and electronics, where precision and reliability are critical.

Role of Machine Learning in Laser-Guided Machines

Machine learning plays a pivotal role in enhancing the capabilities of laser-guided machines by enabling adaptive decision-making and precision. It processes real-time data from sensors to optimize laser operations, ensuring accuracy and efficiency. ML algorithms analyze patterns, predict maintenance needs, and improve quality control, reducing errors. Additionally, machine learning facilitates dynamic adjustments, allowing laser-guided machines to adapt to varying conditions. This integration transforms these machines into intelligent systems capable of autonomous operation and continuous improvement, revolutionizing industrial applications.

Applications of Machine Learning in Laser-Guided Machines

Machine learning enhances operational efficiency, enables predictive maintenance, improves quality control accuracy, and facilitates real-time process optimization, driving industrial advancements and precision.

Predictive Maintenance in Laser-Guided Machines

Machine learning algorithms analyze sensor data from laser-guided machines to predict potential equipment failures before they occur. By identifying patterns and anomalies in real-time, these systems enable proactive maintenance, reducing unplanned downtime and extending machine lifespan. Predictive maintenance leverages historical and operational data to forecast when components may fail, allowing for scheduled repairs and minimizing production interruptions. This approach not only enhances reliability but also optimizes resource allocation, ensuring industrial processes remain efficient and cost-effective. Advanced models, such as supervised learning, are trained on extensive datasets to accurately predict maintenance needs, making laser-guided machines more resilient and dependable in high-precision applications.

Quality Control Using Machine Learning

Machine learning enhances quality control in laser-guided machines by analyzing operational data to detect defects and anomalies in real-time. Advanced algorithms process vast datasets to identify irregularities, ensuring precision and consistency. Computer vision systems, integrated with laser-guided machinery, inspect products for dimensional accuracy and surface quality. By learning from historical data, these models set thresholds for acceptable tolerances, reducing human error. ML-powered quality control minimizes defective products, reduces waste, and optimizes production processes. This leads to higher customer satisfaction and improved competitiveness in manufacturing. The integration of machine learning with laser-guided systems ensures seamless, high-accuracy quality monitoring, making it indispensable in modern industrial applications.

Real-Time Process Optimization

Machine learning enables real-time process optimization in laser-guided machines by continuously analyzing operational data and adjusting parameters for maximum efficiency. Sensors collect data on laser performance, material properties, and environmental factors, which ML algorithms process to predict optimal settings. Edge computing facilitates rapid decision-making, allowing machines to adapt dynamically. For example, ML can adjust laser intensity or feed rates to maintain precision and minimize material waste. This real-time optimization enhances production speed, reduces variability, and ensures consistent output quality. By leveraging historical and real-time data, ML-driven systems improve resource utilization and productivity, making laser-guided machines more adaptable to varying production demands and improving overall manufacturing outcomes.

Key Technologies Behind Laser-Guided Machines

Laser-guided machines rely on advanced sensors, high-speed data acquisition systems, and real-time processing algorithms. These technologies enable precise control and integration with machine learning for optimal performance.

Sensors and Data Acquisition Systems

Sensors and data acquisition systems are critical components of laser-guided machines, enabling real-time data collection and processing. These sensors detect environmental changes, such as temperature, vibration, and laser alignment, ensuring precise operations. Advanced data acquisition systems then process this information, often using edge computing to reduce latency and improve decision-making. Machine learning algorithms analyze the collected data to optimize performance, predict maintenance needs, and enhance overall efficiency. The integration of these technologies allows laser-guided machines to adapt dynamically, improving accuracy and reliability in industrial applications. This synergy between sensing, data processing, and machine learning is fundamental to achieving intelligent automation and scalability in modern manufacturing environments.

Real-Time Data Processing and Edge Computing

Real-time data processing and edge computing are essential for laser-guided machines, enabling instantaneous decision-making and reduced latency. By processing data locally on edge devices, these systems minimize reliance on cloud-based infrastructure, ensuring faster response times. Machine learning models leverage this real-time data to optimize laser operations, such as adjusting power levels or focusing precision; Edge computing also enhances security by keeping sensitive data on-device, reducing the risk of breaches. This combination of real-time processing and localized computing empowers laser-guided machines to operate with high efficiency and accuracy, making them indispensable in industries requiring rapid, precise, and autonomous operations.

Machine Learning Algorithms for Laser-Guided Machines

Machine learning algorithms, including supervised learning and reinforcement learning, enable laser-guided machines to process data, optimize operations, and make precise, dynamic adjustments for improved performance and accuracy.

Supervised Learning for Model Training

Supervised learning plays a crucial role in training models for laser-guided machines by utilizing labeled data to teach systems to recognize patterns and make accurate predictions. This approach enables machines to learn from historical data, such as operational parameters and performance metrics, to improve precision and reliability. For instance, supervised learning algorithms can be trained to detect anomalies in laser cutting or welding processes, ensuring high-quality outputs. By leveraging labeled datasets, these models refine their decision-making capabilities, allowing laser-guided machines to adapt to varying conditions and optimize their performance in real-time. This method is essential for achieving the high accuracy and efficiency required in industrial applications.

Reinforcement Learning for Dynamic Adjustments

Reinforcement learning enables laser-guided machines to dynamically adjust their operations by learning from interactions with the environment. Through trial and error, the system discovers optimal actions to achieve desired outcomes, such as precise laser alignment or material processing. The model receives feedback in the form of rewards or penalties, refining its decision-making over time. This approach is particularly valuable in complex, ever-changing industrial conditions, where traditional programming may fall short. By continuously adapting to new scenarios, reinforcement learning enhances the flexibility and intelligence of laser-guided systems, ensuring they operate efficiently even in unpredictable environments. This capability is crucial for maintaining high performance and accuracy in real-world applications.

Integration with Industrial Systems

Seamless integration of laser-guided machines with industrial systems leverages IoT connectivity, enabling real-time data exchange and enhanced process control through standardized communication protocols like OPC UA and MQTT.

Industrial IoT and Connectivity

Industrial IoT (IIoT) enables seamless connectivity between laser-guided machines and other industrial systems, facilitating real-time data exchange. By leveraging edge computing and standardized protocols like OPC UA and MQTT, these machines can integrate with factory-wide networks, ensuring efficient communication. This connectivity allows for remote monitoring, predictive maintenance, and centralized control, enhancing overall manufacturing efficiency. The fusion of IIoT and machine learning optimizes operational workflows, enabling smarter decision-making and faster response times. Secure and reliable data transmission is crucial, ensuring that sensitive information remains protected while maintaining high performance. This integration is pivotal in driving Industry 4.0 initiatives, where interconnected systems collaborate to achieve unparalleled productivity and precision.

Interoperability with Existing Manufacturing Systems

Interoperability is crucial for integrating laser-guided machines with existing manufacturing systems, ensuring seamless collaboration across diverse industrial environments. By leveraging standardized protocols such as OPC UA and MQTT, these machines can communicate effectively with legacy systems, enabling data exchange and synchronized operations. This compatibility allows manufacturers to enhance productivity without overhauling entire infrastructures. Additionally, APIs and middleware solutions facilitate integration, enabling real-time data sharing and process synchronization. Interoperability ensures that laser-guided machines can function alongside traditional equipment, promoting a unified and efficient production ecosystem. This adaptability is essential for modern factories, where heterogeneous systems must coexist to achieve operational excellence and maximize resource utilization.

Challenges and Limitations

Laser-guided machines face challenges like data quality inconsistencies, sensor calibration complexities, and the need for robust algorithms to handle dynamic environments and ensure precision in operations.

Data Quality and Sensor Accuracy

Data quality and sensor accuracy are critical for laser-guided machines. Poor data can lead to inaccurate model training and unreliable predictions. Sensors must capture precise, consistent readings to ensure optimal machine learning performance. Environmental factors like noise or interference can degrade data quality, affecting decision-making. Calibration and synchronization of sensors are essential to maintain accuracy. Advanced algorithms can mitigate some issues, but high-quality input remains foundational. Improving data acquisition systems and refining sensor technologies are key to overcoming these challenges and enhancing overall system reliability.

Complexity in Algorithm Training

Training machine learning algorithms for laser-guided machines presents significant complexity due to the need for large, diverse datasets and precise model tuning. Ensuring algorithms adapt to dynamic environments while maintaining accuracy is challenging. The integration of data from multiple sensors adds layers of complexity, requiring robust fusion techniques. Additionally, hyperparameter optimization and computational demands further complicate the training process. Continuous retraining is often necessary to keep pace with changing industrial conditions, adding to the difficulty. Despite these challenges, advancements in machine learning frameworks are helping to streamline and improve algorithm training for laser-guided applications, enabling more efficient and reliable systems over time.

Case Studies and Examples

Real-world implementations of laser-guided machines demonstrate enhanced precision in manufacturing, with machine learning improving accuracy and efficiency in metal cutting and welding processes, driving industrial innovation forward.

Success Stories in Industrial Applications

Laser-guided machines, combined with machine learning, have revolutionized industrial applications, particularly in high-precision tasks like metal cutting and welding. Companies in the aerospace and automotive sectors have reported significant improvements in production efficiency and product quality. For instance, a leading automotive manufacturer implemented ML-enhanced laser systems, reducing defect rates by 30% and increasing production speed by 25%. Similarly, in the aerospace industry, laser-guided machines optimized complex part manufacturing, ensuring precise dimensional accuracy. These success stories highlight how the integration of advanced laser technology with machine learning algorithms drives innovation, enhances operational performance, and delivers measurable economic benefits across various industrial domains.

Real-World Implementations and Results

Laser-guided machines integrated with machine learning have demonstrated exceptional results in real-world applications. In the automotive industry, ML-driven laser welding systems achieved a 40% reduction in production errors and a 15% increase in throughput. Similarly, in the aerospace sector, these systems enabled the precise fabrication of complex components, reducing material waste by 20%. A leading manufacturer reported a 35% improvement in production line uptime due to predictive maintenance enabled by ML algorithms. These implementations highlight the tangible benefits of combining laser technology with machine learning, including enhanced accuracy, improved efficiency, and significant cost savings across industrial applications.

Future Trends and Innovations

Future advancements in laser technology and machine learning will enable faster, smarter, and more precise industrial processes, driving innovation in manufacturing and beyond.

Advancements in Laser Technology

Recent advancements in laser technology, such as high-precision beam control and faster processing speeds, are revolutionizing industrial applications. These innovations enable laser-guided machines to achieve greater accuracy in cutting, welding, and surface treatment. Integration with machine learning algorithms allows for real-time adjustments, optimizing performance and reducing material waste. For instance, neural networks can predict optimal laser parameters for specific materials, ensuring consistent quality. Additionally, developments in compact, high-energy lasers are expanding their use in micro-manufacturing and 3D printing. Such breakthroughs are reducing production times while maintaining precision, making laser-guided machines indispensable in modern manufacturing. These advancements are paving the way for smarter, more efficient industrial processes.

Next-Generation Machine Learning Models

Next-generation machine learning models are driving significant advancements in laser-guided machines by enabling more precise and adaptive control systems. These models leverage cutting-edge techniques such as deep neural networks and reinforcement learning to process complex data from laser operations. Enhanced algorithms improve real-time decision-making, allowing machines to dynamically adjust parameters during manufacturing processes. For instance, predictive models can anticipate material behavior under laser exposure, optimizing cutting or welding outcomes. Additionally, advancements in unsupervised learning enable machines to identify patterns and anomalies without extensive pre-programming. These innovations are reducing downtime, improving accuracy, and expanding the range of materials that can be processed. As a result, next-gen ML models are reshaping the capabilities of laser-guided machines across industries.

Laser-guided machines, bolstered by machine learning, are revolutionizing industrial operations by enhancing precision, efficiency, and adaptability. These systems leverage advanced algorithms to analyze data, enabling real-time optimizations and predictive maintenance. As technology evolves, next-gen models promise even greater capabilities, ensuring superior performance across diverse applications. The integration of ML with laser systems not only reduces operational costs but also elevates product quality, making them indispensable in modern manufacturing. With ongoing innovations, laser-guided machines are poised to redefine industry standards, driving progress and sustainability in an increasingly competitive landscape.

chastity guide

Chastity is the practice of refraining from sexual activities, emphasizing self-control and moral discipline. It promotes trust, respect, and emotional intimacy, fostering healthier relationships and personal growth.

1.1 What is Chastity?

Chastity is the virtue of sexual purity, involving abstinence from thoughts, words, or actions that contradict moral standards. It emphasizes self-control and aligns sexual behavior with personal values, fostering trust, respect, and emotional intimacy. Chastity can be practiced in various contexts, including relationships, marriage, or personal growth, and is often seen as a means to deepen spiritual and emotional connections. It involves setting boundaries to prioritize meaningful intimacy over fleeting desires, promoting healthier relationships and personal discipline. Chastity devices, such as cages, are sometimes used to enforce this practice, while others embrace it as a lifestyle choice for spiritual or relational benefits.

1.2 Why Chastity Matters

Chastity matters as it fosters trust, respect, and emotional intimacy in relationships. By prioritizing self-control and aligning actions with personal values, individuals cultivate deeper connections. It reduces stress and prevents unwanted consequences like STIs or unplanned pregnancies. Chastity also promotes personal growth, encouraging mindfulness and discipline. Many find it aligns with spiritual beliefs, enhancing their sense of purpose. In relationships, it strengthens communication and mutual respect, creating a foundation for lasting trust. Chastity is not just abstinence but a conscious choice to value meaningful intimacy over fleeting desires, leading to more fulfilling and healthy connections.

The Benefits of Chastity

Chastity enhances self-discipline, emotional intimacy, and trust in relationships. It reduces stress and risk of STIs, fostering personal growth and alignment with spiritual values.

2.1 Personal Benefits of Chastity

Practicing chastity fosters self-discipline, allowing individuals to align their actions with their values. It enhances emotional clarity, reducing distractions and promoting focus on personal goals. Chastity also elevates self-respect, as individuals prioritize self-control and integrity. By abstaining from casual intimacy, one may experience reduced stress and anxiety, leading to a more balanced life. This practice can also deepen spiritual growth, helping individuals connect with their inner selves and higher purposes. Overall, chastity empowers personal development, encouraging a healthier, more mindful approach to life and relationships.

2.2 Relational Benefits of Chastity

Chastity strengthens relationships by fostering trust, respect, and open communication. Couples who practice chastity often experience deeper emotional intimacy, as they focus on understanding each other beyond physical desires. This practice encourages mutual accountability and commitment, creating a foundation of trust. Chastity also promotes healthier communication, as partners openly discuss boundaries and expectations. By prioritizing emotional connection over physical intimacy, relationships can become more meaningful and enduring. Chastity further reduces misunderstandings and conflicts, fostering a sense of unity and shared purpose. Ultimately, it helps partners build a stronger, more resilient bond, rooted in respect and mutual understanding.

2.3 Spiritual Benefits of Chastity

Chastity is often viewed as a virtue that aligns one with spiritual principles, fostering self-discipline and moral integrity. It helps individuals focus on higher purposes and connect more deeply with their faith. By abstaining from sexual desires, practitioners can redirect energy toward spiritual growth and self-refinement. Chastity is seen in many religions as a means to purify the soul, enabling greater devotion to divine goals. This practice cultivates inner peace, clarity of mind, and a stronger sense of purpose. Spiritually, chastity is believed to enhance one’s ability to love unconditionally and live in harmony with ethical values. It is a pathway to spiritual fulfillment and enlightenment.

Understanding Chastity in Modern Context

Modern views on chastity blend traditional values with contemporary perspectives, emphasizing trust, communication, and personal boundaries. It is now seen as a choice for emotional and relational well-being.

3.1 Chastity in Relationships

Chastity in relationships fosters deep emotional connections and mutual respect. By prioritizing trust and communication, couples can build stronger bonds, enhancing intimacy beyond physical expression. This practice encourages partners to focus on shared values and goals, creating a foundation of understanding and commitment. Chastity can also reduce misunderstandings and conflicts, allowing relationships to flourish in a supportive and respectful environment. Ultimately, it emphasizes the importance of emotional readiness and alignment in fostering meaningful and lasting connections.

3.2 Chastity in Marriage

Chastity in marriage strengthens trust and intimacy, fostering a deeper emotional connection between spouses. It encourages open communication and mutual respect, enhancing the overall quality of the relationship. By aligning sexual choices with shared values, couples can build a stronger foundation of commitment and understanding. Chastity also promotes self-discipline and patience, allowing partners to appreciate the significance of intimacy. This practice can lead to increased satisfaction and a more profound sense of unity, creating a more fulfilling and meaningful marital bond.

3.3 Chastity Before Marriage

Chastity before marriage is a choice that fosters emotional readiness and mutual respect between partners. It allows individuals to focus on building a strong foundation of trust and understanding before engaging in intimacy. By abstaining from sexual activity, couples can cultivate deeper emotional connections and align their values and beliefs. This practice also reduces the risk of psychological damage and unwanted consequences, promoting a healthier transition into marriage. Chastity before marriage encourages open communication and shared commitment, helping partners to appreciate intimacy as a sacred expression of love and responsibility. It lays the groundwork for a more fulfilling and meaningful relationship in the future.

The Practice of Chastity

Chastity involves abstaining from sexual activity, fostering self-discipline and emotional growth. It requires commitment, communication, and trust, often using tools like chastity cages to maintain boundaries and focus on non-physical intimacy.

4.1 How to Practice Chastity

Practicing chastity involves setting clear boundaries and adhering to them consistently. It begins with self-reflection to understand personal values and goals. Open communication with partners is essential to establish mutual respect and trust. Using tools like chastity devices can help maintain discipline, especially in erotic or submissive contexts. Daily commitment to abstinence requires mental and emotional focus, often reinforced by routines that promote self-control. Education about the benefits of chastity, such as reduced stress and increased self-respect, can motivate individuals to stay dedicated. Regular check-ins with oneself or a partner ensure the practice remains healthy and fulfilling over time.

4.2 Chastity Devices and Tools

Chastity devices, such as cages or lockable belts, are tools designed to enforce abstinence by preventing sexual stimulation or orgasm. Made from materials like metal, plastic, or silicone, these devices ensure physical restraint. They are often used in consensual power dynamics, where a keyholder controls access. Safety and comfort are crucial, as improper use can cause harm. Modern designs prioritize hygiene and ease of wear, making long-term use feasible. These tools aid in maintaining discipline and focus, helping individuals or couples explore control and submission in a structured manner. They are a practical means to uphold chastity commitments, fostering trust and accountability in relationships.

4.3 Maintaining Chastity in Daily Life

Maintaining chastity in daily life requires consistent self-discipline and mindfulness. Setting clear boundaries and engaging in activities that distract from temptation can help individuals stay focused. Open communication with partners about desires and challenges fosters trust and mutual respect. Regular reflection and goal-setting reinforce commitment to chastity, while surrounding oneself with supportive environments minimizes triggers. Practices like meditation or hobbies can redirect energy toward positive pursuits. By integrating chastity into daily routines, individuals cultivate self-control and align their actions with personal values, leading to emotional and spiritual growth. This mindful approach ensures that chastity becomes a natural part of one’s lifestyle, enhancing overall well-being.

The Role of Communication in Chastity

Effective communication is vital for fostering trust and emotional intimacy in chastity practices. Open dialogue ensures mutual understanding, respect, and alignment of values, strengthening relationships.

5.1 Strengthening Trust Through Chastity

Chastity fosters trust by promoting transparency and accountability in relationships. When individuals commit to this practice, they demonstrate reliability and integrity, which are foundational for trust. Open communication about boundaries and desires creates a safe environment, encouraging mutual respect and understanding. Trust deepens as partners consistently honor their commitments, showing dedication to shared values. This mutual accountability strengthens emotional bonds, leading to a resilient and enduring connection. Through chastity, trust becomes the cornerstone of a relationship, enabling partners to navigate challenges with confidence and unity. The practice not only enhances trust but also cultivates a deeper sense of security and intimacy.

5.2 Open Dialogue About Chastity

Open dialogue about chastity is essential for fostering understanding and mutual respect in relationships. Communication allows partners to discuss boundaries, desires, and expectations, ensuring alignment and comfort. Sharing thoughts and feelings creates a safe space for vulnerability, strengthening emotional intimacy. When both individuals openly express their needs, trust and respect grow, leading to a deeper connection. This dialogue also helps address any misconceptions or concerns, promoting clarity and unity. By engaging in honest conversations, couples can navigate the challenges of chastity together, fostering a stronger and more supportive relationship. Open dialogue ensures that both partners feel heard and valued, laying a solid foundation for their commitment to chastity.

Chastity and Emotional Intimacy

Chastity allows individuals to focus on emotional bonding, fostering trust and respect, which are essential for building strong, meaningful connections.

6.1 Building Emotional Connection

Chastity enables individuals to cultivate deeper emotional bonds by focusing on shared values, trust, and open communication. This foundation strengthens relationships, fostering mutual respect and understanding, and creating lasting emotional intimacy.

6.2 The Impact of Chastity on Intimacy

Chastity can transform intimacy by shifting focus from physical gratification to emotional and spiritual connection. This shift often leads to increased trust, vulnerability, and a deeper understanding between partners, enhancing overall relational satisfaction and closeness.

Chastity and Self-Discipline

Chastity fosters self-discipline by teaching individuals to manage desires, building willpower and emotional resilience. This practice enhances personal growth and strengthens mental clarity.

7.1 Cultivating Self-Control

Cultivating self-control through chastity involves setting boundaries and adhering to them, fostering mental clarity and resilience. By refraining from impulsive behaviors, individuals develop discipline, aligning their actions with personal values. This practice enhances self-awareness, helping individuals prioritize long-term goals over fleeting desires. Over time, self-control becomes a habit, empowering individuals to make intentional decisions. Chastity teaches the importance of patience and moderation, leading to greater emotional stability. Through consistent effort, individuals can master their impulses, achieving a deeper sense of personal growth and inner strength.

7.2 The Role of Discipline in Chastity

Discipline is a cornerstone of chastity, requiring consistent effort to manage desires and align actions with personal principles. It involves creating routines and strategies to maintain self-control, such as setting clear boundaries or engaging in mindful practices. Chastity thrives when individuals commit to daily disciplines like reflection or goal-setting, fostering accountability. This structured approach helps individuals resist temptations and prioritize their values. Over time, discipline transforms into a natural inclination, reinforcing chastity as a way of life. By embracing discipline, individuals not only maintain chastity but also build a strong foundation for personal integrity and lasting self-respect.

Chastity in Spiritual Practices

Chastity in spiritual practices is often seen as a means to deepen one’s connection with the divine, fostering self-discipline and purity of heart through mindful restraint.

8.1 Chastity as a Spiritual Virtue

Chastity is often upheld as a spiritual virtue, enabling individuals to align their actions with divine will. It fosters self-discipline, purity of intention, and a deeper connection to faith. By abstaining from sexual desires, one can focus on spiritual growth, cultivating inner peace and moral integrity. Many religious teachings emphasize chastity as a means to honor sacred values, promoting a life of purpose and devotion. Through this practice, individuals strive to embody humility and self-control, reflecting their commitment to higher spiritual principles.

8.2 Chastity in Religious Teachings

Chastity is a cornerstone in many religious traditions, often viewed as a means to honor divine will and maintain moral purity. In Christianity, it is emphasized as a virtue that reflects self-control and devotion to God. Islamic teachings also highlight chastity as a moral duty, essential for upholding dignity and spiritual integrity. Similarly, in Hinduism and Buddhism, chastity is seen as a path to enlightenment, fostering mindfulness and detachment from worldly desires. Religious leaders and scriptures frequently commend chastity as a way to align one’s life with sacred principles, promoting a deeper connection to faith and spiritual growth.

Common Misconceptions About Chastity

Chastity is often misunderstood as repression, but it’s about self-control and aligning actions with values. It’s not just for religious individuals; it applies to anyone seeking emotional and relational balance.

9.1 Debunking Myths About Chastity

One common myth is that chastity means complete sexual denial, but it’s actually about self-control and aligning actions with personal values. Another misconception is that chastity is only for religious individuals or repressive regimes. In reality, chastity is a personal choice that fosters trust, respect, and emotional intimacy in relationships. It’s not about suppressing desire but channeling it in a healthy, intentional way. Chastity also promotes self-discipline, which can enhance overall well-being and life satisfaction. By debunking these myths, we can see chastity as a positive practice that transcends cultural or religious boundaries, offering benefits for personal and relational growth.

9.2 Addressing Critics of Chastity

Some critics argue that chastity is outdated or repressive, but this perspective overlooks its empowering aspects. Chastity is not about denial or shame; it’s a deliberate choice to align sexual behavior with personal values. Critics may claim it stifles intimacy, yet many find it deepens emotional connection and trust. Others believe chastity is only for religious individuals, but it’s practiced by people from diverse backgrounds for various reasons, including personal growth and relational harmony. By addressing these criticisms, we can see that chastity is a flexible and meaningful practice that respects individual autonomy and fosters healthy relationships. Its relevance lies in its adaptability to modern values and lifestyles.

The Future of Chastity in Modern Society

Chastity is evolving, blending traditional values with modern perspectives. Its relevance today lies in its adaptability, offering a fresh approach to intimacy, trust, and personal growth.

10.1 Evolving Views on Chastity

Modern society is redefining chastity, moving beyond traditional religious frameworks. It’s now seen as a personal choice for emotional and sexual well-being, emphasizing consent and mutual respect. Chastity is no longer solely about abstinence but about aligning sexual decisions with personal values. This shift fosters open conversations about intimacy, boundaries, and trust. The internet highlights chastity’s role in building healthier relationships and self-discipline. As cultural norms change, chastity is embraced as a means to enhance emotional connection and intimacy, offering a fresh perspective on sexuality and personal growth.

10.2 The Relevance of Chastity Today

Chastity remains relevant in modern society as a personal choice promoting emotional intimacy and self-awareness. It encourages individuals to align their sexual decisions with personal values, fostering healthier relationships. By prioritizing trust and communication, chastity helps couples build stronger connections. It also reduces risks like STIs and unwanted pregnancies, offering a sense of security. Today, chastity is less about strict abstinence and more about mindful, intentional choices. It empowers individuals to balance physical and emotional intimacy, promoting self-respect and mutual understanding. As society evolves, chastity continues to be a meaningful practice for those seeking deeper fulfillment and connection in their lives.

11.1 Final Thoughts on Chastity

Chastity is a transformative practice that fosters self-discipline, trust, and emotional intimacy. By aligning actions with personal values, individuals cultivate a deeper sense of purpose and self-respect. It encourages healthier relationships, prioritizing connection over fleeting desires. Chastity also promotes spiritual growth and emotional maturity, helping individuals navigate societal pressures with integrity. While it may require sacrifice, the rewards—such as stronger bonds and inner peace—are profound. Ultimately, chastity is a personal choice that, when approached thoughtfully, can lead to a more fulfilling and balanced life. It reminds us that true intimacy goes beyond the physical, emphasizing the importance of mutual respect and understanding.

11.2 Encouragement for Practicing Chastity

Embracing chastity is a courageous and rewarding journey that fosters personal growth and deeper connections. By prioritizing self-discipline and emotional intimacy, you cultivate a stronger sense of self-respect and purpose. Chastity encourages open communication and trust, laying a foundation for healthier, more meaningful relationships. It’s a path that requires commitment but offers profound benefits, such as heightened emotional intimacy and a clearer alignment with personal values. Remember, chastity is not about deprivation but about elevating your interactions and focusing on what truly matters. Surround yourself with supportive communities and embrace the journey with patience and grace. Celebrate small victories and stay committed to your goals.

fagor pressure cooker instruction manual

Welcome to the Fagor Pressure Cooker manual! This guide provides essential information for safe and effective use‚ covering components‚ features‚ and troubleshooting. Read carefully for optimal performance.

Overview of the Fagor Pressure Cooker

The Fagor Pressure Cooker is a versatile and reliable kitchen appliance designed for efficient cooking. Its durable construction‚ including a high-quality stainless steel pot and lid‚ ensures even heat distribution and long-lasting performance. The cooker features a user-friendly pressure lock mechanism‚ safety vent‚ and accessories like a steam basket and trivet for added convenience. With its advanced safety features and easy-to-use design‚ the Fagor Pressure Cooker is ideal for preparing a variety of dishes while maintaining optimal cooking results. This manual provides detailed guidance to help you maximize its potential and ensure safe operation.

Importance of Reading the User Manual

Reading the Fagor Pressure Cooker manual is crucial for safe and effective use. It outlines essential safety precautions‚ proper operation techniques‚ and maintenance tips to prevent accidents and extend the cooker’s lifespan. Understanding the manual ensures you utilize all features correctly‚ such as the pressure lock and safety vent‚ and avoid common mistakes. It also provides troubleshooting solutions and guides for optimal performance. By following the manual‚ you can enhance your cooking experience and ensure reliable results while maintaining the appliance’s quality and functionality over time. Always refer to it before first use and as needed.

Components and Features of the Fagor Pressure Cooker

The Fagor Pressure Cooker features a high-quality stainless steel pot‚ a locking lid‚ a pressure lock mechanism‚ and accessories like a steam basket and trivet for versatile cooking.

Pressure Cooker Pot: Material and Quality

The Fagor Pressure Cooker Pot is crafted from high-quality‚ heavy-gauge 18/10 stainless steel‚ ensuring durability and even heat distribution. Its sturdy design resists corrosion and withstands high pressures‚ making it ideal for long-term use. The pot’s thick bottom enhances heat conductivity‚ allowing for consistent cooking results. Easy to clean and maintain‚ it is dishwasher-safe. This premium material ensures safe and healthy cooking‚ as it does not react with food. The pot’s robust construction supports various cooking techniques‚ from pressure cooking to steaming‚ making it a versatile addition to any kitchen.

Lid: Construction and Locking Mechanism

The lid of the Fagor Pressure Cooker is made from high-quality‚ heavy-gauge 18/10 stainless steel‚ ensuring durability and a secure fit. It must be properly locked to build sufficient pressure for cooking. The locking mechanism involves a button that slides up to lock and down to unlock. Figure 6 illustrates this process. Proper alignment and locking are crucial for safe operation and effective pressure sealing. The lid’s design ensures a tight seal‚ preventing steam escape and promoting even cooking. Always verify the lid is correctly locked before starting to cook‚ as this is essential for the pressure cooker to function properly.

Pressure Lock: Function and Operation

The yellow pressure lock on the Fagor Pressure Cooker is essential for securing the lid and enabling pressure buildup. To lock‚ slide the button up toward the lid (as shown in Figure 6). This ensures a tight seal‚ allowing pressure to accumulate during cooking. To unlock‚ slide the button down toward the handle. Proper use of the pressure lock is critical for safe and efficient cooking. Always ensure the lock is engaged correctly before starting to cook‚ as this mechanism prevents accidental opening and maintains the necessary pressure levels for optimal performance. Regular inspection of the lock is recommended to ensure smooth operation.

Accessories Included (Steam Basket‚ Trivet‚ etc.)

The Fagor Pressure Cooker comes with a set of useful accessories to enhance your cooking experience. A steam basket is included for healthy steaming of vegetables‚ seafood‚ and other delicate foods. Additionally‚ a trivet is provided to elevate dishes‚ preventing direct contact with the pot’s base and ensuring even cooking. These accessories are made from high-quality‚ durable materials and are designed to withstand the rigors of pressure cooking. For optimal results‚ use the steam basket and trivet as recommended in the manual. These tools not only add versatility to your cooking but also contribute to safer and more efficient meal preparation. Always ensure accessories are properly positioned to avoid damage or uneven cooking.

Safety Precautions and Guidelines

Ensure the safety vent points away from you to avoid burns. Never fill beyond two-thirds capacity. Keep the vent unblocked and use as directed for safe operation.

Proper Use of the Safety Vent

Always ensure the safety vent points away from you and towards the back of the stove to minimize the risk of burns. This is crucial during cooking‚ as the vent releases excess pressure. Keep the vent clear of obstructions to maintain proper function. Failure to direct the vent correctly can lead to injury from steam or pressure release. Regularly inspect the vent for blockages to ensure safe operation. Proper alignment and maintenance of the safety vent are essential for optimal performance and user safety. Follow these guidelines to prevent accidents and prolong the cooker’s lifespan.

Maximum Capacity and Filling Guidelines

Never exceed the Fagor Pressure Cooker’s maximum capacity‚ which is two-thirds of its total volume. Overfilling can lead to clogged valves and improper pressure release. For liquids‚ fill only up to the halfway mark to prevent overflow during cooking. Avoid filling the cooker with oil‚ as this can cause unsafe conditions. Adhere to these guidelines to ensure safe operation and prevent food splatter or potential hazards. Proper filling practices are crucial for maintaining pressure control and achieving optimal cooking results. Always consult the manual for specific filling recommendations tailored to your cooker model and type of food being prepared.

Direction of the Safety Vent While Cooking

The safety vent on your Fagor Pressure Cooker must be directed away from you and toward the back of the stove during cooking. This ensures that any excess pressure released is directed safely away from the user‚ reducing the risk of burns or injury. Never point the safety vent toward yourself or others in the kitchen. Proper alignment is crucial for safe operation and to prevent accidental discharge of steam or liquid. Always follow the manufacturer’s guidelines to ensure the safety vent functions correctly and maintains a secure cooking environment. This simple precaution significantly enhances safety during high-pressure cooking sessions.

Cooking with the Fagor Pressure Cooker

Cooking with the Fagor Pressure Cooker is easy and efficient‚ allowing for faster meal preparation while retaining flavors and nutrients; Follow the manual for optimal results;

Step-by-Step Cooking Instructions

Ensure the pressure cooker is properly assembled and the pressure lock is engaged. 2. Add food and liquids‚ ensuring the cooker is not overfilled. 3. Place the lid securely‚ aligning the locking mechanism. 4. Set the burner to high heat until steam escapes and the pressure gauge rises. 5. Reduce heat to maintain steady pressure. 6. Cook according to recommended times. 7. Allow natural pressure release or use the quick-release valve. 8. Turn the pressure lock down and open the lid carefully. Always follow safety guidelines for optimal results.

Pressure Build-Up and Monitoring

Building pressure in the Fagor Pressure Cooker is essential for efficient cooking. Start by ensuring the pressure lock is engaged and the lid is securely closed. Place the cooker on high heat until steam begins to escape and the pressure gauge indicates the desired level. Once pressure is achieved‚ reduce heat to maintain a steady level. Monitor the gauge to ensure pressure remains consistent. Avoid overfilling‚ as this can disrupt pressure buildup. Use the safety vent to release excess pressure if needed. Always keep the vent directed away from you to prevent burns. Proper monitoring ensures safe and even cooking. Follow manual guidelines for optimal results.

Cooking Time and Pressure Settings

The Fagor Pressure Cooker offers adjustable pressure settings to suit various recipes. Low‚ medium‚ and high-pressure options allow precise control for different foods. Cooking time varies depending on the type and quantity of ingredients. Always consult the manual for specific guidelines‚ as cooking times are optimized for performance. Adjust the pressure regulator to maintain the desired setting‚ ensuring even cooking. Monitor the pressure gauge to avoid exceeding recommended levels. For best results‚ follow the manual’s timing charts and adjust as needed. Proper pressure management ensures safe and efficient cooking. Never open the lid until pressure has fully released.

Maintenance and Care

Regularly clean the pressure cooker‚ paying attention to the lid and pressure lock. Store in a dry place‚ away from direct sunlight. Inspect gaskets and seals for wear‚ replacing as needed. Avoid using abrasive cleaners to preserve the finish. Proper care extends the lifespan and ensures optimal performance. Always follow manual guidelines for maintenance.

Cleaning the Pressure Cooker

After each use‚ wash the pressure cooker with mild soap and warm water. Avoid abrasive cleaners to maintain the stainless steel finish. The lid‚ including the gasket and pressure valve‚ should be cleaned thoroughly to remove any food residue. Regularly inspect and clean the pressure lock mechanism to ensure proper function. For stubborn stains‚ soak the components in warm soapy water before scrubbing. Dry all parts completely after cleaning to prevent rust. For tough food residue‚ mix equal parts water and white vinegar‚ bring to a boil‚ and simmer for 10 minutes before rinsing. This helps maintain hygiene and performance.

Storage and Handling Tips

Store the Fagor Pressure Cooker in a cool‚ dry place‚ away from direct sunlight. Ensure all components are completely dry after cleaning to prevent rust. Keep the lid and pressure lock separate from the pot to avoid moisture accumulation. When handling‚ always use two hands to lift the cooker for better control. Avoid stacking heavy objects on top of the cooker to prevent damage. Store accessories like the steam basket and trivet in a separate‚ clean area. Regularly inspect the gasket and pressure valve for wear and tear before storing. Proper storage ensures longevity and maintains the cooker’s performance. Always follow these guidelines for safekeeping.

Troubleshooting Common Issues

Identify common issues like pressure lock malfunction or excess pressure release. Refer to the manual for solutions‚ ensuring safe and effective resolution of operational problems;

Pressure Lock Malfunction

A pressure lock malfunction can prevent proper sealing. Ensure the lock is clean and free of debris. If issues persist‚ refer to the manual for repair or replacement guidance.

Excess Pressure Release

The Fagor Pressure Cooker is equipped with a safety vent to release excess pressure automatically. Ensure the vent points away from you‚ ideally toward the back of the stove‚ to avoid burns. If excessive pressure builds up‚ the vent will activate. Regular cleaning of the vent is essential to maintain proper function. Never obstruct the safety vent‚ as this could lead to dangerous pressure levels. Always follow the manual’s guidelines for filling and operating the cooker to prevent unnecessary pressure release. Proper usage ensures safe and efficient cooking with your Fagor Pressure Cooker.

Accessing the Fagor Pressure Cooker Manual

The Fagor Pressure Cooker manual is available online as a downloadable PDF. Visit the official website or authorized portals to access the guide for free.

Downloading the PDF Manual

To download the Fagor Pressure Cooker manual‚ visit the official Fagor website or authorized online portals. Search for your specific model‚ then click the download link. Ensure the manual is in English and matches your cooker model. Save the PDF to your device for easy access. This digital version allows you to view instructions anytime‚ even without internet. Printing is optional for convenience. Always verify the manual’s authenticity to ensure accurate information. This resource is essential for understanding your cooker’s features‚ safety guidelines‚ and troubleshooting tips. Keep it handy for optimal use and maintenance of your Fagor Pressure Cooker;

Online Resources and Support

Fagor offers comprehensive online resources to support your pressure cooker experience. Visit their official website for FAQs‚ user manuals‚ and troubleshooting guides. Interactive forums and video tutorials are available for additional assistance. Contact customer service directly through email or phone for personalized help. Fagor’s digital suite provides advanced tools for monitoring and optimizing your cooker’s performance. Stay updated with the latest software and firmware updates to ensure your appliance runs smoothly. Online support ensures you can address any issue promptly‚ enhancing your overall cooking experience with the Fagor Pressure Cooker.

Congratulations! You’re now ready to maximize your Fagor Pressure Cooker’s potential. Follow the manual for efficient‚ safe‚ and delicious cooking. Happy culinary adventures with your Fagor Pressure Cooker!

Final Tips for Optimal Use

For the best experience with your Fagor Pressure Cooker‚ always follow the manual’s guidelines. Regularly clean and maintain the cooker to ensure longevity. Experiment with recipes but stay within recommended pressure and time limits. For delicate foods‚ use lower pressure settings. Never overfill the cooker‚ as it can lead to poor results or safety issues. Ensure the lid is properly aligned and locked before cooking. Store the cooker in a dry place to prevent rust. If issues arise‚ refer to the troubleshooting section or consult the PDF manual for solutions. Happy cooking with your Fagor Pressure Cooker!

Warranty and Customer Service Information

Your Fagor Pressure Cooker is backed by a limited warranty covering manufacturing defects. For specific terms and conditions‚ refer to the warranty section in the manual. Fagor provides dedicated customer support to address any queries or concerns. Contact their team via phone‚ email‚ or through the official website for assistance. Additionally‚ online resources‚ including FAQs and downloadable manuals‚ are available for troubleshooting and guidance. For warranty claims‚ ensure you have your purchase receipt and product serial number ready. Fagor’s customer service aims to resolve issues promptly‚ ensuring a seamless cooking experience. Reach out for help whenever needed!

surface area of rectangular prism worksheet with answers pdf

A rectangular prism has six rectangular faces. Surface area is the total exposed area‚ calculated as 2(lw + lh + wh). It’s essential for packaging‚ construction‚ and solving real-world problems. Worksheets with answers provide structured practice‚ enhancing geometry skills and understanding.

1.1 Definition of a Rectangular Prism

A rectangular prism is a three-dimensional shape with six rectangular faces. It has three dimensions: length‚ width‚ and height. Also known as a cuboid‚ it is characterized by having all angles as right angles. Commonly found in everyday objects like boxes‚ it serves as a foundational shape in geometry. Understanding its structure is essential for calculating surface area and solving related problems‚ making it a key focus in educational worksheets.

1.2 Importance of Understanding Surface Area

Understanding surface area is crucial for real-world applications like packaging and construction. It helps determine material costs and efficiency. In education‚ mastering surface area calculation enhances problem-solving skills and geometry comprehension. Worksheets with answers guide students through practical exercises‚ ensuring accuracy and confidence. This concept is foundational for advanced math‚ linking to volume calculations and three-dimensional shape analysis. Grasping surface area fosters critical thinking and prepares students for diverse mathematical challenges.

Formula for the Surface Area of a Rectangular Prism

The surface area (SA) of a rectangular prism is calculated using the formula: SA = 2(lw + lh + wh)‚ where l is length‚ w is width‚ and h is height. This formula is essential for accurate calculations and is widely used in worksheets to practice and master the concept.

2.1 Derivation of the Formula

The surface area of a rectangular prism is derived by calculating the area of each of its six rectangular faces. Since opposite faces are equal‚ the formula simplifies to SA = 2(lw + lh + wh). Here‚ l‚ w‚ and h represent length‚ width‚ and height. This derivation ensures that all exposed surfaces are accounted for‚ providing a clear and concise method for determining the total surface area. Worksheets often include examples to illustrate this concept‚ such as calculating the surface area of a box with given dimensions.

2.2 Variables Involved (Length‚ Width‚ Height)

The formula for the surface area of a rectangular prism involves three key variables: length (l)‚ width (w)‚ and height (h). These represent the dimensions of the prism. Length is the longest side‚ width is the shorter side‚ and height is the vertical measurement. Each dimension contributes to the total surface area calculation‚ ensuring accurate results when substituted into the formula SA = 2(lw + lh + wh). Understanding these variables is crucial for applying the formula correctly in various problems.

Step-by-Step Calculation of Surface Area

Begin by calculating the area of each face using the dimensions (length‚ width‚ height). Sum the areas of all six faces to find the total surface area.

3.1 Calculating the Area of Individual Faces

Calculate the area of each face by multiplying its length and width. A rectangular prism has six faces: front‚ back‚ left‚ right‚ top‚ and bottom. Each pair of opposite faces has the same dimensions; For example‚ the front and back faces have the same area‚ calculated as length × height. Similarly‚ the left and right faces are width × height‚ and the top and bottom faces are length × width. Ensure all dimensions are in the same units before calculating. This step-by-step approach helps in organizing the process systematically. Practical examples‚ such as calculating the area of a face with dimensions 5 cm × 3 cm‚ reinforce understanding. Always double-check calculations to avoid errors in final surface area results.

3.2 Summing the Areas of All Faces

After calculating individual face areas‚ sum them to find the total surface area. A rectangular prism has six faces: front‚ back‚ left‚ right‚ top‚ and bottom. Each pair of opposite faces has the same area. For example‚ front and back faces = 2(lh)‚ left and right faces = 2(wh)‚ and top and bottom faces = 2(lw). Add these together to get the total surface area: SA = 2(lw + lh + wh). Ensure all dimensions are in the same units before summing. This step is crucial for accurate results. Always double-check your additions to avoid errors in the final surface area calculation.

Surface Area of Rectangular Prism Worksheet Overview

This worksheet provides structured problems for calculating surface areas of rectangular prisms with integer‚ fractional‚ and decimal dimensions. It includes clear answers and solutions for practice.

4.1 Structure of the Worksheet

The worksheet is designed for grades 5-8‚ featuring problems with integer‚ fractional‚ and decimal dimensions. It includes clear diagrams‚ step-by-step solutions‚ and an answer key. Each problem set focuses on calculating surface area using the formula (SA = 2(lw + lh + wh)). The structure helps students progress from basic to advanced problems‚ ensuring a comprehensive understanding of surface area calculation. Additional resources like printable PDFs and online quizzes are available for further practice.

4.2 Benefits of Using Worksheets for Practice

Worksheets provide structured practice‚ improving understanding and problem-solving skills. They offer clear solutions and answer keys‚ helping students learn from mistakes. Printable PDFs and online quizzes make practice accessible and engaging. Worksheets cater to various skill levels‚ from basic to advanced problems‚ ensuring comprehensive mastery of surface area calculation. They also enhance fluency and confidence‚ preparing students for real-world applications and higher-level math concepts.

Types of Problems in the Worksheet

The worksheet includes problems with integer‚ fractional‚ and decimal dimensions‚ allowing students to practice various scenarios and enhance their understanding of surface area calculation.

5.1 Problems with Integer Dimensions

These problems involve rectangular prisms with integer length‚ width‚ and height measurements. Students apply the surface area formula‚ SA = 2(lw + lh + wh)‚ to calculate the total exposed area. Worksheets include questions with dimensions like 3 cm‚ 5 cm‚ and 6 cm‚ resulting in surface areas such as 54 cm² or 90 cm². These straightforward problems help students master the concept before moving to more complex scenarios. The answer key provides verification‚ ensuring understanding and accuracy in calculations‚ while catering to grades 5-8 with clear‚ structured practice in PDF formats.

5.2 Problems with Fractional and Decimal Dimensions

These problems involve rectangular prisms with fractional or decimal measurements‚ adding complexity to calculations. Students must apply the surface area formula‚ SA = 2(lw + lh + wh)‚ to dimensions like 2.5 cm or 3.75 inches. Worksheets include questions with mixed numbers and decimals‚ requiring precise arithmetic to find accurate surface areas. Answer keys provide detailed solutions‚ ensuring students understand how to handle non-integer values. These exercises prepare learners for real-world scenarios where measurements aren’t always whole numbers‚ enhancing their problem-solving skills and mathematical accuracy‚ with resources available in PDF formats for structured practice.

Answer Key and Solutions

The answer key provides detailed solutions for each problem‚ ensuring clarity and understanding. It covers various problem types‚ including integer‚ fractional‚ and decimal dimensions‚ helping students identify common mistakes and improve their skills. The solutions are structured to guide learners through each step‚ reinforcing their grasp of surface area calculations. This resource is invaluable for self-assessment and mastering the concept effectively‚ making it a comprehensive tool for both students and educators alike in their journey to excel in geometry.

6.1 Detailed Solutions for Each Problem

Detailed solutions guide students through each step‚ ensuring clarity and understanding. Each problem is broken down‚ showing how to apply the surface area formula (SA = 2(lw + lh + wh)) and calculate accurately. Solutions include explanations for finding missing dimensions‚ handling fractional and decimal measurements‚ and interpreting results. Step-by-step breakdowns help students identify and correct common errors‚ such as miscalculating face areas or misapplying the formula. Practical examples from the worksheet are solved systematically‚ reinforcing problem-solving skills and conceptual knowledge. This section serves as a valuable learning tool‚ enabling students to review and master surface area calculations confidently.

6.2 Common Mistakes and How to Avoid Them

Common mistakes include misapplying the surface area formula‚ incorrectly calculating individual face areas‚ and neglecting unit consistency. Students often confuse surface area with volume‚ leading to errors. To avoid these‚ ensure accurate formula application‚ double-check calculations‚ and verify units. Regular practice with worksheets helps identify and correct these errors‚ fostering a deeper understanding of surface area concepts and improving problem-solving accuracy over time. Consistent review of detailed solutions also minimizes recurring mistakes‚ enhancing overall performance in geometry tasks.

Real-World Applications of Surface Area

Surface area calculations are essential in packaging‚ construction‚ and manufacturing‚ aiding in material estimation‚ cost reduction‚ and design optimization for real-world objects and structures.

7.1 Packaging and Wrapping Materials

Calculating the surface area of a rectangular prism is vital for determining the amount of material needed for packaging and wrapping. It helps estimate the cost of materials and reduce waste. For instance‚ understanding the surface area allows businesses to optimize packaging design‚ ensuring products are securely wrapped while minimizing excess material. This application is particularly relevant in industries like e-commerce‚ where efficient packaging is crucial for cost and environmental savings. Worksheets provide practical exercises to master these real-world calculations.

7.2 Architecture and Construction

In architecture and construction‚ understanding the surface area of rectangular prisms is essential for estimating materials. Builders use it to calculate the amount of paint‚ siding‚ or roofing needed. Accurate surface area measurements ensure projects are completed efficiently and within budget. Worksheets help students and professionals practice these calculations‚ applying mathematical concepts to real-world scenarios. This skill is fundamental for designing structures and managing construction resources effectively‚ making it a cornerstone of architectural planning and execution.

Advanced Problems Involving Surface Area

Advanced problems involve solving for missing dimensions and optimizing surface area for given volumes. These challenges enhance critical thinking and practical application skills in geometry.

8.1 Finding Missing Dimensions

Finding missing dimensions involves using the surface area formula and known values to solve for unknown length‚ width‚ or height. Given the surface area and two dimensions‚ students rearrange the formula to isolate the missing variable. For example‚ if length and width are known‚ the height can be found by dividing the remaining surface area by the sum of the products of the known dimensions. This enhances problem-solving skills and understanding of algebraic manipulation in geometric contexts. Such problems are common in worksheets‚ providing practical application and reinforcing mathematical concepts.

8.2 Calculating Both Volume and Surface Area

Calculating both volume and surface area involves using the dimensions of a rectangular prism to find two key measurements. The surface area (SA) is found using SA = 2(lw + lh + wh)‚ while the volume (V) is calculated as V = lwh. Worksheets often include problems where students must find both‚ enhancing their understanding of how different dimensions affect these measurements. This dual calculation reinforces algebraic skills and problem-solving strategies‚ preparing students for real-world applications where both volume and surface area are essential.

Word Problems and Critical Thinking

Word problems challenge students to apply surface area formulas to real-world scenarios‚ enhancing critical thinking and problem-solving skills through practical applications like packaging and construction.

9.1 Scenarios Requiring Surface Area Calculation

Scenarios requiring surface area calculation include packaging materials‚ wrapping gifts‚ and architectural designs. These real-world applications help students understand the practicality of surface area in everyday life‚ such as determining the amount of wrapping paper needed for a box or the material required for constructing a building. Worksheets provide problems involving boxes‚ prisms‚ and other shapes‚ enabling students to apply the formula to solve real-life challenges effectively. This enhances their problem-solving skills and mathematical reasoning.

9.2 Optimizing Surface Area for Given Volumes

Optimizing surface area for a given volume involves finding dimensions that minimize material use while maintaining the required space. This is crucial in packaging‚ construction‚ and design. Worksheets provide problems where students calculate the most efficient dimensions for a rectangular prism with a fixed volume‚ enhancing their critical thinking and problem-solving skills. This concept helps in real-world scenarios like reducing packaging materials or constructing cost-effective buildings while meeting volume requirements.

Grading and Feedback Guide

This guide provides rubrics for consistent grading and detailed solutions for clarity. Constructive feedback helps students identify mistakes and improve their understanding and problem-solving skills effectively.

10.1 Rubrics for Assessing Student Work

Rubrics evaluate accuracy‚ problem setup‚ and calculations. Points are awarded for correct formulas‚ precise arithmetic‚ and proper unit application. Detailed feedback highlights strengths and areas needing improvement‚ ensuring students understand their performance and can target specific skills for growth.

10.2 Providing Constructive Feedback

Constructive feedback highlights strengths‚ areas for improvement‚ and guides future practice. It should be specific‚ positive‚ and actionable. For example‚ “Great job calculating the lateral surface area‚ but double-check the total sum.” This approach helps students understand their mistakes and learn from them‚ fostering a supportive learning environment.

Tips for Teachers and Instructors

Use visual aids like nets of prisms to enhance understanding. Encourage peer discussions to solve problems collaboratively. Provide immediate feedback using answer keys for improvement.

11.1 Effective Strategies for Teaching Surface Area

Engage students with hands-on activities using nets of rectangular prisms to visualize surface area. Use real-world examples‚ like calculating wrapping paper needs‚ to illustrate practical applications. Incorporate step-by-step guides and worksheets with answers for independent practice. Encourage collaborative problem-solving in pairs or small groups. Provide immediate feedback using answer keys to address misconceptions. Integrate digital tools‚ such as interactive simulations‚ to reinforce learning. Offer differentiated instruction to cater to various learning styles and pace.

11.2 Encouraging Peer-to-Peer Learning

Encourage students to work in pairs or small groups to solve surface area problems. Peer-to-peer learning fosters collaboration and mutual understanding. Assign group activities where students explain concepts to each other‚ reinforcing their own knowledge. Use worksheets with answers as a tool for shared practice‚ allowing students to discuss and resolve doubts collectively. This approach promotes active learning‚ improves problem-solving skills‚ and builds confidence in understanding surface area calculations. It also helps identify and address individual misconceptions early.

Common Misconceptions About Surface Area

Students often confuse surface area with volume or misapply the formula. Misconceptions include forgetting to multiply by 2‚ miscalculating individual face areas‚ and incorrect unit conversions;

12.1 Confusing Surface Area with Volume

A common mistake is mixing up surface area and volume. Surface area measures the exposed area of all faces‚ while volume calculates the space inside. Students often confuse the formulas: surface area is 2(lw + lh + wh)‚ whereas volume is lwh. This misunderstanding leads to incorrect calculations‚ especially when dimensions are large. Worksheets with answers help clarify these concepts‚ ensuring students grasp the difference and apply the correct formula for each measurement. Clear examples and practice are essential for avoiding this error.

12.2 Incorrect Application of the Formula

One common error is misapplying the surface area formula. Students may add dimensions instead of multiplying or forget to multiply by 2. For example‚ using l + w + h instead of 2(lw + lh + wh). Another mistake is incorrect exponentiation‚ such as squaring dimensions unnecessarily. These errors stem from poor formula understanding. Worksheets with answers help identify such mistakes‚ providing clear examples and corrections. Practice and review are essential to master the formula and avoid these pitfalls in calculations.

Interactive and Digital Resources

Utilize online tools like GeoGebra and Khan Academy for 3D visualization. Apps such as Mathway offer real-time calculations. Printable PDFs are available for offline practice‚ enhancing learning flexibility and engagement.

13.1 Online Tools for Visualizing Rectangular Prisms

Interactive tools like GeoGebra and Khan Academy allow students to explore rectangular prisms in 3D. These platforms provide visual representations‚ enabling users to manipulate dimensions and calculate surface areas dynamically. Mathway and Desmos offer step-by-step solutions and real-time calculations. Such resources enhance understanding and engagement‚ making complex geometry concepts more accessible. They are ideal for both classroom and self-paced learning environments‚ fostering a deeper grasp of spatial relationships and formulas.

13.2 Apps and Software for Practice

Apps like Mathway and Photomath offer step-by-step solutions for surface area problems. GeoGebra provides interactive 3D models to visualize rectangular prisms. Kahoot! and Khan Academy feature quizzes and exercises for practice. These tools are available on mobile and desktop‚ making learning accessible. They provide immediate feedback and progress tracking‚ enhancing problem-solving skills. By leveraging technology‚ students can engage with interactive exercises and improve their understanding of surface area calculations in a dynamic and efficient manner.

Additional Practice Materials

Enhance learning with printable PDF worksheets‚ online quizzes‚ and interactive tools. These resources provide varied exercises‚ ensuring comprehensive practice for all skill levels and learning styles.

14.1 Printable Worksheets in PDF Format

Printable PDF worksheets are an excellent resource for practicing surface area calculations. They offer a variety of problems with integer‚ fractional‚ and decimal dimensions‚ ensuring comprehensive practice. Many worksheets include answer keys‚ allowing students to check their work and understand their mistakes. These PDFs are ideal for homework‚ classwork‚ or independent study‚ providing a structured way to master the concept of surface area. They cater to different skill levels and learning styles‚ making them a versatile tool for educators and learners alike.

14.2 Online Quizzes and Tests

Online quizzes and tests provide an interactive way to assess understanding of surface area concepts. These resources offer instant scoring‚ detailed feedback‚ and a variety of question types. Many platforms include timers and randomized questions to simulate exam conditions. Students can track their progress and identify areas for improvement. Additionally‚ online tests often cover multiple skill levels‚ making them suitable for different grade levels and learning paces. They are a convenient and engaging way to reinforce learning and prepare for assessments.

15.1 Summary of Key Concepts

The surface area of a rectangular prism is calculated using the formula SA = 2(lw + lh + wh)‚ where l‚ w‚ and h represent length‚ width‚ and height. This concept is fundamental for understanding geometric measurements and their practical applications. Worksheets with answers provide structured practice‚ helping students master the formula and apply it to various problems‚ including real-world scenarios like packaging and construction. Regular practice and review ensure a strong foundation in surface area calculations.

15.2 Encouragement for Further Practice

Consistent practice is key to mastering surface area calculations. Utilize worksheets and online resources to reinforce your understanding. Regular problem-solving enhances spatial reasoning and mathematical accuracy. Challenge yourself with advanced problems‚ such as finding missing dimensions or optimizing surface area for given volumes. The more you practice‚ the more confident you’ll become in applying these concepts to real-world scenarios‚ making you proficient in geometry and problem-solving.

References and Additional Reading

Recommended textbooks and websites provide in-depth explanations and practice materials. Visit Math Worksheets 4 Kids for printable PDFs and Big Ideas Math for comprehensive resources.

16.1 Recommended Textbooks and Websites

For comprehensive learning‚ explore resources like Math Worksheets 4 Kids and Big Ideas Math. These platforms offer detailed guides‚ practice worksheets‚ and interactive tools. Effortless Math Education also provides step-by-step solutions and study guides. These resources cater to various grade levels‚ ensuring a robust understanding of surface area calculations and applications. They are ideal for both students and educators seeking additional practice materials and educational support.

16.2 Links to Relevant Educational Resources

Enhance your learning with resources from Math Worksheets 4 Kids and Big Ideas Math. These websites offer printable PDFs‚ interactive tools‚ and detailed guides. Additionally‚ Effortless Math Education provides comprehensive study materials. These links cater to various grade levels‚ offering practice worksheets‚ answer keys‚ and interactive activities to help students and educators master surface area calculations effectively.

glock 48 guide rod

The Glock 48 guide rod is a critical component designed to enhance recoil management and ensure reliable pistol operation. Crafted from high-quality materials, it supports smooth functionality and accuracy, making it essential for both professional and civilian use. Its sleek design and durability contribute to the overall performance of the Glock 48, a compact and versatile firearm. Understanding its role is vital for optimal maintenance and upgrades, ensuring peak reliability in various shooting scenarios.

1.1 Overview of the Glock 48 Pistol

The Glock 48 is a compact, slimline pistol designed for concealed carry and everyday use. Chambered in 9x19mm, it combines reliability and accuracy with a lightweight, durable design. Featuring a polymer frame and a nitrated steel slide, the Glock 48 is known for its versatility and ease of handling. Its compact dimensions make it ideal for those seeking a balance between concealability and performance. The pistol’s 10-round magazine capacity and smooth trigger pull contribute to its popularity among both civilian shooters and law enforcement. The Glock 48 also incorporates the renowned Safe Action system, ensuring consistent and safe operation without the need for a manual safety. Its sleek design and ergonomic grip make it a preferred choice for self-defense and professional use.

1.2 Importance of the Guide Rod in Pistol Functionality

The guide rod plays a pivotal role in the Glock 48’s operational efficiency, directly influencing recoil management and overall performance. It ensures the smooth cycling of the slide by guiding its movement, which is crucial for maintaining accuracy and consistency. A well-designed guide rod minimizes muzzle rise, allowing for faster target reacquisition and improved control during rapid firing. Additionally, it helps in aligning the barrel and slide properly, reducing wear and tear on internal components. The guide rod’s durability and functionality are essential for the pistol’s reliability, making it a critical component for both professional and civilian shooters who demand consistent and dependable performance in high-stress situations.

History and Development of the Glock 48 Guide Rod

The Glock 48 guide rod was developed to enhance the pistol’s slimline design, introduced in 2019 for concealed carry. Its design reflects Glock’s commitment to durability and reliability.

2.1 Evolution of Glock Pistols and Their Components

Glock pistols have evolved significantly since their introduction in the 1980s, with continuous improvements in design, materials, and functionality. The Glock 48, introduced in 2019, represents a refinement in slimline pistol technology, designed for concealed carry. Its guide rod, like earlier models, was developed to optimize recoil management and ensure consistent performance. Over the years, Glock has incorporated advanced materials and engineering to enhance durability and reliability, reflecting the company’s commitment to innovation. The evolution of Glock components, including the guide rod, has been driven by user feedback and the demand for superior performance in various shooting scenarios.

2.2 Specific Design Considerations for the Glock 48 Guide Rod

The Glock 48 guide rod was designed with specific considerations for its slimline frame and concealed-carry purpose. Crafted from durable stainless steel, it ensures robust performance while maintaining a lightweight profile. The guide rod’s dimensions and spring tension were carefully calibrated to manage recoil effectively in a compact firearm. Its design prioritizes reliability and consistency, addressing the needs of both civilian and professional users. The guide rod’s compatibility with aftermarket components also reflects its versatility. Engineering efforts focused on precision machining to ensure smooth operation and minimal wear; These design considerations underscore the Glock 48’s reputation for reliability and adaptability in various shooting scenarios.

Design and Functionality of the Glock 48 Guide Rod

The Glock 48 guide rod features a stainless steel construction with a captive spring design, ensuring smooth recoil management and consistent pistol operation. Its compact design aligns perfectly with the Glock 48’s slim frame, optimizing performance while maintaining reliability. The guide rod’s functionality is integral to the firearm’s overall accuracy and control, making it a vital component for both professional and civilian use. Its robust design ensures durability, providing consistent performance even under rigorous conditions.

3.1 Key Components of the Guide Rod Assembly

The Glock 48 guide rod assembly consists of a few essential parts, each playing a crucial role in its functionality. First, there is the guide rod itself, typically made from high-strength stainless steel, designed to withstand the forces of recoil. The guide rod is paired with a recoil spring, which absorbs and manages the kinetic energy during the cycling of the pistol. Some aftermarket guide rods include a colored sleeve or guide rod for enhanced visual appeal and easy identification. Together, these components ensure smooth operation, consistent performance, and reliable functionality of the Glock 48 pistol. Proper assembly and alignment of these parts are critical for optimal performance.

3.2 Materials Used in the Construction of the Guide Rod

The Glock 48 guide rod is constructed from high-quality materials to ensure durability and reliability. The primary material is stainless steel, known for its strength, corrosion resistance, and ability to withstand the stresses of repeated recoil. Some guide rods may feature a nitride coating, which enhances surface hardness and provides additional protection against wear and tear. Aftermarket options often use advanced materials like titanium or aluminum, offering reduced weight while maintaining strength. The choice of material directly impacts the guide rod’s performance, with stainless steel being the most common due to its proven reliability in harsh conditions. These materials ensure the guide rod remains functional and durable over thousands of rounds.

3.3 How the Guide Rod Contributes to Recoil Management

The guide rod plays a crucial role in recoil management by absorbing and distributing the forces generated during the firing cycle. As the slide recoils, the guide rod helps to control the rearward motion, ensuring a smooth and consistent operation. This contributes to reduced muzzle flip and felt recoil, making the pistol easier to control, especially during rapid firing. The guide rod’s design and material properties dampen the energy transfer, allowing the slide to return to its forward position more efficiently. This results in improved accuracy, faster target reacquisition, and a more comfortable shooting experience. Proper functioning of the guide rod is essential for maintaining the pistol’s reliability and performance under various conditions.

Installation and Replacement of the Glock 48 Guide Rod

Replacing the Glock 48 guide rod requires specific tools and careful disassembly of the pistol. Proper installation ensures smooth operation and reliability, following detailed steps precisely.

4.1 Tools and Equipment Needed for Replacement

To replace the Glock 48 guide rod, you’ll need specific tools to ensure a smooth process. Essential items include a punch tool, a flathead screwdriver, and a set of Allen wrenches. Additionally, a cleaning brush, lubricant, and a work surface cover are recommended to protect the firearm during disassembly. Safety glasses and a well-lit workspace are crucial for clear visibility. While Glock pistols are known for their simplicity, having the right tools prevents damage to internal components. Always refer to a detailed guide or professional instruction to avoid errors. Proper preparation ensures the replacement process is efficient and safe, maintaining the pistol’s reliability and performance.

4.2 Step-by-Step Guide to Replacing the Guide Rod

Begin by ensuring the Glock 48 is unloaded and safe to work on. Remove the magazine and verify the chamber is empty. Disassemble the pistol by sliding the slide off the frame rails after aligning the tabs. Once the slide is removed, locate the guide rod assembly. Use a punch tool to compress the recoil spring, then carefully slide the guide rod out of the slide. Replace the old guide rod with the new one, ensuring it is properly aligned and seated. Decompress the spring slowly and reattach the slide to the frame. Test the pistol’s action to ensure smooth functionality and reliability.

Performance and Reliability of the Glock 48 Guide Rod

The Glock 48 guide rod delivers consistent performance, reducing muzzle rise and improving accuracy. Its durable design ensures long-term reliability, making it a dependable choice for both professionals and enthusiasts.

5.1 Impact on Pistol Accuracy and Consistency

The Glock 48 guide rod significantly enhances pistol accuracy and consistency by stabilizing the recoil process. Its precise engineering ensures a smoother cycling action, reducing muzzle rise and improving control during rapid fire. This stability translates to tighter shot groups and better precision, especially in high-stress situations. The guide rod’s consistent performance minimizes the variability in recoil, allowing shooters to maintain a steady aim and focus on their targets. For both professional users and enthusiasts, this level of reliability is crucial, as it directly impacts the pistol’s effectiveness in various shooting scenarios. The guide rod’s role in maintaining consistent functionality makes it an indispensable component of the Glock 48 system.

5.2 Durability and Longevity of the Guide Rod

The Glock 48 guide rod is renowned for its exceptional durability and longevity, making it a reliable component for long-term use. Constructed from high-grade materials like stainless steel, it withstands the rigors of frequent firing and harsh environmental conditions. Its robust design ensures minimal wear and tear, even after thousands of rounds. The guide rod’s resistance to corrosion and abrasion further enhances its lifespan, maintaining optimal performance over time. Regular maintenance, as outlined in the care section, can extend its service life. This durability makes the Glock 48 guide rod a cost-effective and dependable choice for both professional and civilian shooters, ensuring consistent performance without compromise.

Maintenance and Care of the Glock 48 Guide Rod

Regular inspection and cleaning are essential for maintaining the guide rod’s performance. Proper lubrication prevents wear, ensuring reliability and longevity. Adhere to manufacturer guidelines for optimal care.

6.1 Cleaning the Guide Rod and Surrounding Areas

Cleaning the Glock 48 guide rod and its surrounding areas is crucial for maintaining optimal performance. Start by disassembling the pistol according to manufacturer instructions, ensuring safety. Use a soft, dry cloth to wipe down the guide rod, removing any visible debris or residue. For tougher grime, apply a mild solvent or gun cleaner, then scrub gently with a nylon brush. Avoid harsh chemicals or abrasive materials that could damage the finish. Pay attention to the recoil spring and guide rod channel, as these areas tend to accumulate dirt and lubricant buildup. After cleaning, inspect for wear or damage before reassembling. Proper cleaning ensures smooth operation and prevents malfunctions.

6.2 Lubrication Recommendations for Optimal Performance

Proper lubrication of the Glock 48 guide rod is essential for smooth operation and long-term reliability. Use a high-quality gun oil or silicone-based lubricant, applying a small amount to the guide rod and recoil spring. Avoid over-lubrication, as excess oil can attract debris and impair performance. Focus on the contact points where the guide rod interacts with the slide and frame. Lubricate after cleaning or every 500 rounds, depending on usage. Consistent lubrication ensures reduced friction, minimizing wear and tear while maintaining consistent recoil management. Always follow manufacturer guidelines for recommended lubricants to preserve the guide rod’s functionality and extend its service life.

Upgrades and Aftermarket Options for the Glock 48 Guide Rod

Aftermarket guide rods offer enhanced performance, durability, and customization for the Glock 48. Made from materials like stainless steel or titanium, they improve accuracy and recoil management while providing a personalized touch. Reputable brands ensure reliability and longevity, catering to shooters seeking upgraded functionality and aesthetics. These options allow users to tailor their pistol to specific needs, ensuring optimal performance in various shooting scenarios. Always choose high-quality aftermarket components to maintain the Glock 48’s renowned reliability and versatility.

7.1 Factory vs. Aftermarket Guide Rods: Pros and Cons

Factory guide rods for the Glock 48 are designed to meet strict specifications, ensuring reliability and consistency. They are typically made from durable materials like stainless steel and are precision-engineered for optimal performance. A key advantage is their seamless integration with the pistol’s design, minimizing the risk of compatibility issues. However, they may lack customization options and could be heavier than aftermarket alternatives. Aftermarket guide rods, on the other hand, offer enhanced features such as reduced weight, improved recoil management, and aesthetic appeal. While they provide more flexibility, they may void warranties or introduce potential reliability concerns if not chosen carefully. Balancing cost, performance, and durability is essential when deciding between the two.

7.2 Popular Aftermarket Guide Rods for the Glock 48

The Glock 48 guide rod has sparked interest in aftermarket upgrades, with several popular options available. Hyve Technologies offers a stainless steel guide rod known for its durability and smooth operation. Sudeta’s guide rod is another favorite, featuring a lightweight design that reduces recoil while maintaining reliability. Both options are crafted to precise tolerances, ensuring compatibility with the Glock 48’s slim frame. These aftermarket guide rods are praised for their performance enhancements and aesthetic appeal. Users often choose them for their ability to improve the shooting experience without compromising the pistol’s inherent reliability. Researching these options can help shooters find the best fit for their needs.

Comparisons with Other Glock Models

The Glock 48 guide rod stands out for its slim design, tailored to the pistol’s compact frame. Unlike bulkier models, it balances size and functionality, enhancing recoil control without added weight, making it ideal for concealed carry and precise shooting experiences.

8.1 Guide Rod Differences Across Glock Pistols

Guide rods vary across Glock models, with differences in length, material, and spring weight. The Glock 48 features a shorter, lighter guide rod, optimized for its slim design. Larger models like the Glock 17 and 19 have longer guide rods to accommodate their full-size frames. While the core function remains consistent, the Glock 48’s guide rod is tailored for concealed carry and reduced recoil in a compact setup. This differentiation ensures each model’s guide rod aligns with its intended use, whether for duty, concealed carry, or competition. The Glock 48’s guide rod stands out for its balance of size and performance, making it a standout in the Glock lineup.

8.2 How the Glock 48 Guide Rod Stands Out

The Glock 48 guide rod is distinguished by its optimized design for the pistol’s slim profile, ensuring reduced recoil and enhanced accuracy. Unlike larger Glock models, the Glock 48 guide rod is engineered for a compact frame, making it ideal for concealed carry. Its lightweight yet durable construction, often featuring stainless steel or other high-performance materials, contributes to smoother cycling and consistent performance. The guide rod’s dual-spring system is specifically calibrated to manage the recoil of the Glock 48’s chambering, offering a balance between control and firepower. This tailored engineering makes the Glock 48 guide rod a standout component, blending reliability with the practical needs of everyday carry and self-defense scenarios.

Safety Considerations and Best Practices

Always handle the Glock 48 guide rod with care, following manufacturer guidelines to ensure reliability. Use authorized parts and avoid unauthorized modifications. Regular inspections and proper lubrication are essential to prevent malfunctions. Ensure compatibility with other components for smooth cycling. Safe handling practices reduce the risk of accidental discharge, maintaining overall firearm safety and performance.

9.1 Proper Handling and Safety Precautions

When handling the Glock 48 guide rod, always wear safety glasses and ensure the firearm is unloaded. Use a firm grip and stable work surface to prevent accidental discharge. Avoid touching the muzzle or breech area to minimize risk of injury. Ensure the guide rod is free from obstructions before reassembly. Use only factory-recommended tools to prevent damage. Keep fingers away from the trigger during disassembly or assembly. Proper lubrication is essential for smooth operation. Never modify the guide rod or surrounding components without professional guidance. Regular inspections should be conducted to identify wear or damage. Always follow Glock’s official safety guidelines for optimal performance and reliability.

9.2 Common Mistakes to Avoid When Dealing with the Guide Rod

  • Improper disassembly: Avoid removing the guide rod without ensuring the pistol is unloaded and the slide is properly aligned.
  • Using incorrect tools: Never use makeshift tools, as they can damage the guide rod or surrounding components.
  • Insufficient lubrication: Failing to lubricate the guide rod can lead to increased friction and wear.
  • Ignoring wear signs: Overlooking scratches or deformation can result in reduced performance and potential malfunctions.
  • Over-tightening: Excessive force when reinstalling can damage the guide rod or other parts of the pistol.

Avoiding these mistakes ensures the Glock 48 guide rod functions reliably, maintaining the pistol’s accuracy and longevity.

Troubleshooting Common Issues

Common issues with the Glock 48 guide rod include increased recoil, accuracy problems, or malfunction symptoms. These often stem from a worn-out or improperly installed guide rod.

10.1 Identifying Symptoms of a Worn-Out Guide Rod

Identifying a worn-out guide rod in the Glock 48 is crucial for maintaining reliability. Common symptoms include increased recoil, inconsistent shot grouping, and a “sticky” slide return. If the guide rod is damaged or worn, the pistol may exhibit feeding issues or fail to return to battery properly. Visible wear, such as scoring or corrosion on the rod, is another indicator. Over time, a worn guide rod can lead to diminished accuracy and reliability, making regular inspection and maintenance essential. Addressing these symptoms promptly ensures optimal performance and prevents further damage to the firearm. Regularly checking for these signs can help prevent critical failures during operation.

10.2 DIY Fixes for Minor Guide Rod-Related Problems

For minor issues with the Glock 48 guide rod, DIY fixes can be effective. Regular cleaning and lubrication often resolve problems like sticky movement or inconsistent recoil. Inspect the guide rod for debris or corrosion and use a soft cloth and solvent to clean it. Apply a high-quality firearms lubricant to moving parts to ensure smooth operation. If the guide rod is slightly bent or misaligned, careful straightening with specialized tools may work. However, avoid attempting complex repairs without proper expertise, as this could damage the firearm. Always ensure the pistol is unloaded before performing any maintenance. These simple fixes can restore functionality and reliability to the guide rod assembly.

Future Advancements in Guide Rod Technology

Future advancements may include lightweight, high-strength materials and adaptive recoil systems. Emerging technologies could enhance durability and performance, offering tailored solutions for different shooting scenarios and preferences.

11.1 Emerging Materials and Designs for Guide Rods

Emerging materials like advanced alloys and carbon fiber are being explored to create lighter, stronger guide rods. These materials could reduce weight while maintaining durability, enhancing recoil management. Innovative designs, such as modular systems, may allow customization of spring tension and weight distribution. Coatings like DLC or nitride could further improve corrosion resistance and wear. Researchers are also investigating 3D-printed guide rods for complex geometries and tailored performance. Such advancements aim to optimize reliability, accuracy, and longevity, ensuring the Glock 48 guide rod remains a critical component in modern firearms. These developments could set new standards for guide rod technology in the industry.

11.2 Potential Innovations in Recoil Management Systems

Future innovations in recoil management systems may include adaptive recoil dampeners that adjust based on the shooter’s grip or ammunition type. Hydraulic or magnetic recoil reducers could offer smoother operation and reduced wear on components. Modular recoil systems might allow users to customize spring tension and weight distribution for specific shooting scenarios. Additionally, smart recoil management could integrate sensors to provide real-time feedback, optimizing performance. These advancements aim to enhance accuracy, control, and comfort while maintaining the reliability of the Glock 48. Such innovations could redefine recoil management, making the Glock 48 even more versatile for tactical, competitive, and self-defense applications.

The Glock 48 guide rod is essential for optimal performance and reliability. Proper maintenance and upgrades ensure its longevity and effectiveness in various shooting scenarios.

12.1 Summary of Key Points

The Glock 48 guide rod plays a pivotal role in the pistol’s functionality, ensuring smooth recoil management and consistent performance. Its robust design and high-quality materials contribute to durability and reliability. Proper maintenance, including regular cleaning and lubrication, is essential to uphold its effectiveness. Upgrades and aftermarket options offer enhancements for enthusiasts seeking improved performance. Comparisons with other Glock models highlight its unique features tailored for specific shooter needs. Adhering to safety guidelines and avoiding common mistakes ensures optimal operation. Troubleshooting common issues early prevents major problems, while future advancements promise even better designs. Overall, the Glock 48 guide rod is a testament to innovative engineering, blending functionality and reliability for shooters worldwide.

12.2 Final Thoughts on the Glock 48 Guide Rod

The Glock 48 guide rod exemplifies exceptional engineering, blending durability with precision to enhance pistol performance. Its role in recoil management and reliability makes it indispensable for shooters seeking consistency. Whether for self-defense or sport, the guide rod’s design ensures smooth operation. While aftermarket options offer customization, the factory rod’s quality is hard to surpass. Proper care and maintenance are crucial to extend its lifespan. As firearms evolve, the Glock 48 guide rod stands as a testament to functional innovation. For those prioritizing accuracy and dependability, it remains a cornerstone of the Glock 48’s design, delivering unparalleled performance in every shot.

kwikset 450126vhc manual

Welcome to the Kwikset 450126VHC manual, your essential guide for installing, programming, and troubleshooting the Z-Wave Plus Lock Version II․ This manual provides detailed instructions to ensure seamless integration with smart home systems, highlighting advanced security features like SmartKey and Z-Wave technology․ Follow the step-by-step guide to maximize functionality and enjoy enhanced home security and convenience․

Overview of the Kwikset 450126VHC Lock

The Kwikset 450126VHC is a cutting-edge smart lock designed for enhanced security and convenience․ Featuring Z-Wave Plus technology, it seamlessly integrates with smart home systems, offering remote control and voice command capabilities․ The lock incorporates the advanced SmartKey Security system, ensuring superior protection against unauthorized access․ With a user-friendly keypad and robust engineering, the 450126VHC is ideal for modern homes seeking reliable and intelligent locking solutions․ Its compatibility with popular smart home hubs further enhances its versatility and functionality․

Importance of the User Manual

The Kwikset 450126VHC manual is crucial for optimal use and troubleshooting of the lock․ It provides step-by-step installation guidance, programming instructions, and solutions for common issues․ The manual ensures users can leverage all features, from Z-Wave integration to SmartKey functionality․ By following the manual, users can avoid setup errors and maintain their lock’s performance․ Regularly referencing the manual helps users stay updated on best practices, ensuring their home remains secure and their smart lock functions seamlessly with other devices․

Structure of the Manual

The Kwikset 450126VHC manual is organized into clear sections for easy navigation․ It begins with an introduction, followed by detailed installation and setup instructions․ Separate chapters cover programming, customization, and troubleshooting common issues․ The manual also includes sections on security features, battery management, and integration with smart home systems․ Additional resources, such as warranty information and support contacts, are provided for user convenience․ This structured approach ensures users can quickly find the information they need to install, configure, and maintain their lock effectively․

Installation and Setup

The Kwikset 450126VHC manual guides you through pre-installation requirements, door preparation, and step-by-step installation․ It also covers first-time setup and configuration for smooth operation․

Pre-Installation Requirements

Before installing the Kwikset 450126VHC lock, ensure your door meets compatibility standards․ Verify the door thickness is between 1․375″ and 1․75″ and check for proper alignment․ Gather necessary tools like a screwdriver, tape measure, and drill bits․ Review FCC regulations and ensure compliance with Z-Wave Plus technology requirements․ Confirm the lock is compatible with your smart home system․ Prepare the door for drilling by marking the correct dimensions․ Familiarize yourself with the manual’s instructions to avoid installation errors․ Ensure all components from the box are accounted for before starting․

Step-by-Step Installation Process

Begin by attaching the keypad to the door’s exterior using the provided screws․ Mark the door’s dimensions for drilling, ensuring alignment with the lock’s components․ Drill pilot holes for the latch and lock body․ Secure the strike plate to the door frame․ Insert the latch into the door edge, aligning it with the drilled holes․ Mount the lock body on the door’s interior, connecting it to the keypad․ Tighten all screws firmly․ Test the lock to ensure proper functionality․ Refer to the manual for specific torque settings and alignment tips to avoid installation issues․

Door Preparation and Drilling Instructions

Begin by measuring the door’s thickness to ensure compatibility with the lock․ Mark the door’s backset (distance from the edge to the handle) at 2․375 inches or 2․75 inches․ Use a drill bit to create pilot holes for the latch and lock body․ Drill a 1-inch hole for the latch and a 2․125-inch hole for the lock body, ensuring proper alignment․ Use a spade bit for the lock body hole, maintaining precise measurements to avoid misalignment․ Refer to the manual for specific drilling templates and alignment guides to ensure accurate preparation․

First-Time Setup and Configuration

Begin by inserting the batteries and ensuring the lock is in factory default mode․ Determine the door’s backset (2․375″ or 2․75″) and perform the door handing process by pressing the Program button and following on-screen instructions․ Use the SmartKey tool to initialize the lock and set your first user code․ Refer to the manual for specific code requirements․ Complete the setup by integrating with your smart home system, if applicable, and testing all functionalities to ensure proper operation․ This process ensures your lock is ready for secure and convenient use․

Programming and Customization

Program user codes, customize settings, and utilize SmartKey re-keying for enhanced security․ Explore advanced features to tailor your lock’s functionality to meet your specific needs seamlessly․

Adding and Managing User Codes

To add user codes, press the program button twice, enter a new code, and press the lock button once; The lock will confirm with a checkmark or sound․ For multiple codes, repeat the process․ To delete codes, enter the master code, press the program button, and select the code to remove․ Use the Premis app for remote code management․ Ensure codes are unique and secure․ Regularly update codes to maintain security․ This feature allows convenient access control for family and guests while keeping your home secure․

Customizing Lock Settings

The Kwikset 450126VHC manual guides you through customizing lock settings for enhanced security and convenience․ Adjust features like auto-lock delay, one-touch locking, and privacy mode to suit your preferences․ Use the Premis app to remotely manage settings, ensuring seamless control over your smart lock․ Customize user access levels, set up notifications, and optimize performance․ These features allow you to tailor the lock’s behavior to your lifestyle, ensuring maximum security and ease of use․ Explore the manual for detailed instructions on personalizing your lock settings effectively․

SmartKey Re-Keying Instructions

The Kwikset 450126VHC manual provides clear SmartKey re-keying instructions, allowing you to reset your lock’s cylinder to work with new keys․ This feature eliminates the need for replacing the entire lock․ Use the SmartKey tool to remove the old key and insert the new one, following the manual’s step-by-step process․ Ensure the lock is in the “re-key” mode and verify proper alignment for a successful re-keying․ This process enhances security and provides flexibility in managing your lock’s key compatibility without professional assistance․

Advanced Features and Configurations

The Kwikset 450126VHC manual details advanced features like remote monitoring, voice control, and custom Scenes for enhanced smart home automation․ Users can integrate the lock with popular smart home hubs, enabling seamless control via apps or voice assistants․ Advanced configurations include customizing user access, setting up notifications, and creating automated routines․ The manual guides users through these settings, ensuring maximum convenience and security․ Explore these features to tailor your lock’s functionality to your lifestyle and smart home ecosystem for a truly personalized experience․

Troubleshooting Common Issues

The Kwikset 450126VHC manual addresses common issues like lock unresponsiveness, failed programming, and connectivity problems․ It provides solutions and diagnostic tools to resolve these issues efficiently․

Lock Not Responding to Commands

If the Kwikset 450126VHC lock is unresponsive, check the battery status and ensure it is properly powered․ Verify Z-Wave network connectivity and confirm the lock is correctly enrolled․ If issues persist, perform a factory reset by pressing the program button and following manual instructions․ Ensure no obstructions block the signal and that the lock is within range of the smart home hub․ Consult the manual for detailed diagnostic steps or contact Kwikset support for further assistance․ Regularly updating firmware can also resolve responsiveness issues․

Failed Programming Attempts

If programming attempts fail, ensure the lock is in the correct state (unlocked and open)․ Verify the code entered matches the required criteria and is programmed correctly․ Check for low battery levels, as insufficient power can disrupt programming․ If issues persist, press the program button twice, enter a new code, and press the lock button once․ Ensure the door is properly prepared and aligned․ Refer to the manual for detailed instructions or reset the lock to factory settings if necessary․ Contact Kwikset support for further assistance if problems continue․

Connectivity Problems with Smart Home Systems

If experiencing connectivity issues, reset the lock and smart home hub․ Ensure the lock is within range of the hub and check for firmware updates․ Verify network configuration and remove the lock from the network, then re-enroll it․ Consult the manual for specific Z-Wave setup instructions․ Check battery levels, as low power may cause connectivity problems․ If issues persist, ensure the lock is properly integrated with your smart home system․ Contact Kwikset support for further assistance or troubleshooting guidance․

Battery and Power-Related Issues

Battery and Power-Related Issues

If the lock’s battery level is low, it may fail to respond or function properly․ Replace the batteries with high-quality alkaline batteries, ensuring correct polarity․ The lock typically requires 4 AA batteries, and replacement is needed every 12-18 months․ Check the battery compartment for corrosion and clean if necessary․ If the lock still doesn’t power up, verify the battery installation․ Low battery alerts are usually indicated by a flashing LED or notifications via the smart home app․ For persistent issues, consult the manual or contact Kwikset support․

Security Features and Technology

The Kwikset 450126VHC features advanced security technologies including Z-Wave Plus for smart home integration, SmartKey for keyless entry, and robust data encryption for enhanced privacy and protection․

Z-Wave Plus Technology Explained

Z-Wave Plus technology enhances smart home connectivity, offering improved range, faster communication, and lower power consumption․ It enables seamless integration with compatible hubs, allowing remote control and monitoring via smart devices․ With enhanced security features, Z-Wave Plus ensures encrypted data transmission, protecting your smart lock from unauthorized access․ This technology also supports over-the-air updates, keeping your system secure and up-to-date․ By leveraging the Z-Wave network, the Kwikset 450126VHC provides a robust and reliable smart home experience․

SmartKey Security System

The SmartKey Security System offers advanced key control and re-keying capabilities․ Using the SmartKey tool, homeowners can easily re-key the lock in seconds without a locksmith․ This feature ensures enhanced security, as lost or compromised keys can be quickly invalidated․ The system also maintains compatibility with traditional keys while providing a secure, patented design․ With SmartKey, users enjoy unparalleled convenience and peace of mind, knowing their home’s security is both flexible and robust․ This technology seamlessly integrates with the lock’s other features, offering a comprehensive security solution․

Data Encryption and Privacy

The Kwikset 450126VHC employs robust data encryption to safeguard user information and ensure privacy․ All communications between the lock and smart home systems are securely encrypted, protecting against unauthorized access․ The system adheres to industry standards for data security, ensuring sensitive information remains confidential․ Additionally, user codes and settings are stored securely, preventing potential breaches․ This advanced encryption technology provides homeowners with peace of mind, knowing their personal data and access codes are protected from cyber threats and unauthorized use․

Compatibility with Smart Home Systems

The Kwikset 450126VHC is designed to integrate seamlessly with popular smart home systems, enhancing convenience and control․ Compatible with Z-Wave Plus technology, it works effortlessly with hubs like Samsung SmartThings, Wink, and Alarm․com․ This lock also supports voice control through Amazon Alexa and Google Assistant, allowing for hands-free operation․ Additionally, it integrates with Qolsys IQ panels, ensuring a unified smart home experience․ Its broad compatibility ensures flexibility, making it easy to incorporate into existing or new smart home setups for enhanced security and functionality․

Battery Management

The Kwikset 450126VHC manual provides guidance on battery replacement, life expectancy, and low battery alerts․ It emphasizes energy efficiency, ensuring optimal performance and extended battery life․

Battery Replacement Instructions

To replace the batteries in your Kwikset 450126VHC lock, start by removing the exterior cover to access the battery compartment․ Use a screwdriver to take out the screws holding the cover in place․ Gently pull the cover off to expose the batteries․ Next, disconnect the old batteries and insert the new ones, ensuring the positive and negative terminals are correctly aligned․ Replace the cover and reattach it using the screws․ Finally, test the lock to ensure it is functioning properly with the new batteries․ This process helps maintain your lock’s performance and security․

Battery Life Expectancy

The Kwikset 450126VHC lock typically operates for 6 to 12 months on a single set of batteries, depending on usage and smart home integration․ Heavy use or frequent remote access may reduce battery life․ To optimize longevity, ensure proper installation and avoid extreme temperatures․ Replace batteries when the low-battery indicator alerts you․ Using high-quality alkaline batteries is recommended for consistent performance․ Regularly monitoring battery levels ensures uninterrupted lock functionality and maintains your home’s security and convenience․

Low Battery Indicators and Alerts

The Kwikset 450126VHC lock features a low-battery indicator, ensuring you’re notified when power levels are critical․ The status LED flashes red when batteries are low, and smart home systems connected to the lock send alerts through their apps․ Voice-enabled notifications are also available via smart speakers․ These alerts ensure timely battery replacement, preventing lock malfunctions․ Always monitor these indicators to maintain optimal lock performance and security․ Promptly replacing batteries when alerted guarantees uninterrupted functionality and peace of mind for your smart home system․

Energy Efficiency Features

The Kwikset 450126VHC lock is designed with energy efficiency in mind, ensuring long battery life and minimal power consumption․ Its advanced Z-Wave Plus technology optimizes energy use, reducing drain on batteries․ The lock automatically enters a low-power sleep mode when inactive, extending battery life․ Additionally, smart home integration allows real-time monitoring of battery levels, enabling proactive management․ These energy-saving features ensure reliable performance while maintaining a seamless smart home experience, making the 450126VHC a cost-effective and eco-friendly choice for home security․

Integration with Smart Home Systems

The Kwikset 450126VHC integrates seamlessly with Z-Wave Plus smart home systems, offering remote access, voice control, and compatibility with popular hubs like Samsung SmartThings Wink․

Z-Wave Network Setup

The Kwikset 450126VHC supports Z-Wave Plus technology for enhanced smart home integration․ To set up the Z-Wave network, ensure your lock is compatible with your smart home hub․ Start by putting the lock into inclusion mode, typically done by pressing the program button twice․ Follow your hub’s instructions to complete the pairing process․ Once connected, you can control the lock remotely, receive notifications, and integrate it with other Z-Wave devices․ Refer to the manual for detailed troubleshooting and setup instructions․

Compatibility with Popular Smart Home Hubs

The Kwikset 450126VHC lock is compatible with popular smart home hubs, including the Qolsys IQ2/IQ2 panels and the Alarm․com app, ensuring a seamless smart home experience․ To ensure proper functionality, make sure your hub runs the latest software versions․ This integration allows for features like remote monitoring, custom scenes, and voice control through compatible systems․ The manual provides guidance on compatibility and optimization, helping you maximize your lock’s smart home capabilities․

Voice Control via Smart Speakers

The Kwikset 450126VHC lock supports voice control through integration with popular smart speakers like Amazon Alexa and Google Home․ This feature allows users to lock, unlock, and check the status of their door with simple voice commands․ For enhanced security, voice commands cannot unlock the door without proper authentication․ The manual provides step-by-step instructions for setting up voice control, ensuring a seamless and convenient smart home experience․ This integration adds an extra layer of convenience, making it easier to manage your lock hands-free․

Remote Access and Monitoring

The Kwikset 450126VHC lock offers remote access and monitoring capabilities through integration with your smart home system․ Using a compatible smart home hub and app, you can monitor the lock’s status, receive notifications, and control the lock remotely․ This feature allows you to grant access to guests or service providers even when you’re not home․ The manual provides detailed instructions for setting up remote access, ensuring a secure and connected experience․ Stay informed and in control of your home’s security with real-time updates and alerts․

Additional Resources and Support

Explore official support, online manuals, community forums, and warranty details for the Kwikset 450126VHC․ Visit kwikset․com for comprehensive resources and assistance․

Official Kwikset Support Center

The Kwikset Support Center offers comprehensive assistance, including troubleshooting guides, FAQs, and direct contact options․ Visit kwikset․com/support for detailed resources, ensuring optimal performance and addressing any issues with your 450126VHC lock․ The center provides 24/7 access to manuals, repair services, and expert help, making it your go-to destination for all inquiries․

Online Manuals and Guides

Access the official Kwikset 450126VHC manual and additional guides online for comprehensive support․ Visit the Kwikset website or platforms like ManualsLib to download PDF versions․ These resources include detailed installation instructions, troubleshooting tips, and programming steps․ The Spectrum Brands FCC application details and Smart Code 913 manual are also available for advanced configurations․ Online guides provide step-by-step instructions for setup, ensuring seamless integration with your smart home system․ Refer to these resources for optimal performance and ease of use․

Community Forums and User Discussions

Engage with the Kwikset community forums to connect with other users and experts․ These platforms offer valuable insights, troubleshooting tips, and real-world experiences․ Users share solutions for common issues, such as programming challenges or integration problems․ Participate in discussions to resolve specific concerns or learn optimization techniques․ The community is a great resource for addressing unique scenarios and enhancing your smart home experience with the Kwikset 450126VHC․ Active discussions ensure you stay informed and supported beyond the manual․

Warranty and Maintenance Information

Your Kwikset 450126VHC lock is backed by a comprehensive warranty covering defects in materials and workmanship․ The warranty typically lasts for a specified period from the date of purchase․ To make a claim, you may need to provide proof of purchase and comply with Kwikset’s return and repair policies․ Regular maintenance, such as cleaning the keypad and lock body, ensures optimal performance․ Additionally, check battery levels and replace them as needed to maintain functionality․ Proper care extends the product’s lifespan and ensures reliable operation․ Refer to the official Kwikset support center for detailed warranty terms and maintenance guidelines․

Congratulations on completing the setup! Regular updates and proper care will ensure your Kwikset 450126VHC lock performs optimally․ Enjoy enhanced security and convenience․

Final Tips for Optimal Performance

To ensure your Kwikset 450126VHC lock operates at its best, regularly check battery levels, update firmware, and clean the keypad․ Proper door alignment is crucial for smooth locking․ Always use genuine Kwikset replacement parts and follow manual instructions for re-keying․ For smart home integration, verify compatibility with your system․ Keep the lock’s software updated to access new features and security enhancements․ By following these tips, you’ll maintain optimal performance and enjoy a secure, convenient smart locking experience․

Staying Updated with Software and Firmware

Regularly updating your Kwikset 450126VHC lock’s software and firmware ensures optimal performance, security, and compatibility․ Check the Kwikset website or your smart home app for the latest updates․ Updating enhances features, fixes issues, and strengthens security․ Always use official Kwikset sources to avoid risks․ Backup your settings before updating․ Visit Kwikset Support for detailed instructions and to download the newest versions, ensuring your lock remains up-to-date and functions seamlessly․

Enhancing Your Smart Home Experience

Enhance your smart home experience by integrating the Kwikset 450126VHC lock with compatible systems․ Utilize voice control through smart speakers for hands-free operation․ Remote access and monitoring via apps allow you to manage your lock from anywhere․ Explore advanced features like custom scenes and automations․ Ensure compatibility with your smart home hub for seamless integration․ Regularly update your system to access new features and improvements․ Refer to the manual or Kwikset support for detailed guidance on maximizing your smart home setup․

hoard of the dragon queen pdf

Hoard of the Dragon Queen is the first part of the Tyranny of Dragons campaign for Dungeons & Dragons 5th Edition, designed for characters from 1st to 8th level.

Overview of the Campaign

Hoard of the Dragon Queen is the first installment of the Tyranny of Dragons campaign, designed for Dungeons & Dragons 5th Edition. It introduces players to a sweeping narrative centered around the Cult of the Dragon, a secretive organization aiming to free the powerful dragon goddess Tiamat. The adventure begins with low-level characters investigating cult activities and gradually escalates into epic battles and high-stakes decisions. Set across the Sword Coast, the campaign explores diverse locations, from bustling cities to ancient ruins, offering a mix of exploration, combat, and role-playing opportunities. By the end, characters reach 7th level, setting the stage for the sequel, The Rise of Tiamat. This adventure provides a foundation for understanding the larger threats and lore of the Forgotten Realms, making it a cornerstone of the Tyranny of Dragons saga.

Background and Setting

Hoard of the Dragon Queen is set in the Forgotten Realms, specifically along the Sword Coast, a region rich in history and adventure. The campaign revolves around the Cult of the Dragon, a mysterious organization dedicated to freeing the powerful dragon goddess Tiamat from her celestial prison. Players are drawn into a world of intrigue as the cult’s activities disrupt the balance of power across the land. The adventure begins in the small town of Greenest, where the cult’s raids and strange occurrences set the stage for a larger conflict. As the story unfolds, characters explore diverse locations, from bustling cities to ancient ruins, uncovering the cult’s plans and facing formidable foes. The setting blends classic Dungeons & Dragons lore with fresh narrative elements, creating an immersive experience for both new and veteran players.

Structure of the Adventure

Hoard of the Dragon Queen is structured as a sweeping narrative, beginning in the town of Greenest and progressing through diverse locations across the Sword Coast.

Main Quests and Objectives

The main quests in Hoard of the Dragon Queen are designed to guide players through a series of interconnected objectives. Initially, players must investigate the Cult of the Dragon’s activities in the town of Greenest, dealing with the aftermath of their attacks. As the adventure progresses, the party uncovers the cult’s broader plans, leading them to key locations such as the cult’s camp, where they must disrupt operations and gather vital information. A significant objective involves infiltrating the cult’s stronghold, Castle Naerytar, to sabotage their efforts and confront prominent leaders. Throughout the campaign, players must also manage resources, form alliances, and make strategic decisions that impact the story’s progression. These quests are balanced to challenge players of varying skill levels, ensuring an engaging experience as they advance from level 1 to 8.

Notable Encounters and Battles

Hoard of the Dragon Queen features a variety of memorable encounters and battles that challenge players. Early in the campaign, the party must fend off a dragon attack on Greenest, setting the tone for the adventure. Later, they face the Cult of the Dragon’s forces in their camp, including powerful warriors and fanatical cultists. One of the most iconic battles takes place in Castle Naerytar, where players confront a blue dragon and its minions. Additionally, the adventure includes encounters with kobolds, cult leaders, and other draconic threats. These battles are designed to test the party’s abilities and strategies, with enemies scaling in difficulty as the players progress. The PDF version provides detailed stats and descriptions for each encounter, ensuring a thrilling experience for both new and experienced players.

Character Progression and Leveling

Hoard of the Dragon Queen is designed to guide characters from level 1 to level 8, offering a balanced progression system. Players begin as novice adventurers and gradually unlock powerful abilities, spells, and feats. The campaign’s structure ensures that challenges escalate appropriately, allowing characters to grow in strength and capability. By the final stages, adventurers are well-prepared to face the looming threat of Tiamat’s return. The PDF version includes detailed leveling guides, ensuring smooth transitions between levels and maintaining an engaging pace throughout the story. This progression system is integral to the adventure’s appeal, making it accessible for new players while offering depth for veterans. The campaign’s conclusion sets the stage for The Rise of Tiamat, where characters can continue their journey to level 15.

Key Elements of the Campaign

The campaign centers on the Cult of the Dragon’s plot to free Tiamat, featuring epic battles, strategic encounters, and a rich narrative across the Sword Coast.

The Role of the Cult of the Dragon

The Cult of the Dragon is a central antagonist group in Hoard of the Dragon Queen, driving the plot with their secretive and dangerous agenda. Their primary goal is to free Tiamat, the powerful dragon goddess, from her prison in Avernus. This cult is well-organized and operates across various regions, infiltrating cities and towns to gather resources and support. They are led by charismatic leaders who manipulate followers, often through fear and deception. The cult’s actions create chaos and destruction, drawing the players into a web of conflict and intrigue. Their presence is felt throughout the campaign, making them a formidable and recurring foe for the adventurers. The cult’s influence is both political and military, adding depth and complexity to the story. Their ultimate aim is to bring about a draconic tyranny, which the players must thwart at every turn.

Significance of Tiamat in the Storyline

Tiamat, the legendary dragon goddess, is central to the storyline of Hoard of the Dragon Queen. She is a powerful deity imprisoned in Avernus, and the Cult of the Dragon’s ultimate goal is to free her. Tiamat’s release would unleash a draconic tyranny, bringing destruction and chaos to Faerûn. The cult’s efforts to summon her drive the campaign’s plot, creating a sense of urgency and high stakes. While Tiamat does not appear directly in this adventure, her influence looms large, shaping the cult’s actions and the players’ mission to stop them. Her significance underscores the epic scale of the story, as the players’ decisions directly impact the possibility of her return and the fate of the world.

Important Locations and Maps

The adventure features a variety of key locations that shape the story and gameplay. The Sword Coast serves as the primary setting, with towns, dungeons, and outdoor environments providing diverse backdrops for exploration and combat. Maps are provided for major locations, such as the Cult of the Dragon’s camps, ancient ruins, and hidden temples. These maps are essential for visualizing encounters and navigating the world. Players and DMs alike benefit from the detailed layouts, which enhance immersion and strategic planning. The PDF includes hand-drawn illustrations and grid-based maps, offering a clear understanding of each location’s layout and significance. These resources are vital for bringing the campaign to life and ensuring a seamless storytelling experience.

Resources and Supplements

Hoard of the Dragon Queen is available as a PDF, offering a comprehensive adventure for D&D 5th Edition. Additional materials include online content, community discussions, and supplementary downloads;

Availability of the PDF Version

The Hoard of the Dragon Queen PDF is widely available for download, offering a digital version of the adventure. It can be purchased from official D&D platforms and third-party retailers. The PDF includes the full adventure, maps, and essential resources for both players and Dungeon Masters. Additionally, some websites offer free previews or introductory content for those interested in exploring the campaign before purchasing. The PDF format ensures easy access and portability, making it convenient for players and DMs to reference during games. With its comprehensive details and engaging storyline, the PDF version remains a popular choice among D&D enthusiasts. It’s also noted for its compatibility with virtual tabletop platforms, enhancing online play experiences. Overall, the PDF version of Hoard of the Dragon Queen provides a versatile and accessible way to enjoy this iconic adventure.

Additional Materials and Downloads

Beyond the core PDF, Hoard of the Dragon Queen offers supplementary materials to enhance gameplay. These include high-resolution maps, encounter tables, and character sheets tailored for the adventure. Players and DMs can download these resources from official D&D platforms or community-driven websites. Additionally, fan-created content, such as custom monsters and NPCs, is available online. A free introductory edition of the adventure is also accessible, providing a preview of the storyline and mechanics. These downloads are designed to complement the main PDF, offering flexibility and depth to the campaign. Many of these materials are available on platforms like D&D Beyond, Reddit forums, and other RPG communities, making it easy for enthusiasts to expand their experience.

Online Content and Community Discussions

The Hoard of the Dragon Queen has sparked vibrant discussions across online platforms. Forums like Reddit and D&D Beyond host threads where players and DMs share strategies, homebrew content, and experiences. YouTube channels and Twitch streams feature playthroughs and analysis, offering insights into the adventure’s mechanics and storytelling. Additionally, fan-created wikis detail key locations, NPCs, and encounters, serving as valuable resources for new players. These online communities foster collaboration, with many users creating and sharing custom maps, character builds, and alternate storylines. The collective enthusiasm highlights the adventure’s enduring popularity and its ability to inspire creativity within the D&D community. This wealth of online content enriches the gameplay experience for both seasoned veterans and newcomers alike.

Reception and Reviews

Hoard of the Dragon Queen is a must-have for D&D enthusiasts, offering thrilling quests and epic battles. Players and critics praise its engaging storyline and expansive world-building, making it a cornerstone of 5th Edition campaigns.

Community Feedback and Ratings

Hoard of the Dragon Queen has received widespread acclaim from both players and Dungeon Masters. Fans praise its engaging storyline, memorable encounters, and the opportunity to explore iconic locations like the Sword Coast. The adventure’s structure, which takes characters from level 1 to 7, is particularly commended for its balanced progression. Many highlight the PDF version’s convenience, allowing easy access to the campaign’s maps, quests, and lore. Critics note that while the campaign is epic in scope, some encounters feel rushed, and the final act could use more detail. Overall, it’s a must-have for anyone exploring the Tyranny of Dragons series, offering a thrilling experience that sets the stage for The Rise of Tiamat.

Critical Reception and Analysis

Hoard of the Dragon Queen has been praised for its epic storytelling and immersive world-building, setting the stage for the Tyranny of Dragons campaign. Critics highlight the adventure’s ability to balance combat, exploration, and role-playing, making it accessible to both new and veteran players. The PDF version is commended for its well-organized layout and ease of navigation, particularly with the inclusion of digital maps and handouts. However, some reviewers note that the pacing can feel uneven, with certain sections feeling rushed and others overly drawn out. The final act, in particular, has been criticized for lacking the depth and climax expected from such a high-stakes narrative. Despite these criticisms, the adventure remains a cornerstone of D&D 5th Edition campaigns, offering a rich foundation for storytelling and character development.

Impact on the D&D Community

Hoard of the Dragon Queen has had a significant impact on the Dungeons & Dragons community, setting a new standard for 5th Edition campaigns. Its release marked a resurgence of epic storytelling, inspiring countless players and Dungeon Masters worldwide. The adventure’s popularity led to the creation of a dedicated fan base, with active discussions and community-driven content. The PDF version’s accessibility has made it easier for new players to join the D&D community, while its modular design has encouraged homebrew adaptations. The campaign’s success also influenced future official content, solidifying its place as a foundational adventure in D&D history. Its legacy continues to shape how players and creators approach large-scale narratives in the game.

Running the Campaign

Hoard of the Dragon Queen is the first part of the Tyranny of Dragons campaign, designed for levels 1-15, set in the Forgotten Realms. The PDF provides a detailed adventure featuring the Cult of the Dragon and their plan to free Tiamat, offering a mix of exploration, combat, and roleplay opportunities for players and Dungeon Masters alike.

Tips for Dungeon Masters

Running Hoard of the Dragon Queen effectively requires balancing combat, exploration, and roleplay. DMs should emphasize the Cult of the Dragon’s menacing presence and Tiamat’s looming threat. Encourage player creativity in solving challenges and use the PDF’s detailed maps and encounters to enhance immersion. Ensure pacing matches the party’s progress, as the adventure spans multiple levels. Highlight key NPCs like Langdedrosa Cyanwrath to deepen the story. Prepare for dynamic battles and adapt to player choices, as the campaign’s success hinges on engaging storytelling and strategic combat encounters. Utilize the PDF’s resources, such as the appendix, to streamline preparation and deliver a memorable experience for your players.

Converting the Adventure to Other Editions

Converting Hoard of the Dragon Queen to other D&D editions requires careful adjustments to stat blocks, spells, and encounters to align with the target system’s rules. While the 5th Edition version is the most popular, fans of earlier editions can adapt the story and maps with minimal changes. DMs should focus on maintaining the adventure’s core narrative and encounters while tweaking mechanics to fit the desired edition. The PDF’s detailed descriptions and maps provide a solid foundation for conversion. Online communities and tools can assist with stat block conversions, ensuring the adventure remains balanced and engaging across editions. This flexibility allows DMs to bring the epic tale of Tiamat’s rise to players of all preferences and playstyles.

Integrating Homebrew Content

Integrating homebrew content into Hoard of the Dragon Queen allows DMs to personalize the adventure while maintaining its core storyline. Custom quests, NPCs, and subplots can seamlessly blend with the existing narrative; For example, DMs can introduce unique side stories tied to the Cult of the Dragon or create original dungeons inspired by the campaign’s themes. Homebrew content can also expand on underutilized locations, such as adding hidden temples or secret cult strongholds. Balancing homebrew elements with the adventure’s progression is key to ensuring a cohesive experience. The flexibility of the campaign’s design makes it easy for DMs to insert their own creative ideas, enriching the adventure without derailing the main plot. This approach fosters a unique and engaging experience tailored to the players’ preferences.

Expanding the Adventure

Expanding Hoard of the Dragon Queen involves adding custom quests, unique NPCs, and thematic extensions to enhance gameplay and deepen immersion in the campaign’s world.

Custom Quests and Side Stories

Custom quests and side stories can enrich the Hoard of the Dragon Queen campaign by introducing unique narratives and challenges. These additions allow players to explore uncharted territories, interact with original NPCs, and uncover hidden plotlines that deepen the story. For instance, a quest to retrieve a powerful artifact from a forgotten ruin or a side story involving a local village’s struggle against the Cult of the Dragon can add layers to the adventure. These elements not only provide additional content but also offer opportunities for character development and world-building. Incorporating player-driven objectives and personalized arcs can further enhance engagement, making the campaign more dynamic and memorable.

Adding Unique NPCs and Encounters

Adding unique NPCs and encounters to Hoard of the Dragon Queen can significantly enhance the campaign’s depth and immersion. Introducing original characters, such as a mysterious cult defector or a charismatic dragon ally, can create unexpected story twists and moral dilemmas. Custom encounters, like a puzzle-filled ancient ruin or a negotiation with a neutral dragon, add variety and challenge. These elements allow players to engage with the world in new ways, fostering creativity and memorable experiences. By incorporating these additions, Dungeon Masters can tailor the adventure to their party’s preferences, ensuring a fresh and dynamic journey through the Sword Coast. Such enhancements complement the existing narrative while offering players unique opportunities for growth and exploration.

Creating Thematic Extensions

Creating thematic extensions for Hoard of the Dragon Queen allows Dungeon Masters to expand the campaign while maintaining its core themes of draconic tyranny and adventure. These extensions can include new plot hooks, side quests, or entire regions tied to the Cult of the Dragon or Tiamat’s influence. For example, introducing a hidden dragon hatchery or a secret cult enclave can deepen the story and provide fresh challenges. Thematic extensions should align with the campaign’s tone, emphasizing epic battles, political intrigue, and the looming threat of Tiamat’s return. By weaving these additions seamlessly into the existing narrative, DMs can create a richer, more immersive experience that stays true to the original vision while offering surprises for even seasoned players.

Hoard of the Dragon Queen offers an epic adventure, blending dragon lore, thrilling battles, and rich storytelling. Its PDF availability ensures accessibility, making it a must-have for D&D enthusiasts seeking a memorable journey through the Forgotten Realms.

Final Thoughts on Hoard of the Dragon Queen

Hoard of the Dragon Queen stands as a cornerstone of D&D 5th Edition, offering a compelling narrative that bridges levels 1 through 8. Its PDF format ensures accessibility, allowing players and DMs to embark on a thrilling adventure across the Sword Coast. The campaign masterfully intertwines the rise of Tiamat with the sinister plots of the Cult of the Dragon, creating a rich tapestry of epic battles and political intrigue. With its modular design and expansive world-building, Hoard of the Dragon Queen remains a timeless classic, perfect for both newcomers and seasoned veterans. Its legacy is a testament to the enduring magic of Dungeons & Dragons storytelling.

Looking Ahead to The Rise of Tiamat

The Rise of Tiamat serves as the climactic conclusion to the Tyranny of Dragons campaign, seamlessly following Hoard of the Dragon Queen. This adventure escalates the stakes, challenging players to confront the full might of the Cult of the Dragon and the looming threat of Tiamat’s return. The PDF version of The Rise of Tiamat expands on the world of Faerûn, introducing new locales, formidable foes, and epic showdowns. Players can expect their characters to reach level 15 by the campaign’s end, making this a fitting culmination of their journey. Together with Hoard of the Dragon Queen, this adventure creates a cohesive and unforgettable experience, solidifying the Tyranny of Dragons as a legendary D&D campaign.

free praxis study guide

This comprehensive guide provides free resources to help prepare for the Praxis tests‚ including official study materials‚ practice tests‚ and strategies for success․

1․1 Overview of the Praxis Tests

The Praxis tests are standardized exams required for teacher certification in many states․ They assess subject-specific knowledge and teaching skills․ The tests cover various subjects‚ including reading‚ mathematics‚ writing‚ and specialty areas like music or elementary education․ Praxis Core tests focus on foundational skills‚ while Praxis Subject Assessments evaluate expertise in specific fields․ Designed to ensure teaching competency‚ these exams include multiple-choice questions‚ essays‚ and content-based exercises․ Scores are used by state licensing boards to evaluate readiness for the classroom․ The tests are part of a national certification program‚ emphasizing their importance for aspiring educators․ Proper preparation is key‚ making study guides and resources essential for success․

1․2 Importance of a Study Guide

A study guide is essential for preparing for the Praxis tests‚ as it provides a structured approach to understanding the exam format‚ content‚ and expectations․ It helps candidates identify key topics‚ practice with relevant questions‚ and develop effective study strategies․ By outlining the test structure and content‚ a study guide reduces anxiety and ensures focused preparation․ It also offers insights into time management‚ enabling candidates to allocate their study hours wisely․ Furthermore‚ a well-designed study guide can highlight areas of weakness‚ allowing for targeted improvement․ Access to free or affordable study guides levels the playing field‚ ensuring all candidates have the resources needed to succeed․ A study guide is not just a tool—it’s a roadmap to achieving your teaching certification goals․

1․3 Benefits of Using Free Resources

Free resources offer numerous advantages for Praxis test preparation‚ making high-quality materials accessible to everyone․ They provide affordable options for candidates‚ eliminating financial barriers that might hinder preparation․ Free study guides‚ such as the ETS Study Companion and Khan Academy’s Praxis Core Prep‚ deliver comprehensive content tailored to the exam structure․ Additionally‚ free practice tests and questions allow candidates to assess their knowledge and identify areas for improvement․ These resources are often updated regularly‚ ensuring they remain relevant and aligned with current test content․ By utilizing free resources effectively‚ candidates can create a robust study plan without incurring additional costs‚ making their preparation both efficient and economical․ This accessibility ensures that all aspiring educators have equal opportunities to succeed on the Praxis tests․

Understanding the Praxis Test Structure

The Praxis tests assess various teaching skills and subject knowledge․ Each test has specific formats‚ content‚ and scoring systems to evaluate candidate readiness for educational roles․

2․1 Types of Praxis Tests

The Praxis test series includes various assessments like Praxis Core Academic Skills for Educators‚ Praxis Subject Assessments‚ and Praxis Content Knowledge for Teaching Foundations․ These tests evaluate fundamental academic skills‚ subject-specific knowledge‚ and teaching expertise․ Praxis Core tests focus on reading‚ writing‚ and mathematics‚ while Subject Assessments cover specialized areas like mathematics‚ biology‚ or music․ Additionally‚ the Praxis Content Knowledge for Teaching Foundations assesses teaching skills in specific subjects․ Each test type ensures candidates demonstrate the necessary competencies for teaching in their chosen field․ By understanding these test types‚ test-takers can better prepare and tailor their study strategies accordingly․ Utilizing free resources‚ such as the ETS Study Companion and Khan Academy‚ can significantly aid in this preparation process․

2․2 Test Format and Content

The Praxis tests are primarily multiple-choice‚ with some tests including essays‚ performance tasks‚ or interactive exercises․ Each test is designed to evaluate specific skills and knowledge relevant to teaching․ The Praxis Core tests focus on academic skills in reading‚ writing‚ and mathematics‚ while subject-specific tests assess expertise in areas like science‚ mathematics‚ or languages․ Most tests consist of 60 to 120 questions‚ with time limits ranging from 1 to 4 hours․ The content is aligned with teaching standards and often includes passages‚ problems‚ or scenarios that mirror real-world classroom situations․ Free resources like the ETS Study Companion and Khan Academy provide detailed breakdowns of test formats and content‚ helping candidates prepare effectively for their specific exam․ These resources ensure a clear understanding of what to expect on test day․

2․3 Scoring System

The Praxis tests use a scoring system that varies by exam type․ Most tests are scored on a scale of 100 to 200‚ with a minimum passing score set by each state or institution․ Some tests‚ like the Praxis Core‚ have a score range of 100 to 200‚ while others‚ such as subject-specific exams‚ may range from 100 to 300․ Essays and performance tasks are scored by trained evaluators based on rubrics․ Understanding the scoring system is crucial for setting goals and interpreting results․ Free resources like the ETS Study Companion provide detailed scoring guides‚ helping candidates understand how their performance translates to final scores․ This knowledge is essential for effective test preparation and strategic studying․ Proper preparation ensures candidates can achieve scores that meet or exceed requirements․

Free Praxis Study Resources

Explore free tools like the ETS Study Companion‚ Khan Academy prep‚ and Teachers Test Prep guides to access practice tests‚ study materials‚ and online courses for effective preparation․

3․1 ETS Study Companion

The ETS Study Companion is a free‚ downloadable PDF resource designed to help candidates prepare for their Praxis tests․ It provides an overview of test content‚ sample questions‚ and scoring information․ This guide is tailored to specific Praxis exams‚ such as the Core Academic Skills for Educators tests in Reading‚ Writing‚ and Mathematics․ The companion is a valuable tool for understanding the format and structure of the Praxis tests‚ allowing test-takers to familiarize themselves with the types of questions and content they will encounter․ By reviewing the Study Companion‚ candidates can identify areas where they may need additional preparation and focus their study efforts effectively․ It is available for free on the ETS website‚ making it an essential resource for all Praxis test preparation․

3․2 Khan Academy Official Praxis Core Prep

Khan Academy offers a free‚ official Praxis Core Prep program designed to help candidates excel on the Praxis Core exams․ This resource provides access to practice questions‚ video tutorials‚ and personalized progress tracking; It covers the essential skills in Reading‚ Writing‚ and Mathematics‚ aligning closely with the actual test content․ The platform is user-friendly‚ allowing test-takers to identify and address weaknesses effectively․ Since it’s free‚ it’s accessible to everyone‚ making it an ideal starting point for Praxis preparation․ The combination of interactive lessons and practice exercises ensures a comprehensive understanding of the material‚ helping candidates build confidence and readiness for the exam․

3․3 Free Practice Tests and Questions

Free practice tests and questions are essential tools for Praxis preparation‚ offering candidates the opportunity to familiarize themselves with the exam format and content․ These resources are available online and cover various subjects‚ including Praxis Core and specialty exams․ They often include timed sections‚ allowing test-takers to simulate real test conditions and improve time management skills․ Detailed answer explanations help identify areas for improvement‚ while progress tracking features enable users to monitor their advancement․ Accessible without cost‚ these practice tests are a valuable addition to any study plan‚ providing realistic practice and enhancing readiness for the actual Praxis exam experience․

3․4 Teachers Test Prep Praxis Study Guides

Teachers Test Prep offers a wide range of free Praxis study guides tailored to various exams‚ including Praxis Core and Content Knowledge Tests․ These guides are designed to provide a clear understanding of test content‚ format‚ and scoring․ They include comprehensive overviews‚ sample questions‚ and strategies to tackle challenging sections․ Additionally‚ the guides are regularly updated to reflect the latest test changes‚ ensuring accuracy and relevance․ By focusing on key subject areas and common pitfalls‚ these resources help candidates build confidence and competence․ Accessible online‚ they serve as a reliable and flexible tool for effective Praxis preparation‚ complementing other study materials and practice tests․

Utilizing Online Platforms

Leverage online platforms like Google Analytics Academy and Skillshop for free e-learning courses‚ interactive tools‚ and community support to enhance your Praxis study experience effectively․

4․1 Google Analytics Academy

Google Analytics Academy offers free e-learning courses designed by experts to help users master Google Analytics․ As part of Skillshop‚ it provides interactive modules‚ practical exercises‚ and certificates upon completion․ These resources are ideal for enhancing digital skills and understanding data-driven decision-making․ The platform is user-friendly‚ making it accessible for all skill levels․ By leveraging these courses‚ test-takers can improve their analytical and problem-solving abilities‚ which are essential for success in Praxis exams․ The academy’s comprehensive curriculum ensures a strong foundation in analytics‚ directly benefiting those preparing for education-related assessments․ This free resource aligns perfectly with the goal of utilizing online platforms effectively for Praxis study guide preparation․

4;2 Skillshop and E-Learning Courses

Skillshop‚ Google’s e-learning platform‚ offers a wide range of free courses to enhance digital skills․ These courses cover topics like Google Analytics‚ Ads‚ and other tools‚ providing practical knowledge․ For Praxis test preparation‚ these resources can improve problem-solving and analytical abilities․ Skillshop’s interactive modules and hands-on exercises make learning engaging․ Users can earn certificates upon completion‚ adding value to their resume․ These courses are designed to be self-paced‚ allowing learners to fit study sessions into their schedule․ By mastering these skills‚ test-takers can gain confidence in their ability to tackle technology-related questions and data interpretation tasks commonly found in Praxis exams․ Skillshop is a valuable addition to any study plan‚ offering free‚ high-quality education․

4․3 Online Forums and Communities

Online forums and communities are invaluable for connecting with fellow test-takers and educators․ Platforms like Google Analytics Academy and Skillshop offer free e-learning courses and resources to enhance your preparation․ These communities provide a space to share tips‚ ask questions‚ and collaborate on study strategies․ Many forums host experienced educators who offer insights and advice․ Additionally‚ these platforms often include free study guides‚ practice tests‚ and interactive tools to aid in your preparation․ Engaging with these communities can help you stay motivated and gain a deeper understanding of the Praxis test format․ They also serve as a hub for accessing the latest updates and resources‚ ensuring you’re well-prepared for your exam․ Online forums and communities are a great way to supplement your study plan and connect with others who are on a similar journey․

Subject-Specific Study Guides

Subject-specific guides offer tailored resources for Praxis Core subjects like Reading‚ Writing‚ and Mathematics‚ ensuring focused preparation and improved performance in each area․

5․1 Praxis Core: Reading

The Praxis Core Reading test assesses skills in understanding‚ analyzing‚ and evaluating written passages․ It includes longer texts across various genres and difficulty levels․ Free resources like the ETS Study Companion and Khan Academy provide targeted practice questions and strategies to improve comprehension and critical thinking․ These tools help candidates identify weaknesses and strengthen their reading proficiency․ Additionally‚ free practice tests offer realistic exam simulations‚ enabling test-takers to familiarize themselves with the format and timing․ By leveraging these resources‚ aspiring educators can build confidence and achieve their desired scores․ Effective preparation ensures readiness for the challenges of the Praxis Core Reading exam․

5․2 Praxis Core: Writing

The Praxis Core Writing test evaluates grammar‚ syntax‚ and essay-writing skills․ It includes multiple-choice questions and a timed essay․ Free resources like the ETS Study Companion and Khan Academy offer practice questions and tips to improve writing clarity and coherence․ Candidates can access free practice tests to refine their skills in identifying sentence errors and structuring essays effectively․ Additionally‚ Teachers Test Prep provides detailed study guides tailored to the Writing section․ By utilizing these tools‚ test-takers can strengthen their command of English conventions and develop strong persuasive writing techniques․ Effective preparation ensures confidence and proficiency in tackling the Praxis Core Writing exam successfully․

5․3 Praxis Core: Mathematics

The Praxis Core Mathematics test assesses foundational math skills‚ including number operations‚ algebra‚ and data analysis․ Free resources like the ETS Study Companion and Khan Academy provide detailed practice questions and video tutorials to enhance understanding․ Candidates can access free practice tests to refine their problem-solving abilities and time management․ The test emphasizes critical thinking and applying mathematical concepts to real-world scenarios; Utilizing free study guides from Teachers Test Prep can help identify areas of improvement․ By focusing on weak points and practicing consistently‚ test-takers can build confidence and achieve a strong score․ Effective preparation ensures mastery of the math concepts required for success on the Praxis Core exam․

5․4 Specialty Subjects and Content Knowledge

For specialty subjects like music‚ special education‚ or science‚ free Praxis study guides offer targeted content knowledge․ Resources such as the ETS Study Companion and Khan Academy provide detailed overviews of specific subjects‚ ensuring comprehensive preparation․ These guides often include interactive tools‚ such as video tutorials and practice questions‚ to reinforce learning․ Additionally‚ free practice tests help candidates assess their understanding of complex topics․ By focusing on subject-specific materials‚ test-takers can address gaps in their knowledge effectively; Leveraging these free resources enables candidates to master specialized content without additional costs‚ ensuring they are well-prepared for their Praxis exams in niche areas․

Effective Study Strategies

Effective study strategies include time management‚ active learning‚ and utilizing free resources efficiently to maximize preparation for the Praxis exams․

6․1 Time Management Tips

Effective time management is crucial for successful Praxis preparation․ Create a structured study schedule‚ allocating specific time slots for each subject and practice tests․ Prioritize weak areas and focus on consistent progress․ Use timers to simulate test conditions‚ enhancing stamina and concentration․ Regularly review mistakes to avoid repetition․ Break study sessions into manageable intervals to maintain focus and reduce burnout․ Utilize free online resources efficiently‚ ensuring optimal use of available study materials․ Stay organized‚ track progress‚ and adjust your plan as needed to stay on track․ By managing time wisely‚ you can cover all necessary topics and enter the exam with confidence․

6․2 Active Learning Techniques

Active learning involves engaging deeply with study materials to enhance understanding and retention․ Techniques include self-testing‚ teaching others‚ and interactive exercises․ Use free practice tests to identify weaknesses and refine skills․ Engage in study groups to discuss challenging topics and gain new insights․ Flashcards are great for memorizing key concepts and formulas․ Additionally‚ summarize study materials in your own words to reinforce learning․ Recording and reviewing study sessions can also improve comprehension․ By actively participating in the learning process‚ you can master the material more effectively and perform better on the Praxis test․ These strategies ensure you stay focused and motivated throughout your preparation journey․

6․3 Utilizing Free Resources Effectively

To maximize your preparation‚ use free resources strategically․ Start with the ETS Study Companion‚ which provides detailed overviews of test content and sample questions․ Supplement this with Khan Academy’s official Praxis Core Prep for interactive lessons and practice exercises․ Take advantage of free practice tests to assess your strengths and weaknesses․ Teachers Test Prep study guides offer in-depth explanations and tips tailored to specific exams․ Organize your study schedule to cover all topics systematically․ Combine these resources with active learning techniques‚ such as creating flashcards or teaching concepts to others․ Explore additional free tools like Google Analytics Academy for skill-specific knowledge․ By integrating these resources effectively‚ you can build a robust study plan without additional costs․ This approach ensures you are well-prepared for the Praxis test while staying within your budget․

Troubleshooting Common Issues

Common issues include technical glitches and interpreting results․ Ensure system compatibility‚ use official guides for clarity‚ and seek support from forums for unresolved problems effectively․

7․1 Technical Issues with Online Resources

Technical issues with online resources can hinder study progress․ Common problems include compatibility issues with study guides‚ slow loading times‚ and browser incompatibility․ Ensure your system meets requirements before accessing materials․ Clear browser cache and disable extensions that may block content․ For PDFs‚ verify Adobe Acrobat is updated․ If issues persist‚ contact support or use alternative devices․ Stable internet connectivity is crucial for streaming content․ Restart routers if connectivity drops․ For mobile apps‚ check app updates and device storage․ Troubleshoot by restarting devices or reinstalling apps․ Utilize forums for community solutions or ETS support for unresolved issues․ Technical glitches should not impede preparation; proactive troubleshooting ensures uninterrupted study sessions․

7․2 Understanding Test Results

Understanding your Praxis test results is crucial for improving your performance․ Scores are typically available online‚ providing a breakdown of performance in each section․ Review the scoring guide to interpret your results accurately․ Identify areas of strength and weakness to focus your study efforts․ If you score below the required threshold‚ analyze the content topics where you underperformed․ Use free resources like the ETS Study Companion or Khan Academy to address gaps in knowledge․ Retake the test only when you feel adequately prepared․ Understanding your results helps you create a targeted study plan‚ ensuring progress toward passing the exam․ Utilize the insights gained to refine your strategy and achieve success․

7․3 Addressing Weaknesses

Identifying and addressing weaknesses is essential for improving your Praxis test performance․ Review your test results to pinpoint areas where you struggled․ Use free resources like the ETS Study Companion or Khan Academy to target these gaps․ Focus on understanding the content and practicing specific question types․ For example‚ if math concepts are challenging‚ utilize the Praxis Core Mathematics study guide․ Teachers Test Prep also offers free study guides that cover key exam topics․ Regular practice with free online questions can help reinforce weak areas․ Retake practice tests to track progress and ensure improvement․ Addressing weaknesses systematically ensures you’re well-prepared for the actual test‚ boosting your confidence and chances of success․

Additional Resources

Explore fee waivers‚ study groups‚ and professional development opportunities to enhance your preparation․ Utilize free webinars‚ workshops‚ and online forums for additional support and guidance․

8․1 Fee Waivers and Financial Assistance

Fee waivers and financial assistance are available to eligible candidates‚ helping reduce the cost of Praxis tests․ These waivers cover test fees‚ making preparation more accessible․ Eligibility varies but often includes low-income individuals‚ military personnel‚ or those participating in federal programs․ Apply through ETS or state-specific initiatives․ Additional resources like scholarships or grants may also be available․ Check the official ETS website or consult with your state’s education department for details․ These programs aim to support candidates in achieving their teaching certification goals without financial strain․

8․2 Study Groups and Peer Support

Joining study groups and leveraging peer support can significantly enhance your Praxis preparation․ Online forums‚ social media groups‚ and local communities offer platforms to connect with fellow test-takers․ These groups provide shared resources‚ study tips‚ and mutual encouragement․ Engaging in collaborative learning can help clarify doubts and build confidence․ Additionally‚ many libraries and educational institutions organize free study sessions for Praxis candidates․ Participating in these sessions fosters a structured study environment and access to experienced mentors․ Peer support not only aids in understanding complex topics but also helps manage stress and stay motivated throughout the preparation journey․ Actively contributing to these groups ensures a more effective and enjoyable learning experience․

8․3 Professional Development Opportunities

Professional development opportunities are essential for educators preparing for the Praxis tests․ These include workshops‚ webinars‚ and online courses that enhance teaching skills and test readiness․ Many organizations offer free or low-cost resources‚ such as Google Analytics Academy and Skillshop‚ to improve knowledge in specific subjects․ Fee waivers and financial assistance programs are also available‚ making it easier for candidates to access study materials․ Additionally‚ joining professional networks and educational communities provides access to shared resources‚ expert advice‚ and peer support․ Engaging in these opportunities not only aids in passing the Praxis exams but also contributes to long-term career growth and effectiveness in the classroom․ These resources are designed to empower educators with the tools and confidence needed for success․

what is required of a manual water pump

A manual water pump is a device requiring manual operation to extract water from sources, essential for marine safety and emergency situations, ensuring reliable performance.

Definition and Purpose

A manual water pump is a hand-operated device designed to extract water from various sources, including surface water, groundwater, and reservoirs. Its primary purpose is to provide a reliable means of water extraction in scenarios where electricity is unavailable, such as marine environments, emergency situations, and remote areas. These pumps are essential for ensuring access to water in diverse applications.

Importance in Various Applications

Manual water pumps are essential in emergencies like floods or marine situations, serving as reliable backups to electric systems. In agriculture, they provide cost-effective irrigation without electricity. Camping and outdoor activities benefit from their portability for accessing water. Marine regulations require them for safety, ensuring vessels can bail water manually. They’re crucial in disaster relief for clean water access and in developing communities for sustainable water solutions. Firefighting utilizes them for drafting water without power sources. Their eco-friendly, quiet operation suits sensitive environments. With simple maintenance and long lifespan, they’re cost-effective. In education, they teach hydraulics and water extraction. Remote areas rely on them for drinking water. Recreation uses them for pools and hot tubs. Accessible to diverse users, they offer precise control in labs and industries. Historically vital, they’ve been cornerstone in infrastructure development. Overall, manual pumps are versatile, reliable, and indispensable in various contexts.

Design and Construction Requirements

Manual water pumps must be durable, with robust materials and precise mechanical components, ensuring reliable operation in emergencies and various environmental conditions while maintaining efficiency and longevity.

Materials and Durability

Manual water pumps must be constructed from durable, corrosion-resistant materials like stainless steel, brass, or high-quality plastics to withstand harsh environments and ensure long-term reliability. The components should be robust enough to handle frequent use and varying water conditions. Durable materials are essential for maintaining structural integrity and preventing wear and tear, ensuring the pump remains functional over time. This is critical for both marine and terrestrial applications.

Mechanical Components and Build Quality

A manual water pump requires robust mechanical components, including durable pistons, cylinders, and valves, to ensure efficient water extraction. The build quality must withstand frequent use and harsh environments. Materials like stainless steel or brass are preferred for their strength and corrosion resistance. Tight tolerances and smooth machining are crucial for optimal performance and minimal wear. A sturdy handle and lever system enhance ease of operation and reliability over time.

Performance Requirements

Manual water pumps must deliver consistent flow rates, handle required pressure, and ensure reliable operation across diverse applications for optimal performance and user satisfaction.

Flow Rate and Pressure Capacity

A manual water pump must deliver a sufficient flow rate to meet specific needs, ensuring efficient water extraction. Pressure capacity is critical, as it determines the pump’s ability to handle varying water sources and heights. Higher capacities are often required for larger boats or systems, while smaller applications may demand lower flow rates. Balancing these factors ensures reliable performance across diverse scenarios.

Efficiency and Reliability

A manual water pump must demonstrate high efficiency by converting manual effort into consistent water flow, minimizing energy waste. Reliability ensures durable performance across various conditions and water sources, maintaining functionality over time. A dependable pump handles regular use without faltering, crucial for emergencies and everyday tasks, ensuring consistent operation regardless of frequency or environment.

Regulatory Compliance

Manual water pumps must meet marine safety standards, vessel regulations, and environmental guidelines, ensuring compliance with legal requirements for operation and water discharge in various jurisdictions.

Marine and Safety Standards

Manual water pumps must comply with marine safety regulations, ensuring reliable operation in emergencies. Vessels between 9 and 12 meters require a manual pump on board. Pumps must meet capacity standards to handle water effectively. Materials should be durable, often metal or high-quality plastic, to withstand harsh conditions. Compliance ensures safety, preventing water accumulation and potential hazards. These standards guarantee pump performance and reliability in critical situations.

Environmental and Usage Regulations

Manual water pumps must comply with environmental standards to minimize ecological impact. They should be designed for eco-friendly operation, ensuring efficient water use and reducing waste. Regulations may restrict usage in protected areas to preserve water sources and prevent contamination. Proper disposal and recycling guidelines for pump materials are often mandated. Users must adhere to local water extraction laws and avoid damaging aquatic ecosystems during operation.

Functional Features

A manual water pump must offer ease of operation, portability, and compatibility with various hoses and fittings, ensuring efficient water extraction in emergency or remote situations.

Ease of Operation and Portability

A manual water pump must be lightweight and compact for easy transportation, ensuring simple handling in emergencies. Its design should allow quick setup and intuitive use with minimal effort, making it accessible for individuals of all strength levels. Portability is crucial, especially for marine applications, where space and weight constraints are significant. A durable yet lightweight construction ensures reliability without compromising ease of operation.

Compatibility with Water Sources

A manual water pump must be compatible with various water sources, including surface water, groundwater, and reservoirs. It should handle different water qualities and temperatures effectively. The pump’s design must prevent debris and particulates from affecting performance, often requiring a filter on the intake. Compatibility ensures reliable operation across diverse environments, making it suitable for marine, emergency, and outdoor applications. Proper design guarantees efficient water extraction from multiple sources without compromising functionality or longevity.

Maintenance and Longevity

Regular lubrication of moving parts and periodic inspection of seals and pistons are essential to ensure the longevity and efficient operation of manual water pumps.

Regular Inspection and Servicing

Regular inspection ensures optimal performance and longevity. Check for corrosion, wear, and damage. Lubricate moving parts and replace worn seals or gaskets. Inspect hoses and connections for leaks. Clean or replace filters to maintain flow efficiency. Service frequency depends on usage, but monthly checks are recommended. Addressing issues early prevents breakdowns and ensures reliable operation during emergencies. Proper servicing extends the pump’s lifespan and maintains its effectiveness in critical situations.

Corrosion Resistance and Lifespan

Manual water pumps must be constructed from materials resistant to corrosion, such as stainless steel or durable plastics, to ensure longevity in harsh environments. Regular maintenance, including inspection and cleaning, is crucial to prevent rust and extend the pump’s lifespan. Proper storage and protection from extreme temperatures also contribute to maintaining its operational efficiency over time, ensuring reliable performance for years.

Selection Criteria

Selecting a manual water pump requires considering flow rate, pressure capacity, durability, and application suitability to ensure it meets specific needs and regulatory standards effectively.

Suitable Applications and Capacities

Manual water pumps are ideal for marine environments, emergency water extraction, and irrigation. They must meet vessel size requirements, with larger boats needing higher-capacity pumps. Materials like metal ensure durability, while efficiency is crucial for consistent performance. Correct sizing ensures effective water handling, adhering to safety standards and environmental regulations. Proper capacity selection maximizes functionality across various applications, ensuring reliability in critical situations.

Cost and Value for Money

A manual water pump should offer cost-effectiveness and long-term value. Durability and low maintenance costs are key, ensuring the pump remains functional without excessive expenses. While initial prices vary, reliable models provide a strong return on investment, especially for marine and emergency applications. Balancing affordability with quality ensures the pump meets safety and performance standards without financial strain, making it a practical choice for essential water management needs.

Safety Considerations

Manual water pumps must include overuse protection, emergency readiness features, and redundancy to ensure reliable operation, meeting marine safety standards for efficient water extraction in critical situations.

Protection Against Overuse or Damage

Manual water pumps must include features to prevent overuse and damage, such as pressure relief valves and durable materials. These mechanisms ensure safe operation and extend lifespan by avoiding excessive wear. Proper usage guidelines and protective components are essential to maintain functionality and reliability in various applications.

Emergency Readiness and Redundancy

Manual water pumps must be reliable in emergencies, ensuring quick water removal to prevent flooding. Redundancy features, like fail-safes, are crucial for uninterrupted operation. They should meet marine safety standards, with durable materials to withstand harsh conditions. Easy accessibility and rapid deployment are vital for emergency response, ensuring user safety and minimizing damage. Regular maintenance is essential to guarantee readiness in critical situations.

  • Fail-safe mechanisms to prevent system failure during emergencies.
  • Quick operation to address urgent water removal needs.
  • Compliance with marine regulations for reliable performance in crises.

Common Types of Manual Water Pumps

  • Diaphragm pumps offer durability and ease of use in various water sources.
  • Hand-operated piston pumps provide efficient, simple operation for water extraction.

Diaphragm Pumps

Diaphragm pumps are popular for their durability and resistance to contamination, making them ideal for marine applications. They operate by compressing and decompressing a flexible diaphragm, creating suction and discharge strokes. Their simple design with few moving parts ensures reliability and minimal maintenance. Suitable for various water sources, they are easy to operate, making them a practical choice for emergency and remote use.

Hand Operated Piston Pumps

Hand-operated piston pumps are reliable manual water pumps requiring minimal effort for operation. They feature a durable construction, often made of metal, ensuring long-term efficiency. These pumps are designed to handle various water sources and are commonly used in marine applications, adhering to safety regulations. They must meet specific capacity and construction standards to ensure effective water extraction, making them ideal for emergency preparedness and consistent performance in challenging environments.

Integration with Systems

A manual water pump must integrate seamlessly with hoses, fittings, and storage solutions, ensuring compatibility and efficient operation within larger water management and safety systems.

Compatibility with Hoses and Fittings

Manual water pumps must be compatible with various hoses and fittings to ensure efficient water transfer. Standardized connections are crucial for marine applications, where pumps often integrate with existing systems. Compatibility ensures secure attachments, preventing leaks and maintaining performance. Materials and sizes should align with industry standards to facilitate easy installation and reliability in diverse environments, including boats and emergency setups.

Storage and Mounting Solutions

Manual water pumps require secure storage to prevent damage and ensure accessibility. Mounting solutions should withstand harsh environments, with durable materials like metal or high-quality plastic. Proper fixation prevents movement during operation, especially in marine applications. Storage compartments or brackets can protect the pump, while drain hoses and valves ensure efficient water discharge. Compliance with safety standards guarantees reliable performance in emergency situations.

Troubleshooting and Repair

Identifying Common Issues

Manual water pumps require regular inspection for corrosion, proper lubrication, and clearing blockages to ensure efficient operation and longevity, adhering to safety and environmental standards.

Common issues with manual water pumps include corrosion, worn seals, and blockages. Regular inspection helps detect leaks, reduced flow rates, orDifficulty in operation. Check for damaged handles, misaligned components, or clogged valves. Ensure proper maintenance to prevent these problems and extend lifespan. Addressing issues early ensures reliable performance and safety, especially in marine applications where failure can lead to water accumulation and safety risks. Always follow manufacturer guidelines for troubleshooting and repairs.

Simple Repairs and Maintenance

Regular inspection and servicing are crucial for maintaining efficiency. Clean or replace filters, oil moving parts, and check for worn seals or gaskets. Tighten loose connections and ensure all components are secure. Store the pump in a dry place to prevent corrosion. Addressing issues promptly extends lifespan and reliability, ensuring optimal performance in emergencies or daily use.

Environmental Impact

Manual water pumps require eco-friendly designs and efficient energy use to minimize environmental impact. They must comply with environmental standards to ensure sustainability and reduce the ecological footprint.

Eco-Friendly Design and Efficiency

Manual water pumps should be designed with eco-friendly materials and energy-efficient mechanisms to minimize environmental impact. Sustainable construction ensures durability while reducing resource consumption. Efficient designs optimize water extraction with minimal effort, conserving energy and water. Eco-conscious pumps align with environmental standards, promoting responsible water usage and longevity, making them a reliable choice for various applications.

Compliance with Environmental Standards

Manual water pumps must meet strict environmental regulations to minimize ecological impact. They should use eco-friendly materials, prevent water contamination, and ensure energy efficiency. Compliance with ISO standards for water quality and waste reduction is essential. Additionally, pumps should be designed for recyclability and low emissions, aligning with global sustainability goals while maintaining reliable performance for diverse applications.

Manual water pumps are essential for marine safety and emergency water extraction, requiring durability, efficiency, and compliance with safety standards to ensure reliable performance in critical situations.

A manual water pump must meet specific criteria, including adequate capacity for the vessel size, durability to withstand harsh environments, and reliability in emergencies. It should be constructed from corrosion-resistant materials, ensuring longevity and performance. The pump must operate efficiently, removing water quickly and safely. Compliance with marine safety standards is essential, and it should be easy to maintain and repair. Proper sizing and construction ensure it meets regulatory requirements for boats and emergency situations.

Final Thoughts on Manual Water Pumps

Manual water pumps are indispensable tools for water extraction, offering reliability and durability in various applications; Their simplicity ensures functionality without electricity, making them vital for marine safety and emergencies. Proper selection, maintenance, and compliance with regulations are crucial for optimal performance. Eco-friendly designs and cost-effectiveness further enhance their value, ensuring they remain essential for both practical and environmental needs in diverse settings.

cuisinart pro custom 11 manual

Welcome to the Cuisinart Pro Custom 11 manual, your essential guide to mastering this versatile food processor. This 49-page manual provides detailed instructions, safety tips, and troubleshooting solutions to ensure optimal performance and longevity of your appliance. Whether you’re a culinary novice or an experienced chef, this resource will help you unlock the full potential of your Cuisinart Pro Custom 11.

Overview of the Cuisinart Pro Custom 11 Food Processor

The Cuisinart Pro Custom 11 Food Processor, model DLC-8S, is a versatile kitchen appliance designed for chopping, slicing, shredding, and mixing. With its 11-cup (2.6 L) work bowl, it offers ample capacity for large recipes. The processor includes a metal blade for chopping and a dough blade for mixing. Accessories like the work bowl cover with feed tube ensure efficient food processing. Built with durable materials, it features a compact design and easy-to-use controls. The BPA-free components ensure safety and longevity. This appliance is ideal for both home cooks and professional chefs, providing reliable performance for various culinary tasks. Its sleek design and robust construction make it a valuable addition to any kitchen.

Importance of Reading the Manual

Reading the Cuisinart Pro Custom 11 manual is essential for safe and effective use of your food processor. It provides critical information on handling sharp blades, assembly, and operation. The manual outlines safety precautions to avoid accidents and ensures proper setup. Understanding the instructions helps you master basic functions and advanced features, optimizing performance. Troubleshooting tips and warranty details are also included, saving time and frustration. By following the manual, you can maximize the appliance’s potential, enhance your cooking experience, and maintain its longevity. Familiarizing yourself with the guide ensures you get the most out of your investment while staying safe in the kitchen.

Key Features of the Cuisinart Pro Custom 11

The Cuisinart Pro Custom 11 features an 11-cup work bowl, multiple interchangeable blades, and a powerful motor for versatile food processing. Designed for precision, it includes a dough blade, slicing disc, and shredding disc, making it ideal for various culinary tasks. The compact design and easy-to-use controls enhance user convenience, while the durable construction ensures long-lasting performance. This model is perfect for home cooks and professional chefs alike, offering unparalleled versatility in food preparation.

Design and Build Quality

The Cuisinart Pro Custom 11 boasts a robust and durable design, crafted with high-quality materials for long-lasting performance. Its sturdy base ensures stability during operation, while the BPA-free work bowl and components prioritize safety and hygiene. The compact design saves kitchen space without compromising functionality.

The construction emphasizes user-friendly engineering, with ergonomic controls and a lightweight yet solid build. The food processor is built to withstand rigorous use, making it a reliable addition to any kitchen. Its sleek and modern aesthetic complements various kitchen styles, ensuring both functionality and visual appeal.

11-Cup Capacity and Work Bowl

The Cuisinart Pro Custom 11 features an 11-cup (2.6L) work bowl, ideal for preparing large batches of ingredients. Its spacious design allows for efficient processing of meats, vegetables, and dough. The work bowl is made from durable, BPA-free material, ensuring safety and longevity.

The included work bowl cover with a feed tube simplifies adding ingredients during operation. The compact cover fits securely, preventing spills and messes. This generous capacity makes the Pro Custom 11 perfect for families or those who enjoy preparing meals in bulk. The bowl’s design also aids in even chopping and mixing, enhancing overall performance.

Included Accessories and Parts

Included Accessories and Parts

The Cuisinart Pro Custom 11 comes with a comprehensive set of accessories designed to enhance functionality. These include the 11-cup work bowl, a work bowl cover with a feed tube, and interchangeable blades for various tasks. The metal blade excels at chopping, slicing, and pureeing, while the dough blade is perfect for kneading bread or pizza dough. Additional accessories may vary by model but often include a compact cover for smaller batches and a spatula for easy food transfer. These parts are dishwasher-safe, making cleanup convenient; The included components ensure versatility, allowing users to tackle a wide range of culinary tasks with ease and precision.

Safety Precautions and Guidelines

Always read instructions carefully before use. Handle sharp blades and components with caution. Unplug the unit when not in use or during assembly to prevent accidents.

Handling Sharp Blades and Components

Exercise extreme caution when handling sharp blades and components of the Cuisinart Pro Custom 11. The main blade, dough blade, and slicing disc are designed for precision cutting and can cause serious injury if mishandled. Always handle blades with a firm grip, avoiding direct contact with the cutting edges. Use the provided plastic blade holder or a sturdy cloth to prevent accidents. Store blades separately from other parts in a secure, out-of-reach location. Never leave sharp components exposed or within children’s reach. Improper handling can lead to injuries and damage to the appliance.

Assembly and Setup Instructions

Operating the Cuisinart Pro Custom 11

Mastering your Cuisinart Pro Custom 11 begins with understanding its intuitive controls and versatile functions. Start by familiarizing yourself with the machine’s components and settings to ensure smooth operation.

Getting Started with the Food Processor

Before using your Cuisinart Pro Custom 11, read the manual carefully to understand its features and safety guidelines. Begin by assembling the appliance, ensuring the work bowl, blade, and cover are securely in place. Handle sharp components with care to avoid injury. Place the food processor on a stable, flat surface and plug it into a nearby outlet. Familiarize yourself with the controls, including the on/off switch and pulse function. Start with simple tasks, such as chopping vegetables, to get comfortable with its operation. Always ensure the lid is securely locked before processing. This initial setup will help you use the appliance safely and effectively.

Basic Functions and Controls

The Cuisinart Pro Custom 11 features intuitive controls designed for ease of use. The On/Off switch allows you to start and stop processing, while the Pulse function provides precise control for chopping or grinding ingredients. The safety interlock ensures the processor operates only when the work bowl and lid are securely locked in place. Familiarize yourself with the touchpad controls for seamless operation. Use the basic functions for chopping, slicing, shredding, and mixing. Always refer to the manual for guidance on selecting the right blade for your task. Proper use of these controls ensures efficient and safe food processing, making your cooking tasks easier and more enjoyable.

Advanced Features for Versatile Use

The Cuisinart Pro Custom 11 boasts advanced features that elevate your cooking experience. The detachable stainless steel blades, including the metal blade and dough blade, handle tasks like chopping, mixing, and kneading dough with ease. The shredding disc allows for consistent results when processing vegetables or cheeses. The adjustable slicing disc offers precise control over thickness, ensuring uniform slices every time. These features, combined with the 11-cup capacity, make the processor ideal for large batches and intricate recipes. Explore the full range of functions to discover how this appliance can adapt to your culinary needs, from baking to meal prep, making it a must-have for both novice and experienced chefs.

Maintenance and Care

Regularly clean the work bowl, blades, and accessories with warm soapy water. Dry thoroughly to prevent rust. Store components in a dry place to maintain performance and longevity.

Cleaning the Work Bowl and Accessories

Cleaning the Cuisinart Pro Custom 11 is essential for maintaining hygiene and functionality. Wash the work bowl, lid, and accessories in warm, soapy water. Use a soft sponge to avoid scratches. For tough residue, soak parts in warm water before scrubbing. Dry thoroughly to prevent water spots and rust. Regular cleaning ensures optimal performance and longevity of your appliance. Avoid using abrasive cleaners or bleach, as they may damage the finish. Always rinse thoroughly to remove any soap residue before storing. Proper care will keep your food processor in excellent condition for years of reliable use.

Proper Storage and Organization

Proper storage and organization are crucial for maintaining the Cuisinart Pro Custom 11. Store the food processor on a stable surface, away from direct sunlight and moisture. Keep the work bowl, blades, and accessories in a dry place to prevent rust. Use the original packaging or a protective cover to shield the appliance from dust. Organize accessories like blades and discs in a designated container to avoid misplacement. Regularly inspect stored parts for signs of wear or damage. By following these guidelines, you ensure your Cuisinart Pro Custom 11 remains in excellent condition and ready for use whenever needed.

Troubleshooting Common Issues

This section addresses common issues with the Cuisinart Pro Custom 11, such as blade malfunctions or motor performance problems, providing practical solutions to ensure smooth operation and extend the appliance’s lifespan.

Resolving Blade Malfunctions

Blade malfunctions are common issues with the Cuisinart Pro Custom 11. If the blade does not spin, ensure it is properly installed and aligned. Dull blades can also cause poor performance. Check for food residue or damage and clean or replace the blade as needed. For optimal results, use the appropriate blade for your task. Always handle sharp components with care to avoid injury. If issues persist, consult the manual or contact Cuisinart support for assistance. Regular maintenance and proper storage can prevent blade-related problems and extend the lifespan of your food processor.

Addressing Motor and Performance Problems

If the motor of your Cuisinart Pro Custom 11 is not functioning properly, start by ensuring the work bowl and lid are correctly aligned and locked. Overloading the processor can trigger the overload protection feature, causing the motor to stop. In such cases, unplug the unit and allow it to cool down before resuming use; Regularly check for worn-out motor brushes and consider replacing them if necessary. Consult the manual’s troubleshooting section for specific guidance. If issues persist, contact Cuisinart support for professional assistance. Proper maintenance and adherence to guidelines can help maintain optimal motor performance and extend the appliance’s lifespan.

Accessories and Replacement Parts

The Cuisinart Pro Custom 11 includes an 11-cup work bowl, cover, metal blade, dough blade, and compact cover. For replacements, refer to the manual or visit the official Cuisinart website.

Optional Accessories for Enhanced Functionality

Enhance your Cuisinart Pro Custom 11 experience with optional accessories designed to expand its capabilities. These include additional blades like the slicing disc or shredding disc, perfect for precise vegetable slicing or cheese shredding. A dicing kit is also available for uniform dicing of ingredients, while a julienne disc adds versatility for creating strips. These accessories are compatible with the DLC-8S series and can be purchased separately to suit your culinary needs. For optimal performance, ensure all accessories are Cuisinart-approved to maintain warranty coverage and safety standards. Visit the official Cuisinart website or authorized retailers to explore these optional enhancements.

Where to Find Replacement Parts

To find replacement parts for your Cuisinart Pro Custom 11, start by consulting the manual for specific guidance. Visit the official Cuisinart website, which offers a support section with detailed information on obtaining genuine parts. Authorized retailers listed on their site ensure compatibility and safety. Online marketplaces like Amazon or eBay may also have these parts, but choose sellers with good reviews to avoid counterfeit items. Contacting Cuisinart’s customer service directly can provide reliable assistance. Additionally, exploring community forums or social media groups can offer user recommendations. Follow these steps to efficiently locate and acquire the necessary replacement parts for your food processor.

Warranty Information

The Cuisinart Pro Custom 11 comes with a limited warranty covering defects in materials and workmanship for a specified period, as detailed in the manual.

Understanding the Warranty Coverage

The Cuisinart Pro Custom 11 warranty ensures your food processor is protected against defects in materials and workmanship. Coverage typically lasts for a specified period, as outlined in the manual. Key aspects include:

  • Coverage for repairs or replacements due to manufacturing defects.
  • Exclusions for improper use, accidental damage, or normal wear and tear.
  • Registration may be required to activate or maintain warranty benefits.

Review the warranty section in your manual for precise terms and conditions to ensure you understand what is covered and how to file a claim if needed.

Registering Your Product

Registering your Cuisinart Pro Custom 11 is a simple process that ensures warranty validation and access to exclusive customer support. Visit the official Cuisinart website and navigate to the product registration section. Provide the required details, including your contact information and product serial number, which can be found in your manual or on the appliance. Registration helps Cuisinart keep you informed about updates, promotions, and maintenance tips. It also streamlines the process if you ever need to file a warranty claim. Make sure to complete this step shortly after purchase to enjoy seamless support for your food processor.

Final Tips for Optimal Use

To maximize your Cuisinart Pro Custom 11’s performance, always read the manual thoroughly before use. Handle sharp blades with care and ensure all parts are securely assembled. Regularly clean the work bowl and accessories to maintain hygiene and functionality. Store components neatly to prevent damage. For best results, use the correct blade for each task and follow the recommended capacities. Experiment with recipes to explore the appliance’s versatility. Refer to troubleshooting guides for any issues and register your product for warranty benefits. By following these tips, you’ll enjoy efficient and safe operation of your food processor for years to come.

Resources for Further Assistance

For additional support, refer to the official Cuisinart Pro Custom 11 manual, available as a free PDF download. This comprehensive guide covers troubleshooting, maintenance, and advanced features. Visit Cuisinart’s official website for warranty details, replacement parts, and customer support. You can also explore online forums and recipe communities for tips and creative ideas. If you encounter issues, the troubleshooting section in the manual offers solutions for common problems. Register your product to access exclusive benefits and ensure your appliance is covered under warranty. For further inquiries, contact Cuisinart’s customer service or consult authorized retailers for professional advice. These resources ensure you make the most of your food processor experience.