e36 auto to manual swap

The E36 auto-to-manual swap is a popular modification for BMW enthusiasts, offering improved performance and driver engagement․ This guide provides a detailed, step-by-step approach to converting your E36 from automatic to manual transmission, covering key considerations and essential steps for a successful swap․

1․1 Overview of the E36 Platform

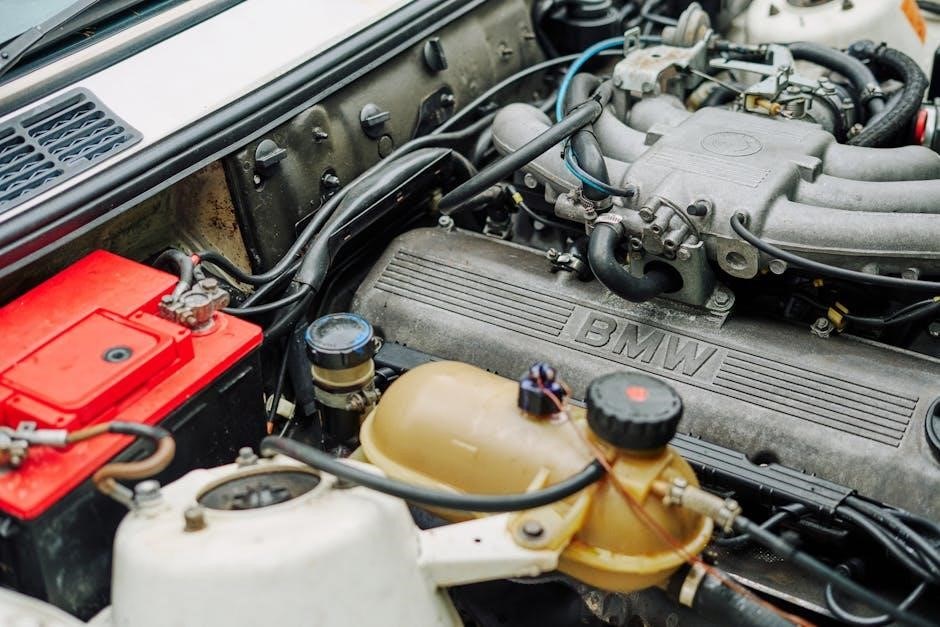
The BMW E36 platform, produced from 1990 to 2000, is a rear-wheel-drive compact executive car available in sedan, coupe, convertible, and wagon body styles․ Known for its balanced handling and performance, the E36 features a robust chassis and inline engines ranging from 4-cylinder to 6-cylinder configurations․ Its popularity among enthusiasts stems from its drivability, durability, and extensive aftermarket support, making it an ideal candidate for modifications like the auto-to-manual transmission swap․

1․2 Why Convert from Automatic to Manual?

Converting from automatic to manual transmission in the E36 enhances driver engagement, offering precise control over gear shifts and a more immersive driving experience․ Manual transmissions are lighter, more fuel-efficient, and cost-effective in maintenance compared to automatics․ Additionally, they provide better acceleration and performance, making the swap appealing to enthusiasts seeking to maximize their car’s potential while saving on long-term costs․ This modification is particularly popular among those who value driving dynamics and connection to the vehicle․

1․3 Brief History of the E36 and Its Transmission Options

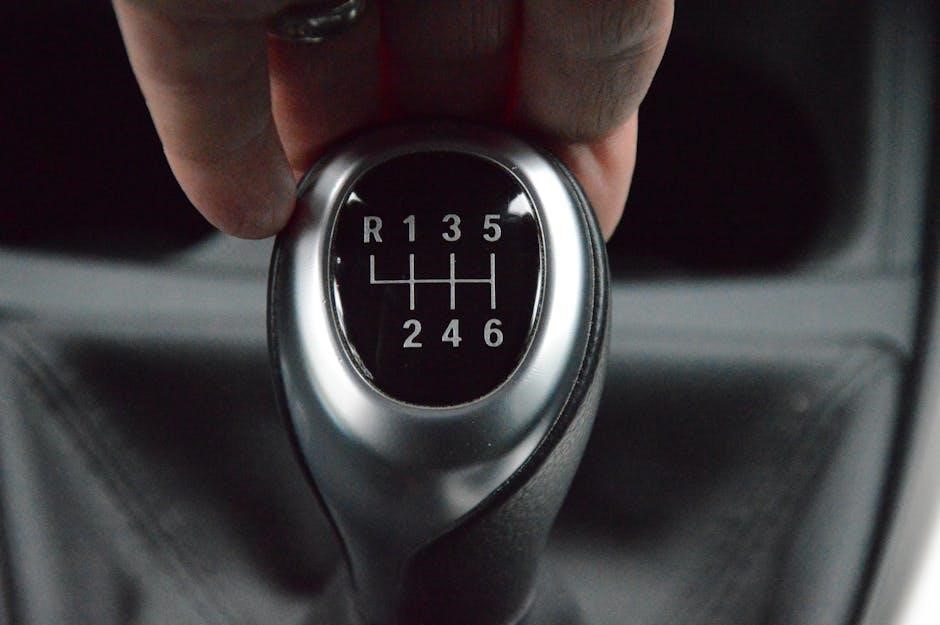
The BMW E36, produced from 1990 to 2000, is a compact executive car available in sedan, coupe, convertible, and wagon body styles․ It featured a range of inline-4 and inline-6 engines, with both manual and automatic transmission options․ The manual transmissions, particularly the ZF 5-speed in later models, were praised for their performance and driver engagement, making them a preferred choice among enthusiasts․ This popularity has driven the trend of swapping automatic to manual transmissions in the E36 chassis․

Benefits of Converting to Manual Transmission

Converting to a manual transmission enhances driver engagement, improves fuel efficiency, and reduces maintenance costs․ It also boosts performance and provides better control over the vehicle’s acceleration and handling․

2․1 Improved Driver Engagement and Control

Switching from automatic to manual transmission in an E36 significantly enhances driver engagement․ Manual gear shifts provide a more immersive driving experience, allowing drivers to fully connect with the vehicle․ By controlling gear changes, motorists can optimize acceleration and deceleration, improving overall handling and responsiveness․ This direct connection fosters a deeper sense of control and satisfaction, making every drive feel more dynamic and rewarding, especially on winding roads or during spirited driving sessions․

2․2 Better Fuel Efficiency

Converting an E36 from automatic to manual often results in improved fuel efficiency․ Manual transmissions typically consume less fuel than automatics due to reduced parasitic losses from the torque converter․ Drivers can optimize gear shifts to match driving conditions, further enhancing mileage․ This makes manual swaps a practical choice for those seeking to lower fuel costs while maintaining performance․ The direct connection between engine and wheels also reduces energy waste, contributing to better overall efficiency, especially in city driving scenarios․

2․3 Cost Savings on Maintenance and Repairs

Switching from automatic to manual transmission in an E36 can lead to significant long-term cost savings․ Manual transmissions generally require less complex and costly repairs compared to automatics, which have more components prone to failure․ With fewer parts like torque converters and solenoids, maintenance becomes simpler and more affordable․ Additionally, manual transmissions often have a longer lifespan, reducing the need for frequent replacements and repairs, making the swap a financially prudent decision for owners seeking reduced ownership costs over time․

2․4 Enhanced Performance and Acceleration

The E36 auto-to-manual swap significantly enhances performance and acceleration by eliminating the torque converter, which can create lag in automatic transmissions․ Manual transmissions allow for quicker shifting and better control over gear ratios, enabling more responsive throttle input and improved acceleration․ This direct connection between the engine and wheels maximizes power delivery, making the car feel more agile and lively, especially during spirited driving or when merging onto highways․ The result is a more engaging and performance-oriented driving experience․

Importance of Proper Planning and Preparation

Proper planning ensures a smooth E36 auto-to-manual swap․ Gather tools, secure a suitable workspace, and budget for parts and labor to avoid unexpected delays or costs․

3․1 Tools and Equipment Required

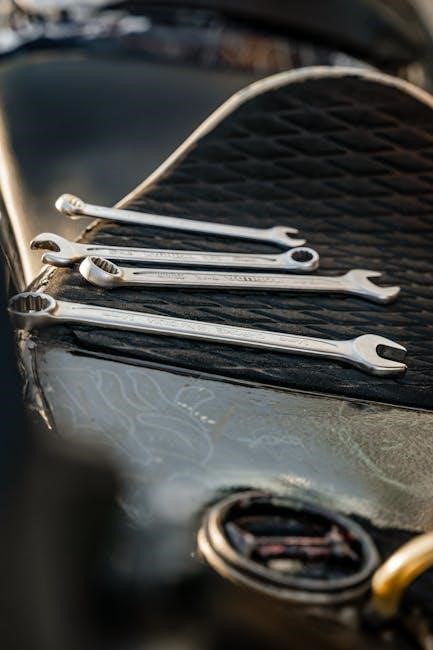
To successfully perform an E36 auto-to-manual swap, you’ll need essential tools like wrenches, sockets, and a jack stand․ Specialized equipment such as a transmission jack and clutch alignment tool are also necessary․ Ensure you have a clean, well-lit workspace and consider safety gear like gloves and safety glasses․ Having all tools and equipment ready beforehand will streamline the process and minimize potential setbacks during the swap․

3․2 Workspace and Safety Considerations

A clean, well-lit workspace is crucial for an E36 auto-to-manual swap․ Ensure the vehicle is securely lifted using jack stands and stabilized to prevent accidents․ Proper ventilation is essential, especially when working with electrical components․ Keep a fire extinguisher nearby and avoid wearing loose clothing that could get caught in tools․ Safety glasses and gloves are recommended to protect against debris and injuries․ A well-prepared workspace reduces risks and ensures a smoother swap process․

3․3 Budgeting for the Swap

Budgeting for an E36 auto-to-manual swap requires careful planning to avoid financial surprises․ Key costs include the manual transmission, clutch system, driveshaft, and pedals․ Additional expenses may arise from specialized tools and potential labor costs if professional help is needed․ Researching part prices and considering used components can help reduce costs․ Allocate extra funds for unexpected expenses, such as wiring or ECU modifications, to ensure the swap stays within budget and runs smoothly from start to finish․

3․4 Research and Gather Necessary Resources

Thorough research is crucial for a successful E36 auto-to-manual swap․ Gather detailed guides, videos, and forums to understand the process․ Identify compatible parts, such as the transmission, clutch, and pedals, ensuring they fit your specific model․ Collect tools like transmission jacks and socket sets․ Consult experts or online communities to address potential challenges․ Organize all resources beforehand to streamline the swap and minimize delays, ensuring a well-prepared and efficient conversion process from start to finish․

Step-by-Step Guide to the E36 Auto to Manual Swap

This section outlines the detailed process of converting an E36 from automatic to manual, including transmission removal, manual gearbox installation, and clutch system integration for a smooth transition․

4․1 Removing the Automatic Transmission

Removing the automatic transmission involves draining the fluid, disconnecting the torque converter, and detaching electrical connectors․ Support the transmission with a jack, remove the crossmember, and slide it out carefully․ Ensure all components like cooling lines and linkages are disconnected before extraction․ Proper lifting equipment is essential for safety and ease of removal․ This step requires patience and attention to detail to avoid damage to surrounding systems․

4․2 Acquiring and Preparing the Manual Transmission

Sourcing a compatible manual transmission, such as the ZF 5-speed from an M3, is essential․ Ensure the unit is in good condition or refurbished․ Inspect for wear and damage, replacing seals and bearings if necessary․ Install a new clutch and flywheel to match the manual setup․ Verify driveshaft compatibility and prepare the transmission for installation by attaching the correct mounts and linkages․ Proper preparation ensures a smooth installation process and optimal performance post-swap․

4․3 Installing the Manual Transmission

With the automatic transmission removed, carefully lower the manual transmission into place using a jack or lift․ Ensure proper alignment with the engine and chassis mounts․ Secure the transmission using the correct bolts and torque specifications․ Reconnect the driveshaft, clutch system, and gear linkages․ Double-check all connections for tightness and alignment․ Test the transmission’s movement by shifting through gears manually before refitting any panels or components․ Proper installation ensures smooth operation and prevents future mechanical issues․

4․4 Integrating the Clutch System

Integrating the clutch system is crucial for completing the auto-to-manual swap․ Install the

Wiring and ECU Modifications

Wiring and ECU modifications are essential for the auto-to-manual swap, ensuring proper communication between the engine and transmission․ Reprogramming the ECU and retrofitting necessary sensors and wiring are required․

5․1 Understanding the ECU and Its Role

The Engine Control Unit (ECU) plays a critical role in managing the vehicle’s systems, including transmission operation․ When converting from automatic to manual, the ECU must recognize the manual transmission configuration to ensure proper engine performance and synchronization with the clutch and gearbox․ The ECU’s role involves adjusting throttle response, gearshift points, and torque delivery, making it essential to reprogram or update the ECU software for a seamless transition to a manual setup․

5․2 Reprogramming the ECU for Manual Transmission

Reprogramming the ECU is essential to ensure compatibility with the manual transmission․ Using tools like DIS or similar software, the ECU must be updated to recognize the manual configuration․ This process involves recalibrating transmission controls, adjusting throttle response, and enabling proper clutch and gearbox communication․ Without this step, the vehicle may experience performance issues or fail to operate correctly․ Proper ECU reprogramming ensures smooth operation and optimal performance after the swap․

5․3 Retrofitting Necessary Wiring and Sensors

Retrofitting wiring and sensors is critical for manual transmission functionality․ This includes installing a reverse light switch, clutch position sensor, and potentially a neutral safety switch․ These components ensure proper communication between the transmission and ECU․ Additional wiring may be required for clutch pedal integration and gear position indicators․ Specialized tools, such as a wiring diagram and soldering equipment, are essential for a seamless and safe installation․ Proper wiring ensures the vehicle operates smoothly post-conversion․

Pedals and Linkages

Installing manual transmission pedals and linkages is essential for clutch operation․ This involves fitting the clutch master and slave cylinders, ensuring proper alignment and function for smooth shifting․

6․1 Installing the Manual Transmission Pedals

Installing manual pedals involves replacing the automatic brake pedal with a clutch and brake pedal assembly․ This requires careful disassembly of the driver-side area, ensuring proper alignment and secure mounting․ The clutch pedal must be connected to the master cylinder, and the throttle pedal adjusted for optimal driver comfort and functionality․ Proper installation ensures smooth clutch engagement and seamless shifting during driving․

6․2 Adjusting the Clutch Linkage

Adjusting the clutch linkage is critical for proper clutch engagement․ Ensure the linkage is properly aligned and connected to the clutch master cylinder․ Tighten all bolts and adjust the tension to eliminate any play․ Incorrect adjustment can lead to poor clutch engagement or failure to disengage fully․ Test the pedal feel and clutch operation after installation to confirm smooth, precise shifting․ Proper adjustment ensures reliable performance and longevity of the clutch system․

6․3 Ensuring Proper Pedal Alignment and Function

Proper pedal alignment and function are essential for smooth clutch and accelerator operation․ After installing the manual pedals, ensure they are securely mounted and aligned with the firewall․ Test the pedal travel and operation to confirm there is no binding or excessive play․ Misaligned pedals can lead to uneven clutch engagement or unsafe driving conditions․ Verify the clutch pedal switches and sensors are properly connected for accurate function․ Correct alignment ensures optimal performance and driver safety․

Cost Considerations and Budgeting

Budgeting for an E36 auto-to-manual swap includes transmission, clutch, and pedal costs, with labor fees varying based on DIY or professional installation․ Plan for parts, tools, and potential hidden expenses to avoid financial surprises․

7․1 Parts and Components Costs

The E36 auto-to-manual swap requires several key components, each contributing to the overall cost․ A compatible manual transmission, such as the ZF 5-speed from the M3, is essential․ Additionally, a new clutch and flywheel must be purchased since the automatic transmission does not include these parts․ The master and slave cylinders need to be upgraded to manual-specific units․ A suitable driveshaft may also be necessary due to potential differences in length or configuration․ Furthermore, a manual shift lever and pedal assembly, including the clutch pedal, are required․ Costs can be managed by sourcing used parts from compatible models, such as the M3, but caution is advised to ensure reliability and functionality․ Budgeting for these components is crucial to avoid financial surprises during the swap․

7․2 Labor Costs and DIY vs․ Professional Installation

Labor costs for an E36 auto-to-manual swap can vary significantly․ DIY enthusiasts with mechanical expertise can save on labor costs but must invest time and effort․ Professional installation, while more expensive (ranging from $500 to $2,000 depending on the shop), ensures a polished and reliable result․ The complexity of the swap, including transmission removal and ECU modifications, often necessitates specialized tools and knowledge․ Weighing DIY savings against professional expertise is crucial for a successful and safe conversion․

7․3 Hidden Costs and Unexpected Expenses

Hidden costs in an E36 auto-to-manual swap often arise from unforeseen repairs or additional parts․ For instance, worn-out components like the driveshaft or differential may require replacement, adding to the budget․ Alignment issues or electrical problems can also surface, increasing expenses․ Budgeting for contingencies is wise, as unexpected costs can escalate the total expenditure․ It’s essential to factor in potential overtime labor fees if professional help is sought, ensuring a comprehensive financial plan for the conversion․ Proper planning helps mitigate these extra costs․

Tools and Equipment Needed

The E36 auto-to-manual swap requires specialized tools like a transmission jack, socket set, wrenches, and a workshop manual․ Essential equipment includes a lift or jack stands for safe access and a clean workspace for efficiency and organization during the process․

8․1 Essential Tools for the Swap

The E36 auto-to-manual swap requires a variety of tools to ensure a smooth process․ Essential tools include a transmission jack, socket set, wrenches, and a workshop manual․ A lift or jack stands are necessary for safe access to the underside of the vehicle․ Pneumatic tools can speed up bolt removal, while a torque wrench ensures proper tightening․ Additional items like a hydraulic clutch bleeding kit and gear pullers may be needed․ Organizing these tools in a clean workspace is crucial for efficiency and reducing downtime during the swap․

8․2 Specialized Tools and Their Uses

Specialized tools are crucial for specific tasks during the E36 auto-to-manual swap․ A transmission jack is essential for safely lowering and raising the gearbox․ A clutch alignment tool ensures the clutch disc is properly seated․ Driveshaft pullers are necessary for removing the old driveshaft without damage․ Additionally, a gearbox mounting bracket tool helps align the manual transmission correctly․ These tools, while not part of a standard toolkit, are vital for avoiding complications and ensuring a precise installation; Having them ready can save significant time and effort during the swap․

8․3 Workspace Setup for Efficiency

A well-organized workspace is critical for the E36 auto-to-manual swap․ Start with a clean, flat surface and ensure good lighting for visibility․ Use a drain pan to catch fluids during transmission removal․ Keep tools and parts neatly organized to avoid misplacement․ Level the car on jack stands for stability and access․ Cover the car and surrounding areas to protect from dirt and damage․ A parts cleaning station and proper ventilation are also essential for efficiency and safety during the swap process․

Common Mistakes to Avoid

  • Incorrect transmission alignment during installation can lead to drivetrain issues․
  • Improper ECU reprogramming may cause the car to run poorly or not start․
  • Insufficient testing post-installation can result in unnoticed mechanical or electrical faults․

9․1 Incorrect Transmission Alignment

Incorrect transmission alignment is a common mistake during the E36 auto-to-manual swap․ Misalignment can lead to drivetrain issues, including vibration, noise, and premature wear on components․ Symptoms often include difficulty shifting gears or unusual noises during acceleration․ Causes may include improper pilot bearing installation or incorrect positioning of the transmission crossmember․ To avoid this, use proper alignment tools and ensure the transmission is securely bolted in place․ Consulting a factory manual or experienced mechanic can help prevent this critical error․

9․2 Improper ECU Reprogramming

Improper ECU reprogramming is a critical error during an E36 auto-to-manual swap․ The ECU must recognize the manual transmission to ensure proper engine and gearbox communication․ Incorrect reprogramming can cause issues like erratic clutch engagement, poor shifting, or even engine stalling․ Symptoms may resemble other problems, making diagnosis challenging․ To avoid this, use compatible software and follow precise reprogramming steps․ Consulting a qualified technician or using factory tools minimizes risks and ensures seamless integration of the manual transmission․

9․3 Insufficient Testing After Installation

Insufficient testing after installing a manual transmission can lead to unforeseen issues․ Problems like gear grinding, slipping, or improper clutch engagement may arise if the system isn’t thoroughly tested․ Drivers might experience erratic behavior, such as hesitation or stalling, which can be dangerous․ Always perform a series of test drives under controlled conditions to ensure smooth operation․ Initial tests should include slow-speed maneuvers and gradual acceleration to verify proper function before regular use․ Proper testing is crucial for long-term reliability and performance․

Troubleshooting Post-Swap Issues

Troubleshooting post-swap issues involves checking mechanical, electrical, and software components․ Common problems include gear misalignment, clutch malfunction, and ECU communication errors․ A systematic approach ensures quick resolution․

10․1 Diagnosing Common Problems

Diagnosing common issues post-swap requires a methodical approach․ Start by checking the clutch engagement and disengagement for smooth operation․ If gears grind or slip, inspect the clutch alignment and cable adjustment․ Electrical issues, such as ECU communication errors, may manifest as dashboard warnings or erratic transmission behavior․ Use diagnostic tools to scan for fault codes․ Mechanical problems like leaks or worn components should be visually inspected․ Addressing these issues promptly ensures reliability and performance․

10․2 Addressing Clutch and Gearbox Issues

Clutch and gearbox issues often arise post-swap due to misalignment or worn components․ If the clutch fails to engage smoothly, check the alignment of the clutch disc and pressure plate․ For gearbox problems, such as grinding gears, inspect the synchros and bearings․ Leaks around the gearbox or clutch housing should be addressed promptly․ Ensure proper fluid levels and condition in the gearbox․ If issues persist, consider professional inspection or replacement of faulty parts to restore smooth operation and reliability․

10․3 Solving ECU and Electrical Problems

Post-swap ECU and electrical issues often arise from improper reprogramming or wiring mismatches․ Ensure the ECU is correctly reprogrammed for manual transmission using tools like DIS․ Check for error codes using an OBD-II reader and address them promptly․ Verify all wiring connections, especially the clutch and gear position sensors․ If issues persist, consult a professional to avoid further complications․ Proper ECU configuration is crucial for smooth operation and preventing electrical malfunctions․

The E36 auto-to-manual swap offers enhanced performance and driver engagement, requiring careful planning but yielding rewarding results for enthusiasts willing to invest time and effort․

11․1 Summary of the Swap Process

The E36 auto-to-manual swap involves removing the automatic transmission, installing a manual gearbox, and integrating the clutch system․ It requires careful planning, specialized tools, and modifications to wiring and the ECU․ The process demands patience and mechanical knowledge but results in enhanced performance and driver engagement․ Proper execution ensures reliability and a more immersive driving experience, making the effort worthwhile for enthusiasts seeking a more connected connection to their vehicle․

11․2 Long-Term Benefits and Satisfaction

Converting an E36 from automatic to manual yields lasting benefits, including improved fuel efficiency and lower maintenance costs․ Drivers experience enhanced control and engagement, making each drive more enjoyable․ The satisfaction of achieving a successful swap is rewarding, with long-term reliability and performance gains․ This modification not only elevates the driving experience but also increases the car’s value and appeal for enthusiasts seeking a more authentic connection to their vehicle․

11․3 Encouragement for DIY Enthusiasts

The E36 auto-to-manual swap is a rewarding project for DIY enthusiasts, offering a sense of accomplishment and cost savings․ With proper planning and patience, enthusiasts can successfully navigate the process․ Detailed guides and online resources provide ample support․ Embrace the challenge, as the end result—a more engaging and responsive driving experience—makes the effort worthwhile․ This swap is a testament to DIY spirit and dedication, proving that hands-on work can yield significant rewards․

brother p touch label printer manual

Welcome to the Brother P-Touch Label Printer Manual․ This comprehensive guide helps you unlock the full potential of your printer, covering setup, design, printing, and customization․ Explore troubleshooting tips, maintenance advice, and advanced features to enhance your labeling experience․ Master your Brother P-Touch printer for professional results․

Overview of the Brother P-Touch Label Printer

The Brother P-Touch Label Printer is a versatile and user-friendly device designed for creating professional-quality labels․ It utilizes thermal transfer technology to produce crisp, durable labels suitable for office, home, or industrial use․ The printer supports various label sizes and materials, including adhesive tapes and specialty labels․ With its intuitive interface and advanced customization options, users can easily design labels with text, symbols, and images․ Compatible with Brother’s P-Touch software, it offers seamless integration with computers and mobile devices, enabling efficient label creation and printing․ Its compact design and robust features make it an ideal choice for both personal and professional labeling needs․

Importance of the User Manual for Effective Usage

The user manual is essential for maximizing the functionality of your Brother P-Touch Label Printer․ It provides step-by-step guidance for setting up the printer, installing software, and connecting devices․ The manual offers troubleshooting solutions for common issues like tape feeding problems and connectivity errors․ It also explains how to customize labels, adjust print settings, and utilize advanced features․ By referring to the manual, users can ensure optimal performance, resolve issues quickly, and explore all available functions․ Regularly updating firmware, as instructed in the manual, further enhances printer efficiency and compatibility․ It serves as a valuable resource for both beginners and experienced users․

Key Features of the Brother P-Touch Label Printer

The Brother P-Touch Label Printer offers a range of features designed for efficient and professional labeling․ It supports high-resolution printing, ensuring crisp and clear labels․ The printer is compatible with various tape sizes and materials, making it versatile for different applications․ It also includes wireless connectivity options like Bluetooth and Wi-Fi, enabling seamless printing from mobile devices․ The P-Touch Design & Print software allows for custom label creation with text, symbols, and images․ Additional features include adjustable font sizes, multiple color options, and margin settings for precise printing․ The printer also supports bulk printing with minimal margins, saving time and tape․ These features make it ideal for both personal and professional use․

Setting Up the Brother P-Touch Label Printer

Unbox and physically set up the printer, then install the Brother P-Touch software․ Connect the printer to your computer or mobile device via Bluetooth or USB for easy operation․

Unboxing and Physical Setup of the Printer

Unbox your Brother P-Touch label printer and carefully remove all packaging materials․ Ensure the printer, power cord, and label tape cassette are included․ Place the printer on a flat, stable surface․ Insert the label tape cassette by aligning it with the guide and gently pushing until it clicks․ Connect the power cord to the printer and plug it into a nearby outlet․ Turn on the printer using the power button․ Allow it to initialize and ensure the display lights up properly․ Familiarize yourself with the control panel and buttons for basic operations․ Refer to the manual for any specific setup instructions․

Installing the Brother P-Touch Software

Visit the official Brother website and navigate to the support section․ Search for the P-Touch software compatible with your printer model․ Download the installer and run it on your computer․ Follow the on-screen instructions to complete the installation․ Ensure you agree to the terms and select the correct installation location․ Once installed, restart your computer to ensure proper driver integration․ The software will allow you to design and print labels effortlessly; For macOS users, ensure compatibility and follow similar steps․ If prompted, enter administrator credentials to finalize the installation․ This software is essential for unlocking the printer’s full functionality and customization options․

Connecting the Printer to Your Computer or Mobile Device

Connect your Brother P-Touch printer to your computer via USB or wirelessly․ For USB, plug the cable into your computer and printer, and the software will automatically detect the device․ For wireless connection, download the P-Touch Design & Print app from the App Store or Google Play․ Pair the printer with your smartphone or tablet using Bluetooth or Wi-Fi․ Ensure both devices are connected to the same network for seamless printing․ On Android or iOS, open the app, select your printer model, and follow in-app instructions to complete the pairing process․ This allows you to print labels directly from your mobile device with ease and convenience․

Label Design and Creation

Use the P-Touch Design & Print app to create custom labels with text, symbols, and imported images for professional results․ Design effortlessly with user-friendly tools․

Using the P-Touch Design & Print Application

The P-Touch Design & Print app offers a user-friendly interface for creating custom labels․ Download and install the app from the App Store or Google Play․ Launch the application and explore its features, such as text formatting, symbol insertion, and image import․ Use the intuitive tools to design professional-looking labels․ Adjust fonts, colors, and layouts to suit your needs․ Preview your designs before printing to ensure accuracy․ The app also allows you to adjust print settings for optimal quality․ Pair the printer with your smartphone or tablet via Bluetooth for wireless printing․ This app enhances your labeling experience with versatility and precision․

Creating Custom Labels with Text and Symbols

Design personalized labels by adding text and symbols using the P-Touch Design & Print app․ Choose from various font styles and sizes to match your needs․ Insert symbols like arrows, icons, or shapes to enhance label clarity․ Use the app’s intuitive tools to align text and adjust spacing․ Preview your labels before printing to ensure accuracy․ Customize labels for different purposes, such as file organization, gift tags, or workplace signage․ The app also supports importing images for a professional touch․ With these features, you can create versatile and visually appealing labels tailored to your preferences․ Achieve professional results with ease and precision․

Importing Images and Logos for Professional Labels

Elevate your labels by importing images and logos using the P-Touch Design & Print app․ Supported formats include PNG, JPEG, and BMP․ Resize and position images to fit your label layout․ High-resolution files ensure crisp results․ Add logos for branding or use icons to enhance visibility․ Preview your design to ensure proper alignment and clarity․ This feature is ideal for creating professional-looking labels for business or personal use․ Importing images expands your creative possibilities, allowing you to combine text and visuals seamlessly․ Ensure your labels stand out with custom graphics and logos, making them more engaging and professional․

Printing Labels

Printing labels with the Brother P-Touch printer ensures high-quality results․ Adjust settings for optimal output, use compatible tapes, and customize margins for efficient labeling․

Understanding Label Tape Compatibility

Ensuring label tape compatibility is crucial for optimal printing results․ Brother P-Touch printers support various tape types, including standard, durable, and specialty tapes․ Always use genuine Brother tapes designed for your specific model, such as the P-Touch PT-H108 or PT-H107, to avoid feeding issues․ Compatible tapes include laminated, fabric, and acid-free options, suitable for different environments․ Refer to your printer’s manual for a list of recommended tapes․ Using non-compatible tapes may damage the printer or result in poor print quality․ Choose the right tape for your needs to achieve professional-looking labels and extend your printer’s lifespan․ Proper tape selection ensures smooth operation and consistent results․

Adjusting Print Settings for Optimal Quality

Adjusting print settings is essential for achieving precise and professional labels․ Use the P-Touch Design & Print application to customize print density, speed, and margins․ Higher density ensures bold text, while lower density saves tape․ Adjusting print speed balances quality and efficiency․ Margins can be minimized to reduce waste․ For intricate designs, slow down the print speed for clarity․ Ensure the selected tape type matches your label requirements․ Proper alignment and calibration also enhance print quality․ Experiment with settings to find the perfect balance for your labeling needs․ Refer to your printer’s manual for specific guidance on optimizing print settings for consistent, high-quality results․

Printing Multiple Labels with Minimal Margins

Printing multiple labels with minimal margins saves tape and enhances efficiency․ Use the “CHAIN” feature in the P-Touch software to print consecutive labels with reduced spacing․ Adjust the margin settings in the print dialog to minimize gaps․ Ensure the tape is aligned correctly to avoid misprints․ For bulk labeling, select the “Multiple Labels” option and choose the number of copies․ The printer automatically optimizes spacing for minimal waste․ Test print a sample to confirm alignment and margins before printing in bulk․ This feature is ideal for professional labeling needs, ensuring crisp, precise results while conserving resources․ Refer to your manual for detailed steps on configuring this setting․

Customization Options

The Brother P-Touch label printer offers extensive customization options, including various fonts, sizes, colors, and styles․ Users can import images and adjust margins for precise, professional-looking labels tailored to their needs․

Changing the Font and Size for Labels

Customizing the font and size of your labels is straightforward with the Brother P-Touch label printer․ Using the P-Touch Design & Print application, users can select from a variety of fonts and sizes to suit their needs․ This feature enhances readability and professionalism, allowing labels to stand out․ Simply navigate to the text settings, choose your preferred font style, and adjust the size using the slider or predefined options․ Preview the changes to ensure clarity and aesthetics before printing․ This flexibility enables you to create labels that are both functional and visually appealing, making it ideal for personal or professional use․

Using Different Colors and Styles for Labels

Enhance your labels by utilizing various colors and styles available on the Brother P-Touch label printer․ The printer supports a range of colored label tapes, allowing you to choose from vibrant hues to match your preferences․ To change the tape, simply open the printer, remove the current cassette, and insert the new colored tape․ Ensure the printer recognizes the new tape by following the on-screen prompts in the P-Touch Design & Print software․ Additionally, customize text with bold, italic, or underlined styles directly within the software․ Preview your designs to ensure clarity and aesthetics before printing․ This feature is ideal for creating visually appealing and professional labels for any occasion․

Setting Up Margins for Precise Printing

To achieve precise printing, adjust the margins on your Brother P-Touch label printer․ Use the P-Touch Design & Print software to set custom margins, ensuring labels fit perfectly on the tape․ Access the margin settings under the “Layout” or “Print Settings” menu․ Experiment with different values to minimize tape waste․ For physical adjustments, refer to the printer’s menu by pressing the “Menu” button, navigating to “Print Settings,” and selecting “Margins․” Save your preferences to maintain consistency across prints․ Properly configured margins ensure labels are centered and evenly spaced, enhancing both functionality and professionalism․ This feature is especially useful for creating clean, precise labels for organizational or business purposes․

Troubleshooting Common Issues

Identify and resolve common issues like tape feeding problems, connectivity loss, and poor print quality․ Follow troubleshooting steps in the manual for quick solutions․

Resolving Tape Feeding Problems

If your Brother P-Touch label printer is experiencing tape feeding issues, ensure you’re using compatible tapes and avoid pulling the tape during operation․ Check for debris or dust inside the printer, as this can obstruct the tape’s path․ Reload the tape cassette correctly, ensuring it’s seated properly and the protective cover is removed․ If the tape bunches up, stop the printer, carefully remove the jammed tape, and restart․ Regularly cleaning the printer’s internal mechanisms can prevent recurring issues․ For persistent problems, consult the user manual or contact Brother support for further assistance to restore smooth tape feeding and printing functionality․

Fixing Printer Connectivity Issues

Troubleshooting connectivity issues with your Brother P-Touch printer involves several steps․ First, ensure the printer is properly powered on and connected to your device via USB, Bluetooth, or Wi-Fi․ Restart both the printer and your computer or mobile device to reset the connection․ Check for loose cables or faulty adapters․ If using wireless, confirm the printer and device are on the same network․ Reinstall the printer drivers or software to ensure compatibility․ For Bluetooth or Wi-Fi issues, reset the printer to its default settings and pair it again․ Use Brother’s P-Touch Design & Print app or software to diagnose and resolve connection problems effectively․

Addressing Print Quality Concerns

To ensure optimal print quality with your Brother P-Touch label printer, start by using genuine Brother P-Touch tapes to avoid compatibility issues․ Regularly clean the print head to remove dirt or dried ink, which can cause smudging or blurry text․ Adjust print settings like density or speed for clearer output․ Install firmware updates from Brother’s official website to resolve software-related issues․ Use the P-Touch Design & Print app for diagnostic tools to identify and fix print problems․ If issues persist, contact Brother’s customer support for professional assistance․ Proper maintenance and settings adjustments will help maintain high-quality labels and extend the printer’s lifespan․

Mobile App Integration

Seamlessly integrate your Brother P-Touch printer with mobile apps for wireless label printing․ Download the P-Touch Design & Print app, pair via Bluetooth, and print labels directly from your smartphone or tablet for enhanced versatility and productivity․

Downloading and Installing the P-Touch App

To start, visit the App Store (for iOS) or Google Play Store (for Android) and search for the P-Touch Design & Print application․ Download and install the app to enable wireless label printing․ Ensure your device is compatible with the app․ Once installed, launch the app and follow the on-screen instructions to pair it with your Brother P-Touch printer․ The app allows you to design labels, import images, and print directly from your mobile device․ This feature enhances convenience, enabling you to create professional labels anytime, anywhere․ The app is user-friendly and supports various Brother P-Touch models for seamless integration․

Pairing the Printer with Your Smartphone or Tablet

To pair your Brother P-Touch printer with your smartphone or tablet, ensure both devices have Bluetooth enabled․ On your mobile device, go to the Bluetooth settings and search for available devices․ Select the Brother P-Touch printer from the list to initiate pairing․ If prompted, enter the pairing code or confirm the connection․ Once connected, open the P-Touch Design & Print app to test the pairing by printing a sample label․ Ensure your printer and device are within range for a stable connection․ This seamless pairing allows you to design and print labels wirelessly, enhancing your productivity and convenience․

Printing Labels Directly from Your Mobile Device

Printing labels directly from your mobile device is quick and convenient․ Download the Brother P-Touch Design & Print app from the App Store or Google Play․ Open the app, select your printer model, and connect via Bluetooth․ Design your label using text, symbols, or images, then preview and print․ Ensure your printer is paired and within range for a stable connection․ This feature allows you to create professional labels on the go, perfect for organizing, shipping, or personal projects․ The app’s intuitive interface makes it easy to customize and print labels wirelessly, enhancing your productivity and flexibility with the Brother P-Touch printer․

Additional Resources and Support

Access the Brother P-Touch user manual online for detailed guidance․ Download firmware updates to enhance performance and functionality․ Contact Brother customer support for personalized assistance and troubleshooting․

Accessing the Brother P-Touch User Manual Online

To access the Brother P-Touch user manual online, visit the official Brother website and navigate to the support section․ Select your specific printer model from the dropdown menu․ Download the PDF manual for free, which covers installation, operation, and troubleshooting; The manual provides detailed instructions for label creation, printer maintenance, and connectivity options․ It also includes troubleshooting guides for common issues like tape feeding problems or print quality concerns․ Use the manual to explore advanced features and optimize your printer’s performance; Regularly check for firmware updates to ensure your printer runs smoothly and efficiently․

Downloading Firmware Updates for Improved Performance

Regularly updating your Brother P-Touch printer’s firmware ensures optimal performance and resolves potential issues․ Visit the official Brother website and navigate to the support section․ Enter your printer model to find the latest firmware version․ Download the update and follow the on-screen instructions to install it․ Firmware updates often include bug fixes, new features, and compatibility improvements; Ensure your printer is connected to a computer or mobile device during the update process․ Always download firmware from Brother’s official site to avoid unauthorized software․ Updating firmware is essential for maintaining printer functionality and enhancing your labeling experience with the latest advancements․

Contacting Brother Customer Support for Assistance

For any issues or inquiries regarding your Brother P-Touch label printer, contacting customer support is a reliable option․ Visit the official Brother website and navigate to the support section․ Here, you can find troubleshooting guides, FAQs, and direct contact options․ Use the live chat feature, email, or phone support to connect with a representative․ Ensure you have your printer model number and a detailed description of your issue ready․ Brother also provides online resources, such as user manuals and firmware updates, to help resolve common problems independently․ Reaching out to Brother’s customer support ensures you receive professional assistance tailored to your needs․

Maximizing the Potential of Your Brother P-Touch Printer

Your Brother P-Touch printer is designed to deliver professional results with minimal effort․ By exploring its advanced features, such as customizable fonts, color options, and mobile app integration, you can create labels tailored to your needs․ Regular firmware updates ensure optimal performance, while Brother’s customer support provides troubleshooting assistance․ To maximize efficiency, use high-quality label tapes and adjust settings for precise printing․ Experiment with the P-Touch Design & Print app to unlock creative possibilities․ With proper care and utilization, your Brother P-Touch printer becomes an indispensable tool for professional labeling needs․ Explore its full potential for consistent, high-quality output․

Exploring Advanced Features for Professional Labeling

Discover the advanced features of your Brother P-Touch printer for professional labeling․ Unlock customization options like multiple fonts and colors to enhance label aesthetics․ Utilize the P-Touch Design & Print app for intricate designs and integrate images or logos for a polished look․ Save time with batch printing and minimize tape waste by adjusting margins․ Explore barcode and QR code capabilities for added functionality․ Pair your printer with mobile devices via Bluetooth or Wi-Fi for seamless connectivity․ Regular firmware updates ensure your printer stays up-to-date with the latest features․ By mastering these tools, you can streamline your workflow and produce high-quality, professional labels effortlessly and efficiently․

tv guide great falls mt

Your comprehensive source for Great Falls, MT television listings, covering local channels, primetime shows, and community programming. Discover what’s on TV today, tonight, and this week with ease.

Overview of TV Programming in Great Falls, Montana

Great Falls, Montana, offers a diverse range of TV programming catering to various interests. From local news and sports to primetime shows and community events, viewers can access a wide variety of content. Major networks like ABC, CBS, FOX, and NBC are well-represented, ensuring access to popular series and national events. Local affiliates provide regionally relevant coverage, including weather updates, sports highlights, and cultural programming. Additionally, viewers can explore cable and satellite options for expanded channel lineups. With both over-the-air and digital platforms available, residents can stay informed and entertained with ease. The programming reflects the unique needs and interests of the Great Falls community, making it a vital part of daily life.

Importance of Local TV Programming

Local TV programming plays a vital role in connecting the Great Falls community. It provides essential updates on regional news, weather, and sports, fostering a sense of unity. Cultural content and community events are highlighted, preserving local traditions. Local channels also address specific issues relevant to residents, ensuring they stay informed. This programming not only entertains but also educates, making it indispensable for daily life in Great Falls. Its impact extends beyond entertainment, serving as a platform for local voices and stories, which strengthens community bonds and cultural identity.

Major TV Channels in Great Falls, MT

Great Falls, MT features prominent TV affiliates, including KFBB (ABC), KHBB (FOX), KRTV (CBS), and KTGF (NBC). These channels provide diverse programming, from news to entertainment.

KFBB-TV: ABC Affiliate

KFBB-TV, an ABC affiliate, serves Great Falls, MT, offering a mix of network shows, local news, and syndicated programming. Popular shows like Dr. Phil and 48 Hours air regularly. As part of the KFBB-KHBB network, it provides regional coverage, ensuring viewers stay informed about local events and entertainment. With a strong signal reach, KFBB-TV is a trusted source for primetime ABC programming and community updates, making it a staple in many Montana households.

KHBB-TV: FOX Affiliate

KHBB-TV, a FOX affiliate, serves the Great Falls, MT area with a diverse lineup of programming. As part of the KFBB-KHBB network, it broadcasts popular FOX shows, local news, and sports. Viewers can enjoy syndicated content like 48 Hours and regional updates. Available on channel 5.2, KHBB-TV provides entertainment and community-focused content, making it a key destination for those seeking FOX programming in central Montana. Its programming mix ensures a blend of national and local interests, catering to a wide audience in the Great Falls region.

KRTV: CBS Affiliate

KRTV, the CBS affiliate in Great Falls, MT, offers a wide range of programming, including popular CBS shows like CBS Saturday Morning and The Grand Tour. Broadcasting on channel 3, KRTV provides local news, weather updates, and sports coverage tailored to the central Montana community. Its programming lineup includes a mix of national entertainment and regional content, making it a trusted source for both entertainment and local information. Viewers in Great Falls rely on KRTV for up-to-date news and compelling CBS series, ensuring it remains a vital part of the local media landscape.

KTGF: NBC Affiliate

KTGF, the NBC affiliate in Great Falls, MT, delivers a diverse range of programming, including popular NBC shows and local content. As a trusted source for news, sports, and entertainment, KTGF serves the central Montana community with channel lineups tailored to local viewers. Its schedule features a mix of national and regional content, ensuring a blend of entertainment and local relevance. Whether it’s primetime shows or community-focused programs, KTGF remains a key channel for residents seeking reliable information and engaging entertainment in the Great Falls area.

How to Access TV Listings in Great Falls, MT

Access Great Falls TV listings through various methods: over-the-air antennas, cable providers, satellite TV, or online platforms. Each offers convenient ways to stay updated on local and national programming.

Over-the-Air TV Listings

Over-the-air TV listings in Great Falls, MT provide free access to local channels using an antenna. Residents can enjoy major networks like ABC, FOX, CBS, and NBC, as well as local programming. Channels such as KFBB, KHBB, KRTV, and KTGF offer a mix of news, sports, and entertainment; This method is cost-effective and reliable, ensuring viewers stay connected to regional content without subscription fees. Over-the-air TV remains a popular choice for those seeking high-quality broadcasts and local coverage in the Great Falls area. It’s a straightforward way to stay informed and entertained.

Cable TV Listings

Cable TV listings in Great Falls, MT offer a wide range of channels and programming options. Providers like Spectrum and Xfinity provide extensive channel lineups, including local networks, sports, and entertainment. Subscribers can access HD programming, premium channels, and on-demand content. Cable TV ensures reliable reception and a diverse selection of shows, making it a popular choice for households. With cable, viewers can enjoy both national and local content, including Great Falls channels like KFBB, KHBB, KRTV, and KTGF, providing a seamless viewing experience tailored to local interests and preferences.

Satellite TV Listings

Satellite TV listings in Great Falls, MT provide access to a vast array of channels through providers like DirecTV and DISH Network. These services offer HD programming, sports packages, and premium channels, ensuring diverse entertainment options. Viewers can check listings via electronic program guides or online platforms. Satellite TV is ideal for rural areas with limited cable access, offering reliable reception and a wide channel selection. It caters to local interests by including regional networks and community-focused content, making it a popular choice for Great Falls residents seeking comprehensive TV coverage.

Online TV Guides and Apps

Online TV guides and apps provide convenient access to Great Falls, MT TV listings. Platforms like TVGuide.com, YouTube TV, and Hulu offer real-time schedules for local channels, cable, and satellite programming. Apps enable users to filter listings by provider, set reminders, and create personalized watchlists. These tools are ideal for viewers who prefer digital convenience, ensuring they never miss their favorite shows or local events. Online guides also feature program descriptions and ratings, helping users discover new content tailored to their interests in Great Falls.

Popular TV Shows and Programs

Discover the latest TV shows and programs in Great Falls, MT, featuring a mix of primetime favorites, local news, and community-focused content tailored to regional interests and preferences.

Primetime Shows on Local Channels

Great Falls, MT offers a diverse lineup of primetime shows across its local channels. From popular series like Dr. Phil on KFBB to gripping episodes of 48 Hours on KHBB, there’s something for everyone.

Catch exciting programs such as The Grand Tour and CBS Saturday Morning, ensuring entertainment for all tastes. These shows air during peak viewing hours, making them a staple for local audiences.

Viewers can also enjoy regional sports coverage and community-focused content, blending national-interest programming with local relevance. Check your TV listings for the latest schedules and tune in to stay entertained!

Local News and Community Programming

Great Falls, MT television features a strong focus on local news and community-centric shows. Channels like KFBB and KHBB deliver updates on regional events, weather, and sports.

Programs such as Positively Montana highlight uplifting stories, while segments like Don’t Waste Your Money provide practical advice.

Community events, cultural content, and public interest series are also prominent, ensuring viewers stay informed and connected to their area. These programs foster a sense of unity and local pride.

Impact of Local TV on the Community

Local TV strengthens community bonds by providing regional news, sports, and cultural content, fostering a sense of belonging and unity among Great Falls residents.

Regional News and Sports Coverage

Regional news and sports coverage play a crucial role in keeping Great Falls residents informed and engaged. Local channels like KFBB-TV and KHBB-TV provide updates on area news, weather, and sports, ensuring the community stays connected. From high school football to Montana’s outdoor adventures, these broadcasts highlight local talent and events. Additionally, stations like KTGF and KRTV offer extensive coverage of regional sports, catering to both local enthusiasts and visiting fans. This focused programming ensures that residents and visitors alike can stay informed and entertained with content tailored to their interests and needs.

Community Events and Cultural Content

Community events and cultural content are cornerstone elements of Great Falls television programming. Local channels feature coverage of art fairs, historical documentaries, and cultural festivals, showcasing the region’s vibrant heritage. Programs like “Positively Montana” highlight unique stories and traditions, while stations such as KFBB-TV and KTGF broadcast events like the Great Falls Symphony and local theater productions. These broadcasts not only entertain but also preserve the cultural identity of the community, offering residents a chance to connect with their roots and celebrate shared experiences. This focus on local culture enriches the viewing experience and strengthens community bonds.

Technical Aspects of TV Viewing in Great Falls

Technical aspects include digital broadcasting, HD programming, and channel frequencies. Viewers can access clear signals via antennas or cable, ensuring high-quality reception and diverse channel lineups.

Channel Lineups and Broadcast Frequencies

In Great Falls, MT, viewers can access a variety of channels through over-the-air, cable, and satellite services. Major stations include KFBB (ABC), KHBB (FOX), KRTV (CBS), and KTGF (NBC). These channels broadcast on specific frequencies, ensuring clear reception across the region. Digital TV and HD programming are widely available, offering high-quality viewing experiences. Cable providers often offer extended lineups, while satellite services provide additional options for diverse programming needs. Check local guides for exact channel numbers and frequencies to tune in seamlessly.

Digital TV and HD Programming

Digital TV and HD programming in Great Falls, MT, offer crisp, high-quality viewing experiences; Local channels like KFBB, KHBB, KRTV, and KTGF provide HD content, ensuring vibrant visuals and clear audio. Digital broadcasts eliminate analog interference, delivering reliable reception. With HD, viewers enjoy immersive entertainment, sports, and news. Modern antennas can enhance signal strength for over-the-air viewers, while cable and satellite services often include HD packages. This technology ensures residents stay connected to their favorite shows and local content with superior clarity and consistency.

Future Trends in TV Guide Great Falls, MT

The future of TV in Great Falls, MT, is shifting towards streaming services and online platforms, offering on-demand access and personalized viewing experiences for residents.

Streaming Services and Their Impact

Streaming services are revolutionizing how residents in Great Falls, MT, consume television content. Platforms like Netflix, Hulu, and Amazon Prime offer on-demand access to a wide range of shows and movies, providing unparalleled convenience. These services allow viewers to watch their favorite programs at any time, breaking free from traditional broadcast schedules. Additionally, streaming platforms often include personalized recommendations, enhancing the viewing experience. However, this shift has also raised concerns about the availability of local content, as streaming services primarily focus on national and international programming.

Despite these challenges, streaming services are becoming increasingly popular in Great Falls, MT, as they cater to diverse viewer preferences. Many residents now rely on these platforms for entertainment, complementing their traditional TV viewing habits. This trend highlights the growing demand for flexible and accessible content delivery, shaping the future of television consumption in the region.

Integration of Online Platforms

The integration of online platforms has transformed how viewers in Great Falls, MT, access TV content. Many local channels now offer live streaming and on-demand services through their websites or apps, allowing audiences to watch their favorite shows anytime, anywhere. Platforms like Hulu, YouTube TV, and fuboTV provide seamless access to both national and local programming. This shift enables viewers to customize their viewing experiences, with features like DVR capabilities and personalized recommendations. Additionally, online platforms ensure that users never miss their favorite programs with real-time updates and schedule notifications.

This integration also enhances accessibility, making it easier for residents to stay connected to local news, sports, and community events. With a few clicks, viewers can switch between live TV and on-demand content, creating a more flexible and user-friendly experience. This trend is expected to grow, further blending traditional TV with digital convenience for the people of Great Falls, MT.

The TV Guide for Great Falls, MT, serves as a vital resource for staying informed about local and national programming, ensuring viewers never miss their favorite shows.

Final Thoughts on the TV Guide Great Falls, MT

The TV Guide for Great Falls, MT, is an essential resource for viewers seeking entertainment, news, and community updates. It provides a comprehensive overview of local and national programming, ensuring residents stay informed about regional events, sports, and cultural content. With options to access listings via antenna, cable, satellite, or online platforms, the guide caters to diverse viewing preferences. Its integration with modern streaming services highlights its adaptability to evolving media trends. Whether for primetime shows or local news, the TV Guide remains a vital tool for planning your viewing experience in Great Falls, Montana.

garrison carbon monoxide detector manual

Welcome to the Garrison Carbon Monoxide Detector Manual. This guide provides essential information on installation, features, and maintenance to ensure your safety.

Understand the detector’s operation, troubleshoot issues, and learn how to maintain it for optimal performance.

Your safety is our priority.

1.1 Importance of Carbon Monoxide Detectors in Home Safety

Carbon monoxide detectors are crucial for home safety, as they detect odorless, colorless CO gas, which can be deadly in high concentrations.

These devices provide early warnings, enabling residents to evacuate before dangerous levels are reached.

CO poisoning can cause severe health issues or death, making detectors a vital protective measure.

Proper placement, like near sleeping areas, ensures maximum effectiveness.

Regular maintenance and testing are essential to maintain reliability.

Investing in a Garrison detector ensures your home is equipped with advanced safety technology.

1.2 Overview of the Garrison Carbon Monoxide Detector

The Garrison Carbon Monoxide Detector is a reliable, user-friendly device designed to protect your home and family from the dangers of carbon monoxide.
It features advanced sensors, a digital display, and a long-lasting battery life, ensuring continuous monitoring and peace of mind.
The detector is compact, easy to install, and suitable for various environments, including homes, apartments, and RVs.
With clear alarm signals and LED indicators, it provides immediate alerts to potential threats.
This manual will guide you through its features, installation, and maintenance, ensuring optimal performance and safety.

Understanding Carbon Monoxide and Its Dangers

Carbon monoxide is a colorless, odorless gas produced by incomplete combustion of fuels. It poses serious health risks, including headaches, dizziness, and even death in high concentrations.

Understanding its sources and effects is crucial for protecting your home and family from potential threats;

2.1 What is Carbon Monoxide and How It Forms

Carbon monoxide (CO) is a colorless, odorless, and tasteless gas produced by the incomplete combustion of carbon-containing fuels.
It forms when fuels like natural gas, coal, wood, and propane burn insufficiently due to inadequate oxygen.
Common sources include faulty fuel-burning appliances, vehicles, and industrial processes.
CO is also emitted by portable generators, water heaters, and fireplaces.
Understanding its formation helps identify potential risks, emphasizing the importance of proper ventilation and detector placement.
This knowledge is crucial for safeguarding against CO exposure, which can be deadly in high concentrations.

2.2 Health Risks Associated with Carbon Monoxide Exposure

Carbon monoxide exposure poses severe health risks, ranging from mild symptoms to life-threatening conditions.

At low levels, CO can cause headaches, dizziness, and nausea, while higher concentrations may lead to confusion, chest pain, and even loss of consciousness.

Prolonged exposure can result in brain damage, heart issues, or death.

Vulnerable groups, such as children, pregnant women, and individuals with pre-existing medical conditions, are at greater risk.

The Garrison detector plays a crucial role in early detection, helping prevent these dangerous scenarios.

Always ensure your detector is functioning correctly to protect yourself and your family.

2.3 Common Sources of Carbon Monoxide in Homes

Carbon monoxide (CO) in homes often comes from fuel-burning appliances like furnaces, water heaters, and generators. Poor ventilation or improper installation can lead to dangerous CO buildup. Blocked chimneys or vents in fireplaces and wood stoves are also major sources. Idling cars in attached garages or using grills indoors can release CO. Additionally, malfunctioning appliances, such as gas ranges or clothes dryers, can emit CO if not maintained. Understanding these common sources is key to preventing CO exposure and ensuring home safety. Regular inspections and proper maintenance of these appliances are essential to reduce risks.

Installation and Placement Guidelines

3.1 Choosing the Right Location for Your Detector

Place detectors near sleeping areas and on every level of your home. Ensure they are at least 6 feet away from fuel-burning appliances for accurate readings.

Proper placement of your Garrison Carbon Monoxide Detector is crucial for effective monitoring. Install detectors near sleeping areas to ensure early detection during nighttime.

Place detectors at least 6 feet above the return air register if you have a natural gas furnace. Avoid areas prone to false alarms, such as near cooking appliances or bathrooms.

Install detectors on every level of your home and near fuel-burning appliances like water heaters or fireplaces.

Ensure detectors are not obstructed by furniture or curtains.

Follow these guidelines to maximize the detector’s performance and keep your family safe from carbon monoxide threats.

3.2 Step-by-Step Installation Instructions

  1. Choose a location 6 feet above the return air register for natural gas furnaces or near sleeping areas for optimal detection.
  2. Peel the adhesive backing and press the detector firmly onto the wall or ceiling.
  3. Clean the area to ensure proper adhesion.
  4. Mount the detector with screws if the adhesive isn’t sufficient.
  5. Install batteries correctly, ensuring the polarity matches the diagram.
  6. Test the detector by pressing the test button until it beeps.
  7. Ensure no obstructions block the sensor.

Follow these steps to ensure your carbon monoxide detector functions correctly and provides reliable protection.

3.3 Tips for Optimal Detector Placement

For maximum effectiveness, place detectors on every level of your home and near sleeping areas.

Install them at least 6 feet above the floor to avoid drafts.

Avoid areas near windows, doors, or bathrooms to prevent false alarms.

In homes with natural gas furnaces, place detectors 6 feet above the return air register.

Replace detectors every 5-7 years or when the sensor expires.

Ensure detectors are not near fuel-burning appliances or garages to maintain accuracy.

Optimal placement ensures early detection and enhances safety.

Features and Functionality of the Garrison Detector

The Garrison detector boasts advanced features, including a long-lasting sensor, visual and audible alerts, and reliable battery life for continuous monitoring.

Its design ensures accurate detection.

4.1 Types of Sensors Used in the Detector

The Garrison Carbon Monoxide Detector utilizes advanced sensor technologies to ensure accurate and reliable detection.
It employs a combination of biomimetic sensors, which mimic the behavior of human hemoglobin, and electrochemical sensors, known for their high sensitivity and quick response times.
These sensors are designed to detect even low levels of CO over time, ensuring early warnings for safety.
The detector also features a built-in self-diagnostic system to monitor sensor performance and alert users to potential issues.
With a sensor lifespan of approximately 5-7 years, the detector provides long-term protection before requiring replacement.
This combination ensures optimal performance and reliability.

4.2 Alarm Systems and Warning Signals

The Garrison Carbon Monoxide Detector features advanced alarm systems designed to alert you of potential dangers.
The detector emits a loud, high-pitched beep pattern when carbon monoxide levels rise above safe thresholds.
Additionally, an LED light flashes to provide visual confirmation of an alert.
For added convenience, some models include voice alerts, clearly stating “Carbon Monoxide” to ensure immediate awareness.
The alarm system is designed to be persistent, continuing until the danger is resolved.
In cases of sensor malfunction or end-of-life, the detector signals with a unique beep pattern and LED sequence.
These warning signals ensure you are always informed and prepared to take action.

4.3 Battery Life and Power Options

The Garrison Carbon Monoxide Detector is designed for reliability and longevity. It typically operates on a 10-year sealed lithium battery, ensuring continuous protection without frequent replacements.

Some models also offer hardwiring options, allowing connection to your home’s electrical system for uninterrupted power.

The detector features low-battery alerts, with a series of beeps indicating when replacement or charging is needed.

For battery-powered units, the sensor lifespan is approximately 5-7 years, after which the detector will signal its end of life.

Proper maintenance, including battery checks, ensures optimal performance and safety.

4.4 Additional Features for Enhanced Safety

The Garrison Carbon Monoxide Detector includes advanced features to enhance safety. It offers a silent test mode to check functionality without loud beeps.
The detector’s memory retains the highest CO levels detected, providing valuable data for analysis.
Additionally, it features a low-battery alert and an end-of-life warning to ensure continuous protection;
Some models include smart connectivity, allowing integration with home security systems for real-time notifications.
LED indicators provide clear visual alerts, while voice alerts offer an audible confirmation of dangers.
These features ensure comprehensive protection and peace of mind for users.

Operating and Maintaining Your Detector

Regularly test your detector and check for error codes. Clean the device to ensure accuracy. Replace batteries or check power sources as needed for reliable performance.

5.1 How to Test Your Detector Regularly

To test your Garrison carbon monoxide detector, press and hold the test button until the alarm sounds.

This ensures the sensor and alarm are functioning correctly.

The LED will flash, and you’ll hear a loud beep, confirming the test was successful.

Perform this test monthly to maintain reliability.

If the detector does not respond, check the battery or power source.

For hardwired models, ensure electrical connections are secure.

Regular testing is crucial for protecting your home and family from potential carbon monoxide threats.

Always refer to your manual for specific testing instructions.

5.2 Understanding Error Codes and LED Indicators

The Garrison Carbon Monoxide Detector uses error codes and LED indicators to communicate its status.
For example, two beeps followed by a pause may indicate an “END” message, signaling the sensor’s end of life.
LED colors like red or yellow can indicate alarms, errors, or low battery.
Refer to the manual for a detailed list of codes and their meanings to ensure proper troubleshooting.
Understanding these indicators is crucial for maintaining your detector’s functionality and ensuring your safety.
Always address these signals promptly to avoid potential risks.
Regular checks can help identify issues before they escalate;

5.3 Cleaning and Maintaining Your Detector

Regular cleaning and maintenance are crucial for ensuring your Garrison Carbon Monoxide Detector functions optimally.

Use a soft brush or vacuum cleaner to gently remove dust and debris from the sensor and vents.
Avoid using chemicals or water, as they may damage the unit.

Check for insect nests or cobwebs inside the detector, as these can interfere with its performance.

After cleaning, test the detector by pressing the test button to ensure it is working correctly.

Replace any worn-out parts, such as batteries or sensors, promptly to maintain reliability.

Follow the manufacturer’s guidelines for routine maintenance to keep your detector in top condition.

Troubleshooting Common Issues

If your detector isn’t responding, check the power source and ensure it’s clean. Consult the manual for error codes and reset or replace if necessary.

6.1 Resolving False Alarms and Unnecessary Beeping

False alarms or unnecessary beeping from your Garrison Carbon Monoxide Detector can be caused by sensor expiration or improper placement.
Check if the detector’s sensor has reached its lifespan (typically 5-7 years);
Ensure it’s placed correctly, avoiding areas near natural gas appliances or return air registers.
Clean the detector to remove dust or debris that may trigger false alarms.
If issues persist, reset the device by pressing the test/silent button.
Replace the detector if the problem continues, as sensors may need updating. Always follow the manual’s troubleshooting steps to maintain accurate detection and safety.

6.2 What to Do If the Detector is Not Responding

If your Garrison carbon monoxide detector is not responding, first ensure it is properly powered. Check the batteries or electrical connections.

Next, test the detector using the test button. If it still does not respond, clean the sensor to remove any dust or debris.

Check for error codes or LED indicators, which may signal a malfunction or expired sensor. If the detector is past its sensor lifetime (typically 5-7 years), replace it immediately.

If issues persist, refer to the manual or contact customer support for assistance. Always prioritize your safety by ensuring a functioning detector.

6.3 Addressing Sensor Malfunction or End-of-Life Alerts

If your Garrison detector indicates a sensor malfunction or end-of-life alert, immediate action is required.

For end-of-life alerts, replace the detector entirely, as sensors cannot be repaired or replaced separately.

If a malfunction occurs, check for dust or obstructions and clean the sensor area gently.

Test the detector after cleaning to ensure proper function. If issues persist, replace the unit promptly to maintain safety.

Always follow the manufacturer’s guidelines for sensor-related alerts to ensure reliable protection against carbon monoxide threats.

Compliance with Safety Standards and Regulations

The Garrison detector meets rigorous safety standards, including UL and CSA certifications, ensuring reliability and compliance with local regulations for carbon monoxide detection.

7.1 Overview of Carbon Monoxide Detector Regulations

Carbon monoxide detector regulations vary by jurisdiction but generally require devices to meet specific safety standards, such as those set by Underwriters Laboratories (UL).

In the U.S., the National Fire Protection Association (NFPA) recommends installing CO detectors on every level of a home and near sleeping areas.

Some states mandate CO detectors in new construction and rental properties.

The Garrison detector complies with these standards, ensuring reliable protection.

Regulations also outline testing and maintenance requirements to ensure devices function correctly.

Adhering to these guidelines is crucial for safeguarding lives and preventing CO-related incidents.

7.2 Certifications and Standards for the Garrison Detector

The Garrison Carbon Monoxide Detector adheres to rigorous safety standards, ensuring reliability and effectiveness. It meets UL 2075 and EN 50291 certifications, guaranteeing compliance with global safety regulations.

These standards ensure the detector accurately senses CO levels, providing timely alerts to protect occupants. Additional certifications include CSA and ETL approvals, further validating its performance.

By adhering to these standards, the Garrison Detector offers unparalleled safety and peace of mind for homeowners. Its design and functionality are backed by extensive testing to meet or exceed industry expectations.

8.1 Importance of Regular Maintenance and Inspection

Regular maintenance and inspection of your Garrison Carbon Monoxide Detector are crucial for ensuring its reliability and effectiveness.
Over time, sensors can degrade, reducing accuracy.
Replace the detector every 5-7 years, as indicated by the manufacturer;
Check for dust or debris that may interfere with performance.
Test the detector monthly using the test button to confirm proper function.
Inspect LED indicators and listen for error beeps to identify potential issues early.
A well-maintained detector provides peace of mind and protects against carbon monoxide threats.

8.2 Staying Informed About Carbon Monoxide Safety

Staying informed about carbon monoxide safety is crucial for protecting your household. Regularly check local regulations and updates on detector standards.

Subscribe to safety newsletters and follow trusted sources for the latest information.

Participate in community workshops or online forums to learn from experts and share experiences.

Always update your detector to the latest firmware if applicable.

By staying informed, you can ensure your home remains safe and your detector functions effectively.

Remember, knowledge is key to preventing carbon monoxide incidents.

exsultet pdf

The Exsultet, or Easter Proclamation, is a sacred hymn sung during the Easter Vigil, expressing joy and praise. Available as a PDF, it glorifies Christ’s resurrection, symbolizing light and salvation for all.

Overview of the Exsultet

The Exsultet, also known as the Easter Proclamation, is a sacred hymn sung during the Easter Vigil. It is a joyful chant that proclaims the resurrection of Christ, emphasizing themes of light, salvation, and triumph over sin. The hymn is typically sung by a deacon or cantor, accompanied by the lighting of the Paschal Candle. Its Latin text, rich in symbolism, asks for God’s blessing on the candle and celebrates the victory of light over darkness. Available as a PDF, the Exsultet is widely used in Catholic and other Christian traditions, offering a powerful expression of Easter’s spiritual significance. Its ancient roots and timeless message make it a cornerstone of Easter liturgy.

Significance of the Exsultet in Easter Celebrations

The Exsultet holds profound significance in Easter celebrations as a triumphant hymn proclaiming Christ’s resurrection. Sung during the Easter Vigil, it embodies the joy and hope of the Paschal mystery. The hymn’s Latin text, rich in symbolism, invokes divine blessings on the Paschal Candle, representing Christ as the light of the world. Its chanting by the deacon or cantor underscores the liturgical solemnity, uniting the congregation in praise. The Exsultet bridges the Old Testament’s redemption narrative with the New Testament’s victory over death, making it a cornerstone of Easter liturgy. Its beauty and theological depth inspire devotion, reflecting the Church’s ancient traditions and the universal celebration of salvation.

Historical Background of the Exsultet

The Exsultet, an ancient chant, traces its origins to early Christianity, with elements attributed to St. Ambrose (397 AD). Its text evolved over centuries, reflecting liturgical traditions.

Origins of the Exsultet

The Exsultet, an ancient chant, traces its roots to early Christian liturgy. Its Latin text, attributed to St. Ambrose (4th century), reflects themes of resurrection and divine light. The hymn evolved from early Christian hymns and chants, blending Jewish and Christian traditions. Over centuries, it became a central part of the Easter Vigil, symbolizing the triumph of Christ. The Exsultet’s origins highlight its enduring theological and musical significance in celebrating Easter’s core message.

Evolution of the Text Over the Centuries

The Exsultet has undergone significant transformations since its origins, reflecting liturgical and cultural shifts. Attributed to St. Ambrose, its earliest forms date to the 4th century. Over centuries, the text evolved, incorporating theological themes and adapting to liturgical reforms. Medieval illuminated manuscripts preserved its beauty, while the Renaissance brought standardization. The 1970 Missal refined the Latin text, ensuring clarity and conciseness. Today, the Exsultet remains a cornerstone of Easter celebrations, with translations and modern interpretations maintaining its relevance. Its enduring legacy is evident in its adaptation to new mediums, such as PDF formats, ensuring accessibility for contemporary audiences while preserving its ancient spiritual essence.

The Exsultet in the Easter Vigil

The Exsultet is a central hymn of the Easter Vigil, proclaiming Christ’s resurrection. Sung by a deacon, it accompanies the lighting of the Paschal Candle, symbolizing light and renewal.

Role of the Exsultet in the Liturgy

The Exsultet holds a central place in the Easter Vigil, serving as a proclamation of Christ’s resurrection. Sung by a deacon, priest, or cantor, it is a powerful hymn that expresses joy and praise. The text, often available in PDF formats, is chanted after the lighting of the Paschal Candle, symbolizing the triumph of light over darkness. The hymn invites the assembly to rejoice, reflecting on the mysteries of salvation. Its liturgical function is to proclaim the resurrection narratives, reinforcing the Easter message. The Exsultet bridges the community to the divine, creating a moment of spiritual connection and renewal. Its chanting is a solemn yet celebratory act, essential to the Easter liturgy.

The Deacon’s Proclamation

The Deacon’s Proclamation, central to the Easter Vigil, involves the solemn chanting of the Exsultet; After incensing the Paschal Candle and the book, the deacon proclaims the hymn, summoning all to rejoice in Christ’s resurrection. This ritual, steeped in tradition, emphasizes the triumph of light over darkness and the victory of life over death. The deacon’s voice carries the prayerful praise, inviting the congregation to reflect on the divine mysteries celebrated during Easter. The proclamation is a powerful moment of worship, bridging liturgy and theology, and is often accompanied by the congregation standing in reverence, holding candles to symbolize the light of Christ.

Structure of the Exsultet

The Exsultet is a poetic hymn divided into sections, beginning with “Exsultet iam angelica turba”, praising God and recounting the Easter story; It includes a prayer for the Paschal Candle’s blessing.

Latin Text and Its Translation

The Exsultet is traditionally sung in Latin, showcasing its ancient origins. Its text is poetic and expressive, with themes of light, resurrection, and divine triumph. Translations into modern languages, such as English, preserve its spiritual depth while making it accessible to broader audiences. The hymn includes prayers for the Paschal Candle, symbolizing Christ as the light of the world. PDF versions often present the Latin text alongside translations, aiding liturgical use and personal devotion. The Exsultet’s Latin roots emphasize its historical and theological richness, while translations ensure its message resonates universally. This duality highlights its enduring relevance in Easter celebrations worldwide.

Key Themes in the Hymn

The Exsultet, or Easter Proclamation, is a hymn rich in theological themes. Central to the text is the triumph of light over darkness, symbolized by the Paschal Candle. It celebrates Christ’s resurrection as the source of salvation, emphasizing victory over sin and death. Themes of divine mercy, redemption, and the universal scope of God’s plan are also prominent. The hymn expresses joy and gratitude, calling all creation to rejoice in the risen Savior. Its poetic language highlights the mystery of Easter, linking past, present, and future. These themes are intricately woven into the hymn, making it a profound expression of Christian faith and hope.

The Paschal Candle and the Exsultet

The Paschal Candle is blessed during the Easter Vigil, symbolizing Christ’s resurrection. The deacon proclaims the Exsultet, praising God for the light of salvation through the risen Christ.

The Blessing of the Paschal Candle

The Paschal Candle is a central symbol in the Easter Vigil, representing Christ, the Light of the World. Its blessing is a solemn ritual, often accompanied by the Exsultet hymn. The candle is inscribed with the current year and a cross, signifying the triumph of life over death. The priest prays for God’s blessing upon the candle, invoking light and grace for the faithful. This rite is deeply rooted in tradition, emphasizing the resurrection’s victory. The candle is then lit from the new fire, symbolizing the dispersion of darkness by Christ’s radiance. The blessing highlights the candle’s role as a beacon of hope and renewal throughout the Easter season.

The Ritual of Incensing

The ritual of incensing is a sacred act performed during the Easter Vigil, preceding the proclamation of the Exsultet. The deacon, after preparing the Paschal Candle, incenses the book and the candle, symbolizing purification and reverence. This act creates a sacred atmosphere, signaling the beginning of the solemn liturgy. Incensing is a visual and sensory reminder of prayer rising to heaven, much like the smoke of the incense. It underscores the sacredness of the moment, drawing the congregation into the mysteries of Christ’s resurrection; The ritual is deeply rooted in tradition, emphasizing the connection between the liturgical action and the spiritual renewal of Easter.

Theological Significance of the Exsultet

The Exsultet profoundly reflects themes of light and resurrection, celebrating Christ’s triumph over darkness. It symbolizes hope and salvation, embodying the church’s joy in the risen Lord.

Themes of Light and Resurrection

The Exsultet profoundly explores themes of light and resurrection, symbolizing Christ’s triumph over darkness and death. The hymn describes the Paschal Candle as a “pillar of fire,” representing divine light guiding humanity. It emphasizes the resurrection as a victory of life over death, renewing hope and joy. The text vividly portrays the Easter miracle, linking light to salvation and eternal life. Through poetic imagery, the Exsultet invites believers to rejoice in the splendor of Christ’s resurrection, celebrating the illumination of the world and the triumph of eternal light over darkness.

The Exsultet as a Prayer of Praise

The Exsultet is a majestic prayer of praise, proclaiming the triumph of Christ over death and darkness. Sung during the Easter Vigil, it exalts the resurrection, symbolized by the Paschal Candle’s light. The hymn invokes divine blessings, celebrating the redemption of humanity and the victory of grace. Its poetic imagery and joyful tone reflect the Church’s jubilation, while its ancient origins link it to early Christian worship. The Exsultet is not only a liturgical chant but a heartfelt expression of faith, uniting believers in awe of God’s love and mercy. Its beauty and theological depth resonate deeply, making it a cornerstone of Easter celebrations worldwide.

Cultural and Liturgical Impact

The Exsultet’s illuminated manuscripts are renowned for their intricate artwork, preserving its liturgical significance. Itschant and text continue to inspire modern performances, enriching Easter celebrations worldwide.

Illuminated Manuscripts of the Exsultet

The Exsultet is often depicted in illuminated manuscripts, showcasing vibrant artwork and intricate designs. These manuscripts, dating back centuries, feature large miniatures, sometimes up to 40 cm high, glorifying Christ’s resurrection. The text is accompanied by ornate decorations, reflecting the hymn’s sacred nature. Historical documents reveal that these manuscripts were hung from pulpits during Easter, serving as visual enhancements to the liturgy. The Exsultet’s Latin text is sometimes paired with stunning illustrations of the Paschal Candle, symbolizing light and renewal. These manuscripts are not only religious artifacts but also treasures of medieval art, blending spirituality and aesthetics. Digital versions, such as PDFs, now allow modern audiences to admire these works, preserving their cultural and liturgical significance.

Modern Interpretations and Performances

Today, the Exsultet is widely accessible as a PDF, allowing for easy distribution and study. Modern performances often blend traditional chants with contemporary musical arrangements, making it more relatable. Many churches incorporate the hymn into Easter Vigil services, sung by deacons, priests, or cantors. The text remains deeply theological, emphasizing themes of light and resurrection. Illuminated manuscripts of the Exsultet are also celebrated for their artistic and cultural significance. In addition, digital platforms now share the hymn globally, preserving its legacy while introducing it to new audiences. This timeless piece continues to inspire spiritual reflection and joy during Easter celebrations worldwide.

The Exsultet remains a timeless Easter hymn, its PDF versions preserving ancient traditions. It continues to inspire spiritual reflection and joy, embodying the resurrection’s enduring legacy worldwide.

The Enduring Legacy of the Exsultet

The Exsultet has left an indelible mark on Christian liturgy and culture, enduring for centuries as a vibrant expression of Easter’s triumph. Its ancient origins and poetic beauty have inspired countless generations, making it a cornerstone of the Easter Vigil. The hymn’s themes of light, resurrection, and redemption continue to resonate deeply, bridging the past and present.

As a PDF resource, the Exsultet is widely shared, preserving its legacy for modern audiences. Its influence extends beyond liturgy, inspiring art, music, and theological reflection. This timeless hymn remains a powerful symbol of hope and renewal, ensuring its relevance for future generations.

Resources for Further Study

The Exsultet is widely available in PDF formats online, offering free downloads for liturgical use and scholarly exploration. The Easter Proclamation (Exsultet) PDF provides the full Latin text and its English translation, along with historical context. Additionally, the Exultet (Gregorian) document includes musical notation, making it a valuable resource for musicians and researchers. Illuminated manuscripts of the Exsultet, such as those from medieval Europe, are also available digitally, showcasing its artistic and cultural significance. For modern interpretations, videos of performances and scholarly articles on its theological themes can be found online. These resources enrich understanding of the Exsultet’s liturgical, historical, and cultural dimensions.

hills puppy food feeding guide

Welcome to the Hills Puppy Food Feeding Guide‚ your comprehensive resource for nurturing your puppy’s growth. This guide offers tailored feeding charts‚ health benefits‚ and expert recommendations to ensure your puppy thrives. With a focus on balanced nutrition and developmental support‚ Hills Puppy Food is a trusted choice for pet owners. Discover how to optimize your puppy’s diet for healthy growth‚ immunity‚ and energy. This guide covers feeding schedules‚ portion sizes‚ and special dietary needs to help you make informed decisions. Let’s explore how Hills Puppy Food can support your puppy’s journey to adulthood.

What is Hills Puppy Food?

Hills Puppy Food is a high-quality‚ nutritionally balanced dog food designed to meet the specific needs of growing puppies. Formulated with essential nutrients‚ it supports healthy growth‚ immunity‚ and energy levels. Made with natural ingredients like chicken meal‚ whole grains‚ and DHA from fish oil‚ it promotes brain development and strong muscles. Hills Puppy Food is tailored to different life stages and breed sizes‚ ensuring optimal nutrition for puppies of all backgrounds. It is a complete pet food‚ adhering to AAFCO guidelines‚ and is part of the trusted Hills Science Plan range‚ known for its scientifically formulated recipes. This food is designed to provide everything your puppy needs for a healthy start in life.

Why Choose Hills Puppy Food?

Choosing Hills Puppy Food ensures your puppy receives balanced‚ scientifically formulated nutrition tailored to their growth needs. It supports immune system development‚ healthy digestion‚ and joint health‚ while also promoting brain development with DHA. Hills Puppy Food is crafted with high-quality protein sources like chicken meal and whole grains‚ providing essential energy and nutrients. Its precise formulation helps prevent overfeeding and supports optimal weight management. With a range of options for different sizes and dietary needs‚ Hills Puppy Food is a trusted choice among veterinarians and pet owners. Its commitment to quality and safety makes it an excellent option for giving your puppy the best possible start in life.

Key Considerations Before Starting

Before starting your puppy on Hills Puppy Food‚ consider their age‚ weight‚ and activity level. Ensure you understand the feeding guide and adjust portions as needed. Always check for product recalls and verify the food’s suitability for your puppy’s specific needs. Consulting your veterinarian is also recommended to ensure a smooth transition and optimal health outcomes.

Understanding Your Puppy’s Age and Weight

Understanding your puppy’s age and weight is crucial for determining the right feeding schedule. Puppies grow rapidly‚ and their nutritional needs change as they develop. Hills Puppy Food offers feeding charts tailored to your puppy’s specific age and weight‚ ensuring they receive the proper amount of nutrients for healthy growth. For example‚ a 10-pound puppy may require 1 1/2 cups per day‚ while a 20-pound puppy needs 2 2/3 cups. Monitoring your puppy’s weight and adjusting portions accordingly helps prevent overfeeding or underfeeding. This personalized approach supports optimal growth‚ immunity‚ and digestion‚ making it essential to track your puppy’s progress closely with the help of Hills’ guidelines;

Importance of Breed Size

Breed size plays a significant role in determining your puppy’s feeding needs. Small‚ medium‚ and large breeds have distinct growth rates and energy requirements. Hills Puppy Food offers tailored formulas‚ such as Small & Toy‚ Medium‚ and Large Breed Puppy Food‚ to address these differences. Large breeds‚ for example‚ need controlled calcium levels to prevent joint issues‚ while small breeds require higher calorie density for rapid growth. Understanding your puppy’s breed size helps ensure proper portion sizes and nutrient balance‚ promoting healthy development and preventing potential health challenges. Always consult Hills’ feeding guide or your veterinarian to match your puppy’s specific needs with the right formula.

Considering Activity Level

Your puppy’s activity level significantly impacts their dietary needs. Puppies with high energy levels or those engaged in regular play require more calories to sustain their lifestyle. Hills Puppy Food provides balanced nutrition to meet these demands‚ ensuring optimal energy levels. For less active puppies‚ portion control is crucial to prevent overfeeding. Adjust feeding amounts based on your puppy’s daily exercise and playtime to maintain a healthy weight. Monitoring their energy levels and weight can help determine the right balance. Always refer to Hills’ feeding guide for specific recommendations tailored to your puppy’s activity level and lifestyle. This ensures they receive the nutrients needed for growth without overfeeding.

Feeding Charts for Hills Puppy Food

Hills Puppy Food feeding charts provide detailed guidelines based on age‚ weight‚ and breed size. Adjust portions to ensure balanced nutrition for optimal growth and energy needs.

Feeding Schedule for Puppies Aged 1-3 Months

For puppies aged 1-3 months‚ feeding 3-4 times daily is recommended to support their rapid growth and high energy needs. Start with smaller portions and gradually increase as your puppy grows. According to Hills Puppy Food guidelines‚ a 2-pound puppy should have 1/2 cup per feeding‚ while a 5-pound puppy needs 1 cup. Adjust portions based on breed size and activity level to prevent overfeeding. Monitor weight and adjust feeding amounts to ensure optimal growth. Always refer to the specific feeding chart on the product packaging or consult your veterinarian for personalized advice. Proper nutrition during this critical stage sets the foundation for a healthy‚ thriving puppy.

Feeding Schedule for Puppies Aged 4-6 Months

During the 4-6 month stage‚ puppies continue to grow rapidly‚ requiring consistent nutrition. Feed your puppy 2-3 times daily‚ adjusting portions as they develop. For example‚ a 10-pound puppy needs approximately 1 3/4 cups per day‚ while a 20-pound puppy requires around 3 1/4 cups. Divide these amounts into 2-3 meals to prevent overfeeding. Hills Puppy Food recommends monitoring your puppy’s weight and adjusting portions to ensure a healthy growth rate. Avoid overfeeding‚ as this can lead to weight gain and developmental issues. Always refer to the feeding chart on the product packaging or consult your veterinarian for tailored advice. Proper feeding at this stage supports energy levels‚ immunity‚ and overall development.

Feeding Schedule for Puppies Aged 7-9 Months

Puppies aged 7-9 months are nearing adulthood‚ so their feeding schedule begins to stabilize. Feed your puppy 2 times daily‚ as their growth rate slows. For example‚ a 15-pound puppy may need about 2 1/4 cups per day‚ while a 25-pound puppy requires roughly 3 3/4 cups. Adjust portions based on breed size and activity level to prevent overfeeding. Hills Puppy Food recommends monitoring your puppy’s weight and adjusting portions accordingly. At this stage‚ their diet should focus on maintaining energy levels and supporting muscle development. Refer to the feeding chart on the product packaging or consult your veterinarian for personalized guidance to ensure a smooth transition to adult food.

Feeding Schedule for Puppies Aged 10-12 Months

Puppies aged 10-12 months are nearing adulthood‚ and their feeding schedule transitions to adult portions. Feed twice daily‚ adjusting amounts based on weight and activity. For example‚ a 15-pound puppy needs about 2 1/4 cups daily‚ while a 25-pound puppy requires 3 3/4 cups. Monitor their weight and adjust portions to avoid overfeeding. At this stage‚ gradual introduction to adult food can begin‚ ensuring a smooth transition. Hills Puppy Food recommends following the feeding chart on the packaging or consulting a veterinarian for personalized advice. This period is critical for maintaining a healthy weight and preparing your puppy for adult nutrition.

Health Benefits of Hills Puppy Food

Hills Puppy Food provides balanced nutrition‚ supporting immune systems‚ healthy digestion‚ and joint mobility. It contains DHA for brain development and controlled calcium for strong bones‚ ensuring optimal growth and vitality. The food is clinically proven to promote overall health and well-being in puppies‚ making it a trusted choice for pet owners seeking high-quality nutrition for their growing pets.

Supporting Immune System Development

Hills Puppy Food is formulated to support immune system development through essential nutrients and vitamins. High-quality protein sources‚ such as chicken meal‚ promote healthy cell growth and immune function. The food contains antioxidants like vitamin E and beta-carotene‚ which help protect against free radicals and strengthen the immune system. Additionally‚ balanced omega-6 fatty acids support skin health‚ acting as a natural barrier against infections. Hills Puppy Food also includes clinically proven ingredients to enhance immune response‚ ensuring your puppy builds a strong foundation for long-term health. By providing a nutrient-rich diet‚ Hills helps your puppy thrive during critical growth stages.

Ensuring Healthy Digestion

Hills Puppy Food is designed to support healthy digestion through high-quality‚ easily digestible ingredients. The formula includes fiber from whole grains like barley and sorghum‚ which aids in smooth digestion and prevents digestive upset. Hills Puppy Food also contains beet pulp and flaxseed‚ natural sources of fiber that promote a balanced gut microbiome. The food’s balanced nutrition ensures that puppies absorb essential nutrients efficiently‚ reducing the risk of digestive issues. Additionally‚ Hills Puppy Food is formulated to minimize stomach sensitivity‚ making it ideal for puppies with delicate digestive systems. By providing optimal digestive support‚ Hills helps your puppy maintain energy levels and overall well-being during their growth phase.

Promoting Joint Health

Hills Puppy Food is formulated to support joint health‚ essential for active puppies. It contains glucosamine and chondroitin‚ natural compounds that promote healthy cartilage and joints. These ingredients help prevent joint issues later in life‚ especially in large or giant breeds prone to hip dysplasia. The balanced calcium and phosphorus levels ensure proper bone growth without overloading joints. Hills Puppy Food also supports muscle development‚ reducing strain on joints. By addressing joint health early‚ Hills helps puppies maintain mobility and activity levels as they grow into adulthood. This focus on joint care ensures your puppy can thrive and stay active for years to come.

Supporting Brain Development

Hills Puppy Food is enriched with DHA from fish oil‚ a key nutrient for brain development. DHA supports cognitive function and learning‚ helping puppies adapt to training and their environment. The balanced formula ensures optimal nutrient absorption‚ fostering intellectual growth and curiosity. Hills Puppy Food also contains antioxidants that protect brain cells from oxidative stress‚ promoting long-term mental clarity. By providing essential vitamins and minerals‚ Hills Puppy Food supports the development of a sharp and responsive mind. This nutritional support helps puppies grow into intelligent and adaptable adult dogs‚ ready to thrive in various environments and situations.

Special Dietary Needs

Hills Puppy Food addresses allergies‚ sensitive stomachs‚ and large breed needs with tailored formulas. It ensures balanced nutrition for puppies with unique dietary requirements‚ promoting healthy growth and digestion.

Feeding Puppies with Food Allergies

If your puppy suffers from food allergies‚ Hills Puppy Food offers hypoallergenic formulas designed to minimize adverse reactions. These recipes often exclude common allergens like beef or dairy‚ using novel protein sources such as venison or salmon. Hills Science Diet formulas are carefully crafted to avoid triggering allergies while providing essential nutrients. For puppies with severe allergies‚ a gradual transition to a new diet is recommended to prevent digestive upset. Always consult your veterinarian before making significant changes to your puppy’s diet. Hills Puppy Food ensures your allergic puppy receives balanced nutrition without compromising on taste or health benefits‚ supporting their growth and well-being effectively.

Managing Sensitive Stomachs

For puppies with sensitive stomachs‚ Hills Puppy Food offers specially formulated recipes to support digestion. These foods often feature easily digestible ingredients‚ such as chicken meal and barley‚ to minimize upset. If your puppy experiences diarrhea‚ vomiting‚ or gas‚ consider transitioning to a sensitive-stomach-specific formula. Hills Puppy Food is designed to reduce digestive issues while providing balanced nutrition. Always introduce new foods gradually to prevent further irritation. If your puppy’s sensitive stomach persists‚ consult your veterinarian for personalized advice. Hills Puppy Food ensures your puppy receives essential nutrients while addressing digestive sensitivities‚ promoting overall health and comfort.

Feeding Large Breed Puppies

Feeding large breed puppies requires careful attention to their unique growth needs to prevent joint issues and ensure proper development. Hills Puppy Food offers specially formulated recipes for large breeds‚ with controlled calcium levels to support bone health. These foods are designed to promote steady growth while minimizing the risk of developmental orthopedic diseases. For large breed puppies‚ feeding amounts should be adjusted based on weight and age‚ with a focus on maintaining a lean body condition. Hills Science Plan Large Breed Puppy Food is a great option‚ providing balanced nutrition with DHA for brain development and high-quality protein for muscle growth. Always follow the feeding guide or consult your veterinarian for a personalized plan.

Transitioning to Hills Puppy Food

Transitioning your puppy to Hills Puppy Food should be done gradually to prevent digestive upset. Start by mixing a small amount with their current food‚ increasing the proportion daily. Monitor your puppy’s tolerance and adjust the transition period as needed. Always introduce the new food over 7-10 days to ensure a smooth switch. Consult your veterinarian if any adverse reactions occur during the transition process.

How to Switch Foods Gradually

Switching your puppy to Hills Puppy Food requires a gradual approach to prevent digestive upset. Start by mixing 25% of Hills Puppy Food with 75% of their current food on day one. Over the next 7-10 days‚ incrementally increase the proportion of Hills Puppy Food while decreasing the old food. For example‚ day three might be 50% Hills and 50% old food‚ and by day seven‚ transition to 100% Hills Puppy Food. Monitor your puppy’s digestion‚ energy levels‚ and stool quality during this period. If any signs of upset occur‚ slow the transition process. Always use a high-quality measuring cup to ensure accurate portions. This gradual method ensures a smooth dietary adjustment for your puppy.

Monitoring for Digestive Upset

When transitioning your puppy to Hills Puppy Food‚ monitor for signs of digestive upset such as diarrhea‚ vomiting‚ or lethargy. Watch for changes in stool consistency‚ appetite fluctuations‚ or increased gas. If these symptoms persist‚ consult your veterinarian. Adjust the transition pace if issues arise‚ extending the mixing period if needed. Ensure fresh water is always available to prevent dehydration. Keep track of your puppy’s behavior and physical condition‚ noting any adverse reactions. Early detection of digestive issues ensures timely intervention‚ safeguarding your puppy’s health during the transition to Hills Puppy Food.

Monitoring Your Puppy’s Growth

Track your puppy’s weight‚ height‚ and overall health regularly. Adjust feeding amounts based on growth milestones and ensure balanced nutrition for optimal development. Regular vet check-ups are essential to monitor progress and address any concerns early.

How to Track Growth Progress

Regularly monitor your puppy’s growth by tracking weight‚ height‚ and body condition. Use a food scale to measure weight weekly and compare it to expected growth charts. Measure height at the shoulder and chest girth to ensure proportional development. Check for visible ribs and a defined waistline to assess body condition. Adjust feeding portions based on growth milestones and activity levels. Keep a growth journal to document progress and identify potential issues early. Consult your veterinarian for guidance on tracking tools and schedules. Ensuring your puppy stays on a healthy growth trajectory supports long-term health and vitality.

When to Consult a Veterinarian

Consult a veterinarian if you notice signs of underfeeding or overfeeding‚ such as unexpected weight loss or gain. Seek professional advice if your puppy shows digestive issues‚ lethargy‚ or lacks appetite. Veterinarians can help adjust feeding portions and ensure proper growth. They can also address concerns about food allergies or sensitivities. If your puppy isn’t reaching expected growth milestones‚ a vet can provide tailored guidance. Additionally‚ consult a vet if you suspect a reaction to Hills Puppy Food or need advice on transitioning to adult food. Regular check-ups ensure your puppy’s diet supports optimal health and development.

Common Feeding Issues

Common feeding issues include overfeeding‚ underfeeding‚ and digestive upset. Monitor portion sizes to prevent obesity or malnutrition. Be aware of food allergies or sensitivities. Adjust feeding schedules as needed to ensure optimal growth and health.

Preventing Overfeeding

Preventing overfeeding is crucial to ensure your puppy maintains a healthy weight and avoids potential health issues like obesity. Monitor your puppy’s food intake closely by adhering to the recommended feeding guidelines provided by Hills Puppy Food. Adjust portion sizes based on your puppy’s growth‚ activity level‚ and breed size. Recognize signs of overfeeding‚ such as visible weight gain or lethargy‚ and consult your veterinarian if you notice any concerning changes. Regular weigh-ins and body condition assessments can help prevent overfeeding. Additionally‚ avoid excessive treats and ensure all family members are aligned on feeding schedules. A balanced and nutrient-rich diet‚ like Hills Puppy Food‚ supports healthy growth without overfeeding‚ promoting a strong foundation for your puppy’s overall well-being.

Recognizing Signs of Underfeeding

Recognizing signs of underfeeding is essential to ensure your puppy receives adequate nutrition for healthy growth. Look for visible indicators such as a thin appearance‚ prominent ribs‚ or a lack of energy. If your puppy is consistently lethargic or shows a lack of interest in food‚ it may signal underfeeding. Monitoring their weight and body condition regularly can help identify if they are not getting enough nutrients. Hills Puppy Food provides a nutrient-rich diet‚ but portion sizes must align with your puppy’s needs. If you suspect underfeeding‚ adjust feeding amounts according to the feeding guide or consult your veterinarian to ensure your puppy is receiving the proper balance of nutrients for optimal health and development.

Recent Recalls and Safety

The FDA has issued alerts regarding elevated vitamin D levels in certain Hills canned dog foods‚ potentially causing vomiting‚ appetite loss‚ and other symptoms. Always check for recalls to ensure your puppy’s food is safe and unaffected.

Checking for Recalled Products

To ensure your puppy’s safety‚ regularly check for recalls on Hills Puppy Food products. Visit the official Hills Pet Nutrition website or the FDA’s recall alert page for updates. Look for specific product codes and batch numbers affected by recalls. Inspect the packaging for any signs of tampering or expiration. If your puppy shows symptoms like vomiting‚ increased thirst‚ or weight loss‚ discontinue feeding the product immediately. Contact Hills’ customer support for verification and advice. Always verify the product’s authenticity and consult your veterinarian if you suspect any issues. Staying informed protects your puppy’s health and ensures they receive safe‚ nutritious food.

Contacting Hills Pet Nutrition Support

For any concerns or questions about Hills Puppy Food‚ reaching out to Hills Pet Nutrition Support is essential. Visit their official website to find contact details‚ including phone numbers and email addresses. Use the live chat feature for immediate assistance or submit a query through their online form. When contacting‚ provide details like product batch numbers and specific issues encountered. Their team is available to address feeding concerns‚ product recalls‚ or health-related queries. Ensure your message is clear and concise for a prompt response. Hills Pet Nutrition is committed to supporting your puppy’s well-being‚ offering expert guidance tailored to your needs. Their dedicated customer service ensures you receive accurate and helpful information to keep your puppy healthy and thriving.

Hills Puppy Food is a trusted choice for balanced nutrition‚ supporting optimal growth and development. With DHA for brain health and quality protein‚ it ensures your puppy thrives. Follow the guide for a healthy‚ happy puppy.

Final Tips for Feeding Your Puppy

Feeding your puppy requires attention to detail and consistency. Always refer to the Hills Puppy Food feeding guide for portion sizes based on age and weight. Monitor your puppy’s growth and adjust feeding amounts to prevent overfeeding or underfeeding. Transition gradually to new foods to avoid digestive upset. Ensure fresh water is always available. Consult your veterinarian if you notice any signs of food allergies or sensitivities. For large breeds‚ follow specific feeding recommendations to support joint health. Maintain a balanced diet with essential nutrients like DHA for brain development and quality protein for muscle growth. Track your puppy’s progress regularly to ensure they are thriving. With proper feeding‚ your puppy will grow into a healthy‚ energetic adult.

Ensuring a Healthy‚ Happy Puppy

A healthy‚ happy puppy starts with a balanced diet and proper care. Hills Puppy Food provides essential nutrients for growth‚ immunity‚ and energy. Regular veterinary check-ups are crucial to monitor development and address any concerns early. Ensure your puppy has access to fresh water at all times and a safe‚ clean environment. Provide opportunities for exercise and play to support physical and mental well-being. Track growth progress and adjust feeding amounts as needed to maintain an ideal weight. Avoid overfeeding to prevent obesity and related health issues. With consistent care and a nutritious diet‚ your puppy will thrive and become a vibrant‚ energetic companion.

math minutes grade 3 pdf

The Math Minutes Grade 3 PDF is a comprehensive resource designed to help third graders master essential math skills through engaging and structured worksheets. It covers time, multiplication, division, and word problems, providing a fun and effective way to build foundational math abilities. The PDF includes detailed answer keys and instructions, making it an invaluable tool for teachers and parents aiming to support young learners in achieving math proficiency.

Overview of the Resource

The Math Minutes Grade 3 PDF is a well-organized collection of 17 worksheets tailored for third-grade students. It focuses on essential math skills such as time conversion, mental math, and practical word problems. The resource is designed to be both engaging and educational, offering a variety of exercises that cater to different learning styles. With clear instructions and detailed answer keys, it serves as a valuable tool for teachers and parents. The worksheets are structured to gradually build proficiency, ensuring students gain confidence and fluency in math. This PDF is ideal for daily practice, making math learning fun and accessible for young learners.

Importance of Math Practice for Third Graders

Regular math practice is crucial for third graders as it strengthens their foundational skills and builds confidence. At this stage, students are refining their understanding of numbers, operations, and problem-solving strategies. Consistent practice helps improve fluency in arithmetic and prepares them for more complex concepts in higher grades. Engaging in activities like the Math Minutes Grade 3 PDF fosters a routine that makes math enjoyable and reduces anxiety. It also enhances critical thinking and the ability to apply math to real-world situations, which is essential for long-term academic success. By prioritizing math practice, students develop a strong foundation that supports their growth as learners.

Key Math Skills Covered in Grade 3 Math Minutes

The Grade 3 Math Minutes focuses on essential skills like telling time, elapsed time, arithmetic operations, and word problems. It also introduces multiplication, division, and mental math, ensuring a well-rounded math foundation.

  • Telling and writing time to the nearest minute
  • Understanding time intervals and conversions
  • Mastering addition, subtraction, and basic multiplication
  • Solving real-world word problems
  • Developing mental math exercises

Telling and Writing Time to the Nearest Minute

The Math Minutes Grade 3 PDF includes focused exercises on telling and writing time to the nearest minute. Students learn to interpret analog and digital clocks, understanding concepts like “quarter past” and “half past.” Activities involve matching clock faces with digital times and solving word problems related to time. For example, identifying 9:15 as “15 minutes past 9” or 3:45 as “quarter to 4.” These exercises help students develop accuracy and fluency in time-telling skills, which are essential for everyday tasks and more complex math concepts in higher grades. The PDF also includes visual aids and practical scenarios to make learning engaging and relevant.

  • Matching analog and digital clocks
  • Solving time-related word problems
  • Understanding minutes past and to the hour

Elapsed Time and Time Intervals

The Math Minutes Grade 3 PDF dedicates specific sections to mastering elapsed time and time intervals. These exercises help students calculate the duration between two times, such as how many minutes pass from 9:15 AM to 10:10 AM. Activities include word problems like determining how long an event lasts or scheduling tasks within a given timeframe. For example, if a movie starts at 3:20 PM and ends at 4:15 PM, students practice calculating the total duration. The PDF also emphasizes understanding time intervals in minutes, such as identifying the time 25 minutes after 2:00 PM. These skills are reinforced through visual aids and practical scenarios, making it easier for students to grasp and apply them in real-life situations.

  • Calculating duration between start and end times
  • Solving word problems involving elapsed time
  • Understanding intervals in minutes

Conversion Between Minutes and Seconds

The Math Minutes Grade 3 PDF includes exercises that focus on converting time between minutes and seconds, a fundamental skill for understanding time measurement. Students learn to convert minutes into seconds by multiplying by 60 and seconds into minutes by dividing by 60. For example, 25 minutes equals 1,500 seconds, and 120 seconds equals 2 minutes. These problems are presented in clear, straightforward formats, often accompanied by word problems that apply to real-life scenarios, such as timing activities or sports events. The worksheets also include visual aids and step-by-step instructions to help students grasp the concept of time conversion, reinforcing their understanding of time units and relationships.

  • Converting minutes to seconds
  • Converting seconds to minutes
  • Applying conversions to real-world scenarios

Arithmetic Operations in Math Minutes

The Math Minutes Grade 3 PDF focuses on essential arithmetic skills, introducing multiplication and division while reinforcing addition and subtraction. Worksheets include word problems and mental math exercises to build proficiency.

Addition and Subtraction Word Problems

The Math Minutes Grade 3 PDF includes a variety of addition and subtraction word problems designed to help students apply their math skills to real-world scenarios. These exercises cover topics like time, money, and measurement, making learning practical and engaging. The problems are crafted to challenge students to think critically while reinforcing their understanding of basic arithmetic operations. With clear instructions and answer keys provided, the worksheets offer a structured way for students to practice and master these essential skills. The inclusion of word problems also helps develop reading comprehension and problem-solving abilities, ensuring a well-rounded learning experience.

The Math Minutes Grade 3 PDF provides an engaging introduction to multiplication and division, essential skills for third graders. Through fun and interactive worksheets, students are introduced to basic concepts of repeated addition and equal grouping. The resource includes practical examples and word problems to make learning these operations meaningful and relevant. With clear instructions and answer keys, the PDF supports teachers and parents in guiding young learners. The exercises are designed to build confidence and fluency in these foundational math skills, preparing students for more complex problems in the future. This section emphasizes understanding the relationship between multiplication and division, fostering a strong mathematical foundation.

Mental Math Exercises

The Math Minutes Grade 3 PDF includes engaging mental math exercises to sharpen students’ calculation skills and number sense. These activities encourage quick thinking and accuracy without relying on written calculations. Students practice estimating, rounding, and solving simple arithmetic problems in their heads. The exercises often start with a base number, such as 418, and ask students to perform a series of operations mentally. For example, adding or subtracting specific values and circling the correct answer. This approach helps build confidence and speed in mathematical problem-solving. The PDF also includes fun challenges, like spinning a fidget spinner to determine how many times to perform an action, making mental math enjoyable and interactive. These exercises are designed to prepare students for real-world situations where fast calculations are necessary.

Word Problems and Real-World Applications

The Math Minutes Grade 3 PDF incorporates word problems that connect math to everyday scenarios, such as time intervals, measurements, and practical activities. These exercises help students apply math skills to real-life situations, fostering problem-solving abilities and making learning meaningful and engaging. The PDF includes tasks like calculating elapsed time for mowing the lawn or converting minutes to seconds, ensuring students can relate math to their experiences. This approach prepares them to tackle real-world challenges with confidence and accuracy, bridging the gap between classroom learning and practical application.

Solving Time-Related Word Problems

The Math Minutes Grade 3 PDF emphasizes solving time-related word problems, helping students grasp concepts like telling time to the nearest minute and calculating elapsed time intervals. Exercises involve scenarios such as determining the finish time after mowing the lawn for 45 minutes or converting minutes to seconds. These problems enhance understanding of time measurement and intervals, preparing students for real-world applications. The PDF includes tasks like matching clock times to written descriptions and solving word problems involving addition and subtraction of minutes. By practicing these skills, students develop accuracy and confidence in handling time-based math challenges, making it easier to apply these skills in everyday situations.

Practical Measurement Activities

The Math Minutes Grade 3 PDF incorporates engaging measurement activities that connect math to real-world scenarios; Students practice converting units of time, such as changing minutes to seconds, and estimating time intervals; The worksheets include exercises like filling in clocks to show specific times and matching written time descriptions to analog clocks. These activities help students understand practical applications of time measurement, such as calculating how long an activity takes or determining the time until an event. The PDF also provides answer keys and clear instructions, ensuring students can work independently and build confidence in their ability to measure and interpret time effectively. These measurement skills lay a strong foundation for more complex math concepts in later grades.

Structure of the Worksheets

The Math Minutes Grade 3 PDF worksheets are neatly organized, covering a variety of math skills such as addition, subtraction, multiplication, and division. Each worksheet includes word problems, measurement activities, and time-related exercises, ensuring a well-rounded practice experience. The PDF also features clear instructions and detailed answer keys, making it easy for students, teachers, and parents to track progress and understand concepts effectively. This structured approach helps young learners develop consistency and confidence in their math abilities.

Layout and Design of the PDF

The Math Minutes Grade 3 PDF is designed with a clean and visually appealing layout, ensuring that each worksheet is easy to navigate and understand. The PDF features clear sections for different math skills, such as time, multiplication, and word problems, with ample spacing to prevent clutter. The use of bold headings and distinct fonts helps students focus on specific tasks. Visual elements like clocks for time exercises and simple diagrams for measurement activities enhance learning. The worksheets are organized sequentially, allowing for a smooth progression from basic to more complex problems. This user-friendly design makes it easier for third graders to engage with the material and stay motivated throughout their practice sessions.

Answer Keys and Instructions

The Math Minutes Grade 3 PDF includes comprehensive answer keys and detailed instructions, making it a self-contained resource for both students and educators. Each worksheet is accompanied by clear directives, ensuring that third graders can understand the tasks without confusion. The answer keys provide correct solutions for every problem, allowing for easy verification of work and identification of areas needing improvement. Instructions are written in simple, age-appropriate language, while the answer keys are organized for quick reference. This feature not only helps students build confidence but also enables parents and teachers to track progress effectively, fostering a supportive learning environment tailored to young learners’ needs.

Benefits of Using Math Minutes Worksheets

Using Math Minutes Grade 3 PDF worksheets helps students gain confidence, improve problem-solving skills, and enjoy learning in a structured, supportive environment.

Building Confidence in Math Skills

The Math Minutes Grade 3 PDF is designed to empower students by fostering a sense of achievement and confidence in their math abilities. Through consistent practice, students develop fluency in essential skills like time conversion, mental math, and word problems. The structured worksheets allow learners to track their progress, celebrating small victories that boost self-esteem. Instant feedback from answer keys helps students identify and correct mistakes early, reinforcing their understanding. Engaging activities, such as solving elapsed time and multiplication problems, make learning enjoyable while building resilience. By mastering these skills, students gain the confidence to approach more complex math challenges with enthusiasm and determination.

Developing Problem-Solving Abilities

The Math Minutes Grade 3 PDF is a valuable tool for enhancing problem-solving skills in young learners. It offers a variety of engaging math exercises that encourage critical thinking and logical reasoning. Students are challenged with word problems, time-related scenarios, and mental math activities that require strategic problem-solving approaches. The worksheets are designed to promote analytical thinking, helping students break down complex problems into manageable steps. By consistently practicing these exercises, students develop the ability to approach math challenges with confidence and creativity. The resource also includes practical measurement activities that connect math to real-world situations, further enhancing problem-solving abilities and preparing students for future academic success.

How to Use the Math Minutes Effectively

Incorporate Math Minutes Grade 3 PDF into a daily math routine, using the answer keys for feedback. Engage students with fun activities to make learning enjoyable and interactive.

Creating a Daily Math Routine

Establishing a consistent math routine with Math Minutes Grade 3 PDF helps students develop strong foundational skills. Start by setting aside 10-15 minutes daily for focused practice. Use the PDF’s structured worksheets to guide the routine, beginning with quick review problems to reinforce previous concepts. Incorporate a mix of skills, such as time telling, mental math, and word problems, to keep the sessions engaging. Encourage students to attempt problems independently before checking the answer keys for feedback. This routine not only builds math fluency but also fosters a habit of regular practice, essential for long-term academic success. Make it fun by rewarding progress and celebrating milestones!

Engaging Students with Fun Activities

Engaging students with fun activities is key to making math enjoyable and effective. The Math Minutes Grade 3 PDF incorporates interactive elements like fidget spinner problems and mental math exercises to keep students excited. Teachers can use the worksheets creatively, such as turning time-telling exercises into a game or using coloring activities to visualize math concepts. Incorporating real-world scenarios, like measuring elapsed time during a science experiment, makes learning relatable. Parents and educators can also introduce math bingo or scavenger hunts using the PDF’s word problems. These activities not only make math interactive but also help students develop a positive attitude toward learning, fostering a deeper understanding and enthusiasm for math.

Accessing the Math Minutes PDF

The Math Minutes Grade 3 PDF is available for free download from various educational websites, including k5learning.com. Simply search for “3rd Grade Math Minutes 1-50.pdf” or “51-100.pdf” to access the resource instantly.

Free Download Options

The Math Minutes Grade 3 PDF is readily available for free download from various online platforms. Websites like k5learning.com and other educational resources offer direct links to the PDF. You can search for “3rd Grade Math Minutes 1-50.pdf” or “51-100;pdf” to access the worksheets. These files are designed to be user-friendly and include comprehensive math exercises for third graders. The PDFs cover topics such as time, multiplication, division, and word problems, ensuring a well-rounded math practice experience. Additionally, the downloads often include answer keys and instructions, making them a valuable resource for both teachers and parents. No registration or payment is required, making it easily accessible for everyone.

Online Resources and Websites

Several online platforms offer the Math Minutes Grade 3 PDF for easy access. Websites like k5learning.com provide a variety of math resources, including time and measurement worksheets. Educational forums and teacher blogs often share direct links to download the PDF. Additionally, platforms like SlideShare and Google Drive host these worksheets, making them accessible to a wide audience. You can search for “3rd Grade Math Minutes 1-50.pdf” or “51-100.pdf” to find specific sets of exercises. These resources are designed to be user-friendly, with clear instructions and answer keys included. They cater to both teachers and parents seeking structured math practice materials for young learners.

The Math Minutes Grade 3 PDF is a valuable tool for building confidence and skills. It encourages continuous learning and reinforces math fundamentals effectively.

Final Thoughts on the Importance of Math Practice

Regular math practice is essential for building strong foundational skills in third graders. The Math Minutes Grade 3 PDF offers a structured approach to mastering time, multiplication, division, and word problems. By solving problems involving elapsed time, converting minutes to seconds, and tackling mental math exercises, students enhance their problem-solving abilities and confidence. The resource’s focus on real-world applications, such as measuring time intervals and solving practical measurement activities, prepares students for everyday challenges. Consistent practice fosters accuracy, speed, and a deeper understanding of math concepts, making it an invaluable tool for teachers and parents. Encouraging daily math routines ensures continuous improvement and a lifelong love for learning.

Encouraging Continuous Learning

Encouraging continuous learning is crucial for third graders to stay engaged and motivated in their math journey. The Math Minutes Grade 3 PDF provides a variety of engaging activities, such as mental math exercises and time-related word problems, to keep students interested. By incorporating fun elements like fidget spinner activities and practical measurement tasks, the resource makes learning enjoyable. Parents and teachers can support students by creating a daily math routine, ensuring consistent practice. This approach not only reinforces math skills but also fosters a positive attitude toward learning. Continuous exposure to new challenges helps build resilience and a growth mindset, essential for long-term academic success.

clenpiq instructions pdf

Clenpiq is a prescription colonoscopy prep solution approved by the FDA in 2017. It contains sodium picosulfate, magnesium oxide, and anhydrous citric acid, designed for effective bowel cleansing in adults and children aged 9 and above;

1.1 What is Clenpiq?

Clenpiq is a prescription oral solution designed for colon cleansing prior to colonoscopy. It contains sodium picosulfate, magnesium oxide, and anhydrous citric acid, which work together to stimulate bowel movements and ensure a clean colon. Approved by the FDA in 2017, Clenpiq is suitable for adults and children aged 9 and older. It is a ready-to-drink, low-volume solution, making it more convenient compared to traditional prep methods. Clenpiq is intended to be taken in two doses: one the evening before and one the morning of the procedure. Its formulation ensures effective bowel preparation while minimizing discomfort and taste issues, enhancing patient compliance and prep success.

1.2 Purpose of Clenpiq in Colonoscopy Preparation

Clenpiq is specifically designed to cleanse the colon prior to colonoscopy, ensuring a clear view for accurate diagnosis. Its active ingredients stimulate bowel movements, effectively removing stool and debris. The solution is formulated to be low-volume and ready-to-drink, enhancing patient compliance. By achieving thorough cleansing, Clenpiq helps healthcare providers detect abnormalities during the procedure. It is FDA-approved for use in adults and children aged 9 and older, making it a versatile option for colonoscopy preparation. The purpose of Clenpiq is to simplify and improve the effectiveness of bowel preparation, contributing to successful colonoscopy outcomes.

Clenpiq Dosage Instructions

The first dose is taken at 6:00 PM the evening before the procedure, followed by five 8oz cups of clear liquid. The second dose is taken the morning of the procedure, followed by additional clear liquids as directed.

2.1 First Dose: Evening Before the Procedure

The first dose of Clenpiq is taken at 6:00 PM the evening before your colonoscopy. Drink the entire contents of one Clenpiq bottle without diluting it. After consuming the solution, follow up by drinking five 8-ounce cups of clear liquid within the next two hours. This step is crucial for effective colon cleansing. Avoid eating solid foods or dairy products after this dose. Ensure you adhere strictly to the clear liquid diet to maintain proper hydration and prepare your colon for the procedure. This regimen helps ensure a clean and effective bowel preparation for your colonoscopy.

2.2 Second Dose: Morning of the Procedure

The second dose of Clenpiq is taken the morning of your colonoscopy, typically 6 hours after the first dose. Drink the entire contents of the second Clenpiq bottle, just as you did the first dose. After consuming the solution, follow up by drinking additional clear liquids to stay hydrated. However, stop drinking all liquids 2-3 hours before your procedure to ensure your colon is clear of residue. Adhering to this schedule ensures optimal bowel cleansing and prepares you for a successful colonoscopy. Proper timing is essential for the effectiveness of the preparation.

Clear Liquid Diet Guidelines

A clear liquid diet is essential to ensure proper hydration and effective bowel cleansing. Stick to clear fluids like water, broths, and electrolyte drinks to avoid residue.

3.1 Importance of Hydration

Proper hydration is critical for effective bowel cleansing with Clenpiq. Drinking sufficient clear liquids ensures the solution works efficiently and helps prevent dehydration. Start hydrating the day before your procedure, consuming only clear fluids like water, broth, or electrolyte drinks. Avoid solid foods and dairy to maintain a clear digestive tract. After taking Clenpiq, drink five 8-ounce glasses of clear liquids within two hours to aid the cleansing process. Inadequate hydration can lead to poor prep quality, potentially requiring a repeat procedure. Always follow the recommended fluid intake to ensure optimal results and a successful colonoscopy preparation.

3.2 List of Acceptable Clear Liquids

Acceptable clear liquids include water, clear broths (chicken or vegetable), electrolyte solutions like Pedialyte, and herbal teas. Clear juices such as apple or grape (without pulp) are also permitted. Beverages like clear soft drinks (e.g., ginger ale or Sprite) and clear sports drinks (e.g., Gatorade) are allowed. Avoid any liquids with pulp, fiber, or red/purple coloring, as they may interfere with the colonoscopy results. Ensure all liquids are transparent and free of solids. Proper hydration with these fluids is essential for the effectiveness of Clenpiq and overall preparation success.

Contraindications and Warnings

Clenpiq is contraindicated in patients with severe renal impairment, gastrointestinal obstruction, or bowel perforation. Use with caution in patients with known electrolyte imbalances or on blood thinners.

4.1 Severe Renal Impairment

Clenpiq is contraindicated in patients with severe renal impairment (creatinine clearance less than 30 mL/minute). Use in such patients may lead to reduced renal function or electrolyte disturbances. Avoid administration in individuals with significant kidney dysfunction. Consult a healthcare provider for alternative preparation methods if renal impairment is present. Severe renal impairment increases the risk of complications due to the active ingredients in Clenpiq. Patients with this condition should not use Clenpiq without medical guidance. Always prioritize renal health and seek professional advice for appropriate colonoscopy preparation in such cases.

4.2 Gastrointestinal Obstruction or Bowel Perforation

Clenpiq is contraindicated in patients with gastrointestinal obstruction or bowel perforation. Use in these conditions may worsen symptoms or lead to serious complications, such as intestinal rupture or blockage. The active ingredients in Clenpiq, particularly sodium picosulfate, can increase intraluminal pressure, which may exacerbate gastrointestinal obstruction. Patients with a history of bowel perforation or current obstruction should not use Clenpiq. If symptoms of obstruction or perforation arise, such as severe abdominal pain or vomiting, discontinue use and seek immediate medical attention. Consult a healthcare provider for alternative colonoscopy preparation methods in such cases to ensure safe and effective bowel cleansing.

Ingredients of Clenpiq

Clenpiq contains sodium picosulfate, magnesium oxide, and anhydrous citric acid. These ingredients work together to stimulate bowel movements and effectively cleanse the colon for procedures.

5.1 Sodium Picosulfate

Sodium picosulfate is a key active ingredient in Clenpiq, functioning as an osmotic laxative to promote bowel cleansing. It works by drawing water into the colon, softening stool, and stimulating bowel movements. Approved by the FDA, it is safe for use in adults and children aged 9 and above. Sodium picosulfate is designed to prepare the colon for procedures like colonoscopies by ensuring a clean and clear visual field. It is essential to follow the recommended dosage to avoid potential side effects and ensure effectiveness. This ingredient plays a critical role in the formulation of Clenpiq, making it a reliable choice for colonoscopy preparation. Proper use enhances the quality of the procedure and patient outcomes.

5.2 Magnesium Oxide and Anhydrous Citric Acid

Magnesium oxide and anhydrous citric acid are key components of Clenpiq, working synergistically to enhance its effectiveness. Magnesium oxide acts as an osmotic laxative, helping to retain water in the colon, which softens stool and facilitates bowel movements. Anhydrous citric acid aids in the formulation by creating a buffered solution that supports the activity of sodium picosulfate. Together, these ingredients ensure a gentle yet thorough cleansing of the colon, making it easier for healthcare providers to perform a successful colonoscopy. Their combined action helps prevent dehydration and maintains electrolyte balance, contributing to the overall safety and tolerability of Clenpiq for patients preparing for colonoscopy.

Administration Instructions

Clenpiq is taken in two doses: one the evening before the procedure and one the morning of. Do not dilute the solution; drink it as directed.

6.1 How to Open the Clenpiq Bottle

To open the Clenpiq bottle, first break the seal by twisting the cap. Once the seal is broken, fully turn the cap to remove it. Ensure the bottle is upright to avoid spills. After opening, the solution is ready to drink as directed. Handle the bottle carefully to prevent accidental leakage. Always open the bottle immediately before consumption to maintain the integrity of the solution. Follow these steps to ensure safe and proper administration of Clenpiq. Proper opening is essential for effective preparation and to avoid any potential mess or waste.

6.2 Mixing and Consuming the Solution

Clenpiq is a premixed solution and does not require any additional preparation or mixing. Patients should drink the entire contents of one bottle in one sitting. After consuming the solution, it is essential to follow up by drinking five 8-ounce cups of clear liquids within the next two hours to stay hydrated and ensure effectiveness. The solution should be consumed as directed, without dilution or alteration. Proper hydration is crucial for the effectiveness of the preparation. Patients should avoid eating solid foods and stick to clear liquids only during the preparation period. Adhering to the recommended timeline and instructions is vital for optimal results;

Regulatory Information

Clenpiq is FDA-approved for colon cleansing in adults and children aged 9 and above. The FDA granted approval in November 2017, ensuring safety and efficacy for colonoscopy preparation.

7.1 FDA Approval

Clenpiq received FDA approval in November 2017 for colon cleansing in adults and children aged 9 and above. The approval confirms its safety and effectiveness for colonoscopy preparation, ensuring proper bowel cleansing. This regulatory endorsement highlights Clenpiq’s role in improving colonoscopy outcomes by providing a reliable and efficient solution. The FDA’s decision was based on clinical trials demonstrating its efficacy and tolerability. Patients and healthcare providers can trust Clenpiq as a proven option for colonoscopy prep, adhering to strict regulatory standards. This approval underscores Ferring Pharmaceuticals’ commitment to advancing gastrointestinal health solutions.

7.2 Pediatric Use (Ages 9 and Above)

Clenpiq is approved for use in pediatric patients aged 9 and above for colon cleansing prior to colonoscopy. This indication was added based on clinical trials demonstrating its safety and effectiveness in this age group. The dosage and administration for pediatric patients mirror those for adults, with two doses of 5.4 oz each, taken the evening before and the morning of the procedure. The clear liquid diet and hydration guidelines also apply to pediatric patients. Clenpiq’s formulation supports ease of use, making it suitable for children. Parents or guardians should ensure proper administration and adherence to instructions to achieve effective bowel cleansing for a successful colonoscopy.

Patient Guidelines

Patients must follow a clear liquid diet and adhere to medication restrictions. Blood thinners may need adjustment. Follow all instructions carefully to ensure effectiveness.

8.1 Medication Restrictions

Patients should strictly follow medication guidelines provided by their healthcare provider. Blood thinners may need to be paused before the procedure if instructed. Avoid taking any medications that could interfere with the cleansing process unless directed otherwise. Ensure all medications are discussed with your doctor to prevent complications. Hydration is crucial, so clear liquids should be consumed as directed. Adhering to these guidelines ensures the effectiveness of the prep and the safety of the procedure. Failure to follow instructions may result in inadequate cleansing or potential health risks. Always consult your healthcare provider if unsure about any medication adjustments.

8.2 Blood Thinners and Precautions

Patients on blood thinners must follow specific precautions. If instructed by your doctor to pause blood thinners for the procedure, ensure they are not taken the morning of the colonoscopy. Resume only as directed by your healthcare provider post-procedure. Always inform your doctor of all medications, including blood thinners, to avoid potential complications. Clenpiq prep requires careful adherence to medication guidelines to ensure safety and effectiveness. Failure to follow instructions may lead to inadequate cleansing or health risks. Consult your healthcare provider if unsure about medication adjustments or precautions during the prep process.

Handling and Storage Instructions

Do not refrigerate Clenpiq bottles. Store at room temperature, away from direct sunlight. Dispose of empty containers properly, following local recycling or waste disposal guidelines.

9.1 Do Not Refrigerate the Bottles

Clenpiq bottles should not be refrigerated. Store them at room temperature, away from direct sunlight, to maintain the solution’s effectiveness. Refrigeration may alter the consistency or potency of the ingredients. Proper storage ensures the laxative works as intended during your colonoscopy preparation. Always keep the bottles in their original packaging to protect them from light. If mistakenly refrigerated, allow the solution to return to room temperature before use. Ensure the bottles are sealed tightly when not in use to prevent contamination. Following these storage guidelines helps guarantee the preparation’s success and safety. Proper handling is essential for achieving the desired cleansing effect for your procedure.

9.2 Proper Disposal of Empty Containers

Empty Clenpiq containers should be disposed of according to local regulations and guidelines for pharmaceutical waste. Do not crush or burn the bottles, as this may release harmful substances. Check with your healthcare provider or pharmacist for specific instructions on proper disposal methods in your area. Ensure containers are sealed tightly before disposal to prevent leakage or contamination. Proper disposal helps protect the environment and public health. Always follow local waste management protocols for medicinal products. Safe disposal is an important part of responsible medication management and adherence to environmental safety standards. By following these steps, you contribute to a safer and cleaner community.

Effectiveness of Clenpiq

Clenpiq’s effectiveness depends on strict adherence to dosage instructions and proper hydration. Its success is enhanced by following the split-dose regimen and consuming clear liquids as directed.

10.1 Importance of Adhering to Instructions

Adhering to Clenpiq instructions is crucial for optimal colon cleansing. Proper timing, dosage, and hydration ensure effective bowel preparation. Missing doses or deviating from the regimen can reduce efficacy. Following the split-dose schedule and clear liquid diet guidelines maximizes results; Patients must avoid solid foods and medications that interfere with prep. Strict adherence ensures a clean colon, enabling accurate colonoscopy results. Proper preparation minimizes complications and improves procedure outcomes.

10.2 Role of Clear Liquids in Prep Success

Clear liquids play a vital role in Clenpiq’s effectiveness by ensuring proper hydration and facilitating bowel cleansing. Drinking the recommended five 8-ounce cups of clear liquids after each dose helps prevent dehydration and enhances the solution’s action. Clear liquids aid in flushing out residue, ensuring a clean colon for accurate colonoscopy results. Proper hydration maintains electrolyte balance and supports the laxative effect of sodium picosulfate. Adhering to the clear liquid diet guidelines is essential for achieving optimal bowel preparation and avoiding complications. Patients should strictly follow the timeline for consuming clear liquids to maximize the effectiveness of Clenpiq and ensure a successful procedure.

Clenpiq is an FDA-approved colonoscopy prep solution for adults and children over 9. It ensures effective bowel cleansing when instructions, hydration, and clear liquid guidelines are followed strictly.

11.1 Final Tips for a Successful Colonoscopy Prep

To ensure a successful colonoscopy prep, follow the instructions provided in the Clenpiq guidelines precisely. Stay hydrated by drinking plenty of clear liquids as directed, and avoid solid foods. Complete the entire Clenpiq regimen, including both doses, to achieve optimal bowel cleansing. Do not refrigerate the bottles, and drink the solution as instructed without dilution. Avoid medications that may interfere with the prep unless advised by your healthcare provider. If you experience any issues or discomfort, consult your doctor promptly. Remember, adhering to the clear liquid diet and timing of doses is crucial for effective preparation and a successful procedure.

11.2 Resources for Additional Support

For further assistance with your Clenpiq preparation, refer to the official Clenpiq Instructions for Use guide provided with your prescription. Visit the official Clenpiq website for detailed prep videos, FAQs, and downloadable resources. Contact your healthcare provider or pharmacist for personalized guidance. Ferring Pharmaceuticals, the manufacturer, offers patient support services, including a dedicated hotline and online materials. Additionally, consult the FDA-approved prescribing information for comprehensive safety details. If you encounter any issues or have concerns, reach out to your medical team for clarification. Utilize these resources to ensure a smooth and effective colonoscopy preparation experience.

paladin pathfinder guide

The Paladin is a divine warrior, blending martial prowess with sacred power. Bound by oaths, they serve as defenders, healers, and beacons of justice in Pathfinder campaigns.

1.1 Overview of the Paladin in Pathfinder

The Pathfinder Paladin is a versatile class that combines martial prowess with divine magic. They are champions of justice, sworn to protect the innocent and vanquish evil. Paladins are highly durable, with access to heavy armor and divine grace, which enhances their saving throws. Their abilities include smiting enemies, healing allies with lay on hands, and channeling energy to support or harm. Paladins are oaths-bound, guiding their actions and defining their role in both combat and narrative. They excel as both defenders and healers, making them invaluable to any party.

1.2 Role of the Paladin in a Party

The Paladin serves as a cornerstone of any party, fulfilling multiple roles seamlessly. They are formidable defenders, using their martial skills and divine auras to protect allies. Paladins also act as healers, employing lay on hands and channel energy to mend wounds. Their ability to smite evil foes makes them potent damage dealers. Additionally, their charisma and divine authority allow them to serve as the party’s face, negotiating and leading with moral authority. This versatility ensures the Paladin is both a combat powerhouse and a narrative anchor for the group.

1.3 Key Abilities and Features

Paladins possess unique divine abilities that set them apart. Smite Evil deals bonus damage to evil creatures, scaling with level. Lay on Hands allows healing or harming, while Channel Energy provides area effects. Divine Grace enhances saves, making Paladins resilient. Their Aura of Courage boosts allies’ morale, preventing fear. These abilities, combined with martial prowess, make the Paladin a versatile and powerful class, capable of fulfilling both combat and support roles effectively in any adventuring party. Their features are both tactical and narrative, enhancing the party’s overall performance.

Paladin Class Overview

The Paladin combines martial prowess with divine magic, serving as a versatile Defender, Striker, and Healer. Their hybrid role makes them adaptable to various party needs and strategies.

2;1 The Paladin’s Role as a Martial and Divine Class

The Paladin seamlessly merges martial combat skills with divine spellcasting, offering versatility in both battle and support roles. Their martial prowess allows them to excel as front-line defenders or damage dealers, while their divine abilities provide healing, buffs, and protection. This dual nature makes Paladins adaptable, capable of fulfilling multiple roles within a party, ensuring they remain integral to any adventuring group’s success in Pathfinder.

2.2 Alignment and Oath Restrictions

Paladins are bound by strict moral and ethical codes, with their alignment closely tied to their chosen oaths. Most Paladins are lawful good, though some archetypes allow for variations. Their divine powers are contingent upon upholding these oaths, and failure to do so risks losing access to key abilities. Each oath imposes specific behavioral restrictions, shaping the Paladin’s role in both combat and roleplay. This adherence to a sacred vow ensures Paladins remain paragons of virtue, embodying their order’s ideals in Pathfinder.

2.3 Base Class Features and Progression

Paladins gain a mix of martial and divine features, with progression focused on enhancing combat and healing capabilities. Key abilities include Smite Evil, Lay on Hands, and Divine Grace, which improve as they level up. Their Channel Energy feature allows them to heal or harm, scaling with their class level. Paladins also gain access to spells, starting with limited slots that increase progressively. The class further emphasizes high saving throws and proficiency in armor and weapons, making them versatile defenders and support characters in Pathfinder campaigns.

Choosing the Right Race for Your Paladin

Selecting the right race enhances a Paladin’s abilities. Races like Aasimar, Tiefling, and Human offer bonuses to charisma, aligning with the Paladin’s divine and martial prowess, optimizing their builds.

3.1 Popular Races for Paladins

Popular races for Paladins include Aasimar, Tiefling, and Human. Aasimar offer innate bonuses to charisma, aligning with Paladins’ divine magic. Tiefling provide spell-like abilities and racial traits that complement smite evil. Humans gain bonus feats, enhancing combat effectiveness. These races synergize with Paladin abilities, making them top choices for players seeking to optimize their builds for both martial and divine prowess in Pathfinder campaigns. Each race offers unique advantages, tailoring to specific playstyles.

3.2 Racial Traits and Their Impact on Paladin Builds

Racial traits significantly influence Paladin builds, enhancing core abilities. Aasimar gain charisma bonuses, boosting divine magic and leadership. Tiefling offer spell-like abilities, adding versatility in combat. Humans receive bonus feats, improving martial prowess. Dwarf and Elf traits provide defensive and offensive boosts, respectively. Each race’s unique abilities synergize with Paladin features, allowing players to tailor their characters for specific roles, whether as healers, tanks, or damage dealers. These traits ensure a customized approach to building an effective Paladin.

Paladin Archetypes

Paladin archetypes offer diverse playstyles, from the Oath Against Corruption to the Hospitaler. Each archetype provides unique abilities, shaping the Paladin’s role in combat and storytelling.

4.1 Overview of Popular Archetypes

Popular Paladin archetypes include the Oath Against Corruption, Hospitaler, and others. Each offers unique twists, such as enhanced healing or improved combat tactics. These archetypes allow players to customize their Paladin’s role, whether as a devoted healer or a formidable tank. By choosing an archetype, Paladins can specialize in specific duties, making them versatile assets to any party. Archetypes enhance both combat effectiveness and roleplaying depth.

4.2 Oath Against Corruption

The Oath Against Corruption archetype focuses on purity and righteousness. Paladins sworn to this oath gain abilities to protect the innocent and vanquish evil. They excel at identifying and combating corrupt forces, often gaining bonuses against evil-aligned enemies. This archetype emphasizes the Paladin’s role as a moral guardian, enhancing their divine magic and combat prowess against malevolent foes. It is ideal for players seeking a traditional, justice-oriented Paladin.

4.3 Hospitaler and Other Support-Focused Archetypes

The Hospitaler archetype transforms the Paladin into a dedicated healer and protector. Focused on preserving life, they gain enhanced healing abilities and protective auras. This archetype is ideal for players who prefer to support their party rather than deal damage. Hospitalers excel at keeping allies alive and can even use their divine magic to bolster morale. Other support-focused archetypes offer similar utility, emphasizing the Paladin’s role as a guardian and healer, making them invaluable in any adventuring party.

Feats for Paladins

Paladins rely on feats to enhance combat and divine abilities, ensuring they excel as defenders, healers, or damage dealers. Essential feats boost their martial and divine prowess.

5.1 Essential Combat Feats

Essential combat feats for Paladins enhance their martial effectiveness. Power Attack and Weapon Focus improve melee potency, while Improved Initiative ensures they act first in battles. Cleave allows for multiple attacks, clearing clusters of foes. Additionally, Smite Evil boosts damage against evil enemies, making it a core choice. These feats ensure Paladins remain formidable defenders and strikers, balancing offense and defense seamlessly in any combat scenario.

5.2 Divine and Martial Feat Selections

Paladins can combine divine and martial feats for versatility. Divine Might enhances melee attacks with charisma, while Sacred Weapon grants bonuses to attacks and damage. Feats like Channel Smite merge combat and divine energy, allowing Paladins to channel energy through smite attacks. Selective Channeling improves healing efficiency, and Vestment of the Champion boosts armor capabilities. These feats highlight the Paladin’s unique blend of martial prowess and divine power, enabling them to excel in both combat and support roles effectively.

5.3 Trait Choices for Paladins

Traits enhance a Paladin’s abilities and background. Tiefling traits boost self-healing with Lay on Hands, while Wayang increases Channel Energy efficiency. Some traits like Deft Acrobatics improve mobility, and Warrior Spirit enhances combat prowess. Choosing traits that align with your Paladin’s build, such as boosting Charisma or enhancing martial skills, ensures a well-rounded character. These selections complement class features and define your Paladin’s unique role in the party, whether focusing on offense, defense, or support.

Paladin Spells and Divine Magic

Paladins wield divine magic, casting spells that heal, protect, and smite enemies. Their spell list includes Cure Wounds, Bless, and Summon Monster, enhancing their martial and supportive roles.

6.1 Overview of the Paladin Spell List

The Paladin’s spell list combines martial and divine power, offering versatile options for combat and support. Spells like Cure Wounds and Bless provide healing and buffs, while Smite Evil and Summon Monster enhance their offensive capabilities. Their divine magic allows them to protect allies, debilitate foes, and adapt to various combat scenarios, making them invaluable in both offense and defense. This flexibility ensures Paladins can fulfill multiple roles within a party effectively.

6.2 Key Spells for Different Levels

Paladins gain access to spells that enhance their combat and support capabilities. At lower levels, spells like Cure Wounds and Bless provide healing and buffs. Mid-level spells such as Smite Evil and Summon Monster offer offensive and strategic advantages. Higher-level spells like Holy Smite and Divine Power amplify their martial prowess. These spells allow Paladins to adapt to various challenges, making them versatile defenders and healers in any party composition. Their divine magic grows stronger with each level, ensuring they remain effective in both combat and support roles.

6.3 Channel Energy and Its Applications

Channel Energy is a cornerstone of the Paladin’s divine abilities, allowing them to heal wounds or deal damage to undead. At higher levels, this power becomes more potent, affecting multiple targets. It can be used strategically to bolster allies or debilitate foes. Proper management of this resource is crucial, as it enhances the Paladin’s versatility in both combat and support scenarios. This ability underscores their role as a divine intermediary, capable of profound impact on the battlefield.

Paladin Abilities and Mechanics

Paladins wield divine grace, smite evil, and lay on hands, combining martial skills with sacred powers to protect and inspire allies while vanquishing foes effectively.

7.1 Smite Evil and Its Variations

Smite Evil is a hallmark ability, allowing paladins to deal bonus damage against evil outsiders, undead, and dragons. On the first hit, the damage increases significantly, scaling with their level. This ability is potent in combat, making paladins formidable against specific foes. Variations through archetypes and feats can enhance its effectiveness, ensuring versatility in different playstyles while maintaining its core purpose as a powerful tool against evil forces.

7.2 Lay on Hands and Its Tactical Uses

Lay on Hands is a versatile ability that channels divine energy to heal wounds or harm undead. Paladins can use it creatively in combat, such as healing themselves or allies between attacks or targeting undead foes with radiant energy. This ability becomes even more potent with archetypes and feats that enhance its effects, making it a cornerstone of a paladin’s support and combat tactics. Its swift action usability ensures it remains a valuable tool in dynamic battlefield situations.

7.3 Divine Grace and Save Bonuses

Divine Grace grants paladins a divine bonus to all saving throws, enhancing their resilience against magical and mundane threats. This ability scales with level, providing increased protection as the paladin grows in power. Combined with high Charisma, it makes paladins formidable defenders, capable of withstanding even the most potent effects. This divine protection ensures they remain steadfast in battle, upholding their oaths and safeguarding their allies from harm, making them reliable pillars of defense in any adventuring party.

Building Your Paladin

Building a Paladin involves selecting race, archetype, and feats to align with their oath and role; Focus on divine magic, martial prowess, and party support to create a versatile champion.

8.1 Tank Paladin Build

The Tank Paladin excels at absorbing damage and protecting allies. Focus on high Constitution and Wisdom for survivability. Select defensive feats like Shield Mastery and Improved Shield Bash. Archetypes like the Hospitaler enhance healing and support. Utilize heavy armor and shields to maximize AC. Lay on Hands and Channel Energy provide self-healing and utility. This build ensures the Paladin stands as an unyielding fortress, safeguarding the party while maintaining offensive capabilities.

8.2 DPS-Focused Paladin Build

A DPS-focused Paladin maximizes damage output through martial prowess and divine might. Prioritize Strength and Charisma for enhanced melee attacks. Feats like Power Attack and Cleave boost combat effectiveness. Archetypes such as the Oath Against Corruption amplify offensive capabilities. Utilize high-damage weapons and select spells like Bless and Divine Favor for combat enhancement. This build transforms the Paladin into a formidable striker, delivering devastating blows while maintaining some defensive and supportive utility.

8.3 Support and Healing Paladin Build

The Support and Healing Paladin excels at restoring health and bolstering allies. Focus on Charisma and Wisdom to enhance divine magic. Archetypes like the Hospitaler amplify healing abilities. Feats such as Extra Lay on Hands and Channel Smite maximize utility. Use spells like Cure Wounds and Bless to sustain the party. This build ensures the Paladin serves as a reliable healer and buffer, keeping allies alive and empowered during combat, while still contributing to offense through judicious use of divine energy.

Paladin Equipment and Armor

Paladins rely on sacred armor and divine weapons to uphold their oaths. They wear heavy armor for protection and wield holy avengers to smite enemies, ensuring righteousness prevails.

9.1 Weapon and Armor Choices

Paladins favor weapons and armor that align with their sacred oaths, often choosing holy avengers for their versatility and heavy armor for maximum protection. These divine warriors benefit from magic items like Magic Vestment to enhance their equipment; Their weapon and armor selections are crucial for balancing offense, defense, and mobility, ensuring they can fulfill their roles as both protectors and combatants. Proper gear optimization is key to their effectiveness in battle.

9.2 Magic Items and Gear Optimization

Paladins benefit greatly from magic items that enhance their martial and divine capabilities. Magic Vestment and Holy Avenger weapons are particularly effective, as they amplify damage and provide additional bonuses. Armor enhancements like Cloak of Resistance and Belt of Physical Perfection boost defensive stats. Optimizing gear involves balancing offense, defense, and mobility while ensuring items align with the paladin’s oath. Strategic selection of magic items is crucial for maximizing effectiveness in both combat and roleplay scenarios;

9.3 Mounts and Animal Companions

Paladins often bond with mounts and animal companions, enhancing their combat and exploration capabilities. Sacred mounts, like Paladin’s Mount, offer increased strength and loyalty. Animal companions provide utility, such as scouting or aiding in battle. Gear optimization for mounts, including Barding and Magical Bridles, ensures they remain effective allies. These companions symbolize the paladin’s commitment to justice and are integral to their role as both warriors and protectors in the party.

Paladin Combat Tactics

Paladins excel in combat through strategic positioning, aura utilization, and efficient resource management, ensuring they protect allies while delivering divine justice to enemies effectively in battle.

10.1 Positioning and Initiative

Proper positioning is crucial for Paladins to maximize their impact. By securing high initiative, they can act swiftly, ensuring they strike first in combat. Positioning themselves between enemies and allies protects the party, while maintaining distance from overwhelming clusters prevents being flanked. Using high ground or cover enhances survivability. Additionally, casting buffs at the start ensures the party begins combat with an advantage. This strategic placement allows Paladins to effectively control the battlefield and safeguard their companions while dealing significant damage to foes.

10.2 Using Auras and Buffs Effectively

Paladins excel at bolstering allies and weakening foes through their auras and buffs. Abilities like Crusader’s Flair and Shield of the Righteous provide aura bonuses to attack rolls and AC, respectively. Activating these before combat ensures your party starts with an advantage. Use higher-level auras strategically, such as Call to Oneness for mobility or Crusader’s Focus for precision. Combine these with spells like Bless or Magic Weapon to amplify effectiveness; Properly timing and layering these effects maximizes their impact in battle.

10.3 Managing Resources in Combat

Paladins must carefully manage their limited-use abilities to maximize combat effectiveness. Lay on Hands and Channel Energy are potent but finite, so reserve them for critical moments. Use Smite Evil early in encounters to capitalize on its bonus damage and attack enhancements. Keep track of remaining spells and ensure their use aligns with the battle’s flow. Efficient resource management ensures the Paladin remains a formidable force throughout the fight, balancing offense, defense, and support roles seamlessly. Proper timing enhances both survival and impact.

Advanced Paladin Techniques

Advanced Paladins refine their playstyle through mythic paths, prestige classes, and multiclassing, enhancing their divine and martial capabilities. High-level builds often focus on optimizing smite, spellcasting, and aura effects for maximum impact.

11.1 Mythic Path and Prestige Classes

Mythic paths like the Angel enhance Paladins with divine powers, granting abilities like Heavenly Form and Divine Intervention. Prestige classes such as the Sentinel or Champion of the Faith offer specialized features, boosting combat and divine abilities. These advanced options allow Paladins to refine their role, whether as unstoppable warriors, devoted protectors, or charismatic leaders. Choosing the right path or prestige class depends on the player’s vision for their Paladin, ensuring a cohesive and powerful high-level build.

11.2 Multiclassing Options

Multiclassing a Paladin can create versatile builds. Combining with Cleric enhances divine magic, while Fighter boosts martial prowess. Bard multiclassing adds charisma utility, making Paladins effective faces. Ranger or Barbarian blends combat styles for unique playstyles. Each multiclass option offers strategic trade-offs, allowing Paladins to adapt to various roles without losing core identity. However, care is needed to maintain class cohesion and avoid diluting key abilities, ensuring a balanced yet powerful character. Multiclassing rewards creativity and strategic planning in Pathfinder.

11.3 High-Level Play and Endgame Builds

At high levels, Paladins excel in specialized roles. Their smite evil ability becomes devastating, especially against powerful foes. Divine magic and aura abilities enhance party performance. Endgame builds often focus on maximizing damage, healing, or tanking; The Tank Paladin excels at absorbing damage, while DPS-focused builds leverage high attack bonuses and smite enhancements. Support builds optimize Channel Energy for mass healing or buffering. Strategic play involves managing resources like lay on hands and divine grace. High-level Paladins are versatile but require careful build planning to maintain effectiveness.

Paladin Playstyles and Ethics

Paladins embody righteousness, adhering to strict moral codes. Their oaths guide actions in combat and roleplay. Players must balance ethics with practicality, ensuring alignment with their character’s beliefs.

12.1 Staying True to Your Oath

A paladin’s oath is their cornerstone, defining their purpose and conduct. Upholding it means adhering to specific tenets, whether protecting the innocent, vanquishing evil, or maintaining justice. Consistency in actions and decisions ensures character integrity. Breaking the oath risks severe penalties, including loss of divine abilities. Roleplayers must weave their oath into every interaction, making it central to their identity and story. This commitment enhances both gameplay and narrative depth.

12.2 Moral Dilemmas and Roleplaying

Paladins often face complex moral dilemmas, as their oaths demand strict adherence to justice, mercy, or protection. Roleplaying these challenges enhances the story, as players must balance personal beliefs with party goals. For instance, sparing an evil foe or aiding a morally ambiguous cause can spark internal conflict. These situations deepen character development and create memorable narratives. A paladin’s rigid code of conduct can clash with companions, adding layers of tension and realism to the adventure. This dynamic enriches both individual and group storytelling.

12.3 Balancing Combat and Roleplay

Balancing combat prowess and roleplay is crucial for paladins, as their abilities and oaths are deeply tied to their narrative. Players must weave their character’s convictions into both dialogue and action. For example, using smite evil in combat reflects their righteousness, while adhering to their oath in social interactions maintains authenticity. This synergy creates a cohesive character identity, making the paladin both a formidable ally in battle and a compelling figure in roleplay. Harmonizing these aspects enhances the overall gaming experience.

The Paladin is a divine warrior, blending martial prowess with sacred power. Bound by oaths, they serve as defenders, healers, and beacons of justice in Pathfinder campaigns.

13.1 Final Thoughts on Playing a Paladin

The Paladin is a powerful and versatile class, excelling as both a defender and a healer. Their divine abilities, such as Smite Evil and Lay on Hands, make them invaluable in combat and out. Choosing the right race and archetype can significantly enhance their effectiveness. Paladins must stay true to their oaths, balancing roleplay with combat efficiency. With proper builds and gear, they can be unstoppable champions of justice, bringing hope to any adventuring party.

13.2 Resources for Further Learning

For deeper insight into the Paladin class, explore guides like Ilzury’s Guide to the Pathfinder Paladin and RPGBOT’s Paladin Handbook. These resources offer detailed builds, archetype analysis, and strategies for mastering divine abilities. Additionally, forums and community discussions provide tips on race selection, feat optimization, and spell usage. Websites like Pathfinder Archives and D20PFSRD are excellent for rule clarifications and class feature breakdowns, ensuring you maximize your Paladin’s potential in any campaign.

12 steps celebrate recovery pdf

Celebrate Recovery is a faith-based program founded by Rick Warren and John Baker, offering a supportive fellowship for individuals struggling with hurts, habits, and hang-ups. It emphasizes the transformative power of Jesus Christ through the 12 Steps and 8 Recovery Principles, fostering spiritual growth and healing. The program is designed to create a safe space for sharing experiences, strengths, and hopes, helping participants find freedom and restoration in their lives.

1.1 Overview of the Program

Celebrate Recovery is a Christ-centered program designed to help individuals overcome hurts, habits, and hang-ups. It combines the 12 Steps of recovery with biblical teachings, emphasizing spiritual growth and healing. The program creates a safe, supportive environment where participants share their experiences, strengths, and hopes. Weekly meetings include teachings, testimonies, and small-group discussions. The program is rooted in the belief that Jesus Christ is the ultimate healer and that His teachings provide the foundation for lasting change. By focusing on faith and community, Celebrate Recovery offers a holistic approach to recovery, addressing emotional, mental, and spiritual needs.

1.2 Purpose and Goals

The purpose of Celebrate Recovery is to provide a faith-based, supportive environment where individuals can overcome hurts, habits, and hang-ups. Its primary goal is to help participants experience spiritual transformation through Christ-centered teaching and fellowship. By applying the 12 Steps and 8 Recovery Principles, the program aims to empower individuals to break free from destructive patterns and live a life of wholeness. Celebrate Recovery seeks to create a safe space for healing, growth, and accountability, encouraging participants to deepen their relationship with God and find purpose in their journey toward recovery and restoration.

1.3 The Role of Faith in Recovery

Faith is the cornerstone of Celebrate Recovery, emphasizing the power of Jesus Christ to transform lives. The program integrates biblical principles with the 12 Steps, encouraging participants to rely on God for healing and strength. Through prayer, meditation, and scripture, individuals connect with a higher power, fostering spiritual growth and accountability. Faith not only provides hope but also equips participants to resist sin and embrace lasting change. Celebrate Recovery highlights the importance of surrendering to God’s will, trusting in His plan for restoration, and allowing His grace to guide the recovery journey.

The 12 Steps of Celebrate Recovery

The 12 Steps of Celebrate Recovery are biblically-based principles guiding individuals toward healing from hurts, habits, and hang-ups. Rooted in faith, they provide a pathway to restoration.

2.1 Step 1: Admitting Powerlessness

Step 1 of Celebrate Recovery involves admitting powerlessness over addictions and compulsive behaviors, recognizing that life has become unmanageable. This step is rooted in the biblical truth that apart from God, true recovery is impossible. Participants acknowledge their inability to control their harmful habits and surrender to God’s grace. This admission opens the door to spiritual healing and the realization of their need for a Higher Power. By embracing humility and honesty, individuals take the first crucial step toward freedom and restoration, aligning with the program’s foundational principle of surrendering to God’s care.

2.2 Step 2: Believing in a Higher Power

Step 2 of Celebrate Recovery focuses on developing a belief in a Higher Power, recognizing God as the source of strength and guidance. This step emphasizes trusting in God’s ability to restore and transform lives. Participants are encouraged to embrace the biblical truth that faith in God is essential for healing and recovery. By surrendering to God’s plan, individuals begin to see their struggles in a new light, fostering hope and spiritual renewal. This step lays the foundation for a deeper relationship with God, enabling participants to move forward in their journey toward freedom and wholeness.

2.3 Step 3: Deciding to Turn Will and Life Over to God

Step 3 involves a profound decision to surrender one’s will and life to God, trusting in His divine care and wisdom. This step encourages individuals to let go of self-control and embrace God’s leadership, believing that His plans are for their good. By relinquishing control, participants open themselves to spiritual transformation and guidance, aligning their lives with biblical principles. This surrender fosters humility and dependence on God, allowing Him to work in their lives and bring about lasting change and freedom from destructive patterns.

2.4 Step 4: Conducting a Moral Inventory

Step 4 requires individuals to conduct a thorough moral inventory of themselves, examining their thoughts, feelings, and actions. This step emphasizes honesty and self-awareness, encouraging participants to identify patterns of sin, hurtful behaviors, and areas where they have caused harm. By reflecting on past mistakes and shortcomings, individuals can take responsibility for their actions and prepare to confess them to God and others. This process aligns with biblical teachings, such as Psalm 139:23-24, which encourages self-examination and surrender to God’s truth, fostering accountability and spiritual growth in the recovery journey.

2.5 Step 5: Admitting Wrongdoings to God, Ourselves, and Others

Step 5 involves confessing sins and wrongdoings to God, oneself, and others. This step emphasizes transparency and accountability, encouraging individuals to acknowledge the harm caused by their actions. By sharing their moral inventory with a trusted person, participants experience liberation from guilt and shame. Biblical teachings, such as 1 John 1:9, underscore the importance of confession for spiritual cleansing. This step fosters humility, trust, and healing, as individuals take responsibility for their past and seek forgiveness, aligning with Celebrate Recovery’s goal of restoration through faith and fellowship.

2.6 Step 6: Being Ready to Let Go of Defects

Step 6 focuses on humility and willingness to surrender defects of character. It involves recognizing that God’s plan for transformation requires letting go of harmful traits. Participants prayerfully examine their willingness to surrender shortcomings, understanding that true change comes from God. This step aligns with biblical teachings like Romans 12:2, emphasizing spiritual transformation. By embracing this principle, individuals open themselves to God’s grace, allowing Him to remove defects and replace them with virtues. This step is a cornerstone of spiritual growth, fostering a deeper reliance on God’s power and guidance in the recovery journey.

2.7 Step 7: Humbly Asking God to Remove Shortcomings

Step 7 encourages participants to humbly ask God to remove their shortcomings. This step emphasizes surrendering defects of character to divine will, trusting in God’s power for transformation. Rooted in biblical teachings, it reflects James 4:10, which highlights humility before God. By prayerfully seeking God’s intervention, individuals acknowledge their inability to change on their own. This step fosters a deeper reliance on God, promoting spiritual growth and freedom from self-destructive patterns. Celebrate Recovery’s Step 7 aligns with the principle of yielding to God’s care, a key aspect of the program’s faith-based approach to healing and restoration.

2.8 Step 8: Making a List of Those Harmed and Willing to Make Amends

Step 8 involves creating a list of individuals harmed by our actions and becoming willing to make amends. This process promotes accountability and healing by acknowledging the impact of our behavior on others. Rooted in biblical principles of restitution and forgiveness, it encourages participants to take responsibility for past wrongs. Celebrate Recovery emphasizes that making amends is not about self-punishment but about restoring relationships and demonstrating God’s transformative power. This step fosters humility, empathy, and a commitment to repairing harm caused to others, aligning with the program’s focus on spiritual growth and relational restoration.

2.9 Step 9: Making Direct Amends Where Possible

Step 9 focuses on making direct amends to those harmed, whenever possible. This involves taking action to repair relationships damaged by past actions, demonstrating accountability and commitment to change. Rooted in biblical teachings, such as Matthew 5:23-24, it emphasizes reconciling with others before worshiping God. Celebrate Recovery encourages participants to approach amends with humility, ensuring restitution is made in a way that honors God and promotes healing. This step is crucial for rebuilding trust and demonstrating the transformative power of faith in action, fostering genuine restoration and spiritual growth in the recovery journey.

2.10 Step 10: Continuing to Take Personal Inventory

Step 10 emphasizes the importance of maintaining ongoing self-awareness and accountability. It involves regularly examining one’s actions, thoughts, and motives to ensure alignment with spiritual principles. Celebrate Recovery encourages participants to practice honesty and humility, promptly admitting when they are wrong. This step is rooted in biblical teachings, such as 1 Corinthians 10:12, which warns against complacency. By continuing to take personal inventory, individuals foster spiritual growth, strengthen their relationship with God, and develop a consistent practice of self-reflection. This step ensures that recovery is not a one-time event but a lifelong journey of transformation and accountability.

2.11 Step 11: Seeking Spiritual Growth Through Prayer and Meditation

Step 11 focuses on deepening spiritual connection through prayer and meditation. It encourages individuals to seek a conscious contact with God, improving their understanding of His will. Celebrate Recovery emphasizes the importance of prayer as a means to strengthen faith and guidance. Through meditation, participants reflect on scripture and its application in their lives. This step is biblically grounded, as seen in Colossians 3:16, which highlights the value of letting Christ’s teachings dwell richly in one’s heart. Regular prayer and meditation foster spiritual growth, providing clarity and strength for ongoing recovery and a deeper relationship with God.

2.12 Step 12: Carrying the Message to Others

Step 12 emphasizes sharing the message of recovery with others. Having experienced spiritual transformation, individuals are encouraged to carry this message to those still suffering. This step is rooted in Galatians 6:1, which calls believers to gently restore others. By sharing their stories, participants inspire hope and guide others toward healing. Celebrate Recovery fosters a community where individuals can support one another, creating a ripple effect of faith and recovery. This step not only helps others but also deepens the speaker’s commitment to their own spiritual growth, embodying the program’s purpose of fellowship and restoration through Christ’s love.

The 8 Recovery Principles

The 8 Recovery Principles are based on the Beatitudes, guiding individuals to align their lives with biblical teachings. They emphasize surrendering to God, seeking His will, and transforming through faith, complementing the 12 Steps to foster spiritual growth and healing.

3.1 Principle 1: Realize I am not God

Principle 1 emphasizes acknowledging human limitations and surrendering control to God. It aligns with Step 1 of the 12 Steps, admitting powerlessness and unmanageability in life. This principle encourages individuals to recognize their inability to control addictive behaviors or harmful tendencies, fostering humility and openness to divine guidance. By accepting that they are not God, participants begin their journey toward healing and spiritual growth, grounded in the belief that surrendering to a Higher Power is essential for recovery. This foundational principle sets the stage for the transformative work of Celebrate Recovery, rooted in biblical truths and faith-based principles.

3.2 Principle 2: Earnestly Believe that God Exists

Principle 2 focuses on fostering a deep belief in God’s existence and His active role in recovery. It aligns with Step 2 of the 12 Steps, which emphasizes faith in a Higher Power. This principle encourages individuals to trust in God’s love and sovereignty, recognizing His presence in their struggles and healing journey. By earnestly believing in God, participants build a foundation of hope and trust, essential for surrendering control and embracing spiritual transformation. This principle underscores the importance of faith as a cornerstone of Celebrate Recovery, guiding individuals toward reliance on divine grace and support.

3.3 Principle 3: Deciding to Commit to God’s Care

Principle 3 invites individuals to make a conscious decision to entrust their lives to God’s care. This step, aligned with Step 3 of the 12 Steps, encourages surrendering one’s will to God’s guidance. It emphasizes trust in His wisdom and love, acknowledging His sovereignty over all aspects of life. By committing to God’s care, participants embrace spiritual transformation, seeking His will above their own desires. This principle fosters dependence on divine grace, enabling individuals to live a life centered on faith and obedience. It is a foundational step toward healing and freedom, rooted in the belief that God’s plan is greater than human understanding.

3.4 Principle 4: Openly Examining and Sharing My Life

Principle 4 encourages individuals to openly examine and share their lives with others, fostering transparency and accountability. This step aligns with Steps 4 and 5 of the 12 Steps, where participants conduct a moral inventory and admit their wrongdoings. By sharing their struggles and experiences, individuals create a safe space for healing and growth. This principle emphasizes the importance of fellowship and vulnerability, allowing others to provide support and encouragement. Through open sharing, participants experience freedom from shame and guilt, enabling them to walk in authenticity and integrity. This step is vital for building trusting relationships within the recovery community.

3.5 Principle 5: Voluntarily Submitting to Every Change God Wants

Principle 5 focuses on surrendering to God’s will, allowing Him to transform every area of life. Rooted in the Beatitude, “Blessed are the merciful,” it calls for humility and readiness to change. This principle aligns with Steps 3 and 7 of the 12 Steps, emphasizing trust in God’s plan. By submitting voluntarily, individuals open themselves to spiritual growth and healing. Celebrate Recovery teaches that true freedom comes from yielding to God’s purpose, rather than clinging to self-reliance. This step fosters a deeper reliance on divine guidance, enabling participants to embrace necessary transformations for a life of wholeness and purpose.

3.6 Principle 6: Evaluating and Sharing My Thoughts

Principle 6 encourages individuals to examine and share their thoughts openly, aligning with the Beatitude, “Blessed are the pure in heart.” This step involves reflecting on thoughts, identifying those that hinder recovery, and aligning them with God’s truth. By sharing thoughts in a safe community, participants gain clarity, accountability, and spiritual growth. Rooted in Step 4 and Step 10, this principle promotes self-awareness and honesty, fostering a deeper connection with God and others. Celebrate Recovery emphasizes that sharing thoughts breaks strongholds, allowing individuals to live authentically and experience freedom through vulnerability and trust in God’s guidance.

3.7 Principle 7: Resisting Sin and Asking for God’s Help

Principle 7 focuses on resisting sin and seeking God’s help, rooted in the Beatitude, “Blessed are those who hunger and thirst for righteousness.” This principle emphasizes recognizing the triggers of sinful behavior and surrendering them to God. By acknowledging human weakness, individuals learn to rely on divine strength to overcome temptations. Celebrate Recovery teaches that resisting sin involves confessing it, turning away from it, and trusting in God’s power for transformation. This aligns with Steps 6 and 7, where participants ask God to remove shortcomings and humbly seek His will. Principle 7 highlights the importance of spiritual warfare and the need for constant prayer and accountability in maintaining sobriety and spiritual growth.

3;8 Principle 8: Yielding Myself to God to be Used

Principle 8 focuses on surrendering one’s life to God, allowing Him to use them for His purposes. Rooted in the Beatitude, “Blessed are the peacemakers,” this principle emphasizes yielding to God’s will and being vessels for His work. It involves surrendering control and trusting in His plan, aligning with Step 12, which encourages carrying the message of recovery to others. Celebrate Recovery teaches that true freedom comes from submitting to God, enabling individuals to live out their faith in service to others. This principle highlights the transformative power of humility and obedience, empowering participants to live a life surrendered to God’s purpose.

The Connection Between the 12 Steps and the Bible

The Celebrate Recovery program deeply intertwines the 12 Steps with biblical teachings, providing a spiritual foundation for healing. Each step mirrors scriptural principles, reinforcing faith as central to recovery.

4.1 Biblical Foundations of the 12 Steps

The 12 Steps of Celebrate Recovery are rooted in biblical teachings, offering a spiritual framework for healing. Step 1 reflects humility, aligning with Proverbs 16:18, which warns against pride. Step 2 encourages belief in a Higher Power, echoing Romans 11:36, acknowledging God’s sovereignty. Step 3 emphasizes surrender, mirroring Psalm 37:7, which advises resting in God. These steps draw from scriptural truths, providing a faith-centered approach to recovery, ensuring participants are grounded in God’s Word throughout their journey toward restoration and spiritual growth.

4.2 Aligning Each Step with Scriptural Teachings

The 12 Steps of Celebrate Recovery are deeply rooted in biblical principles, providing a spiritual foundation for healing. Step 1 aligns with Proverbs 16:18, emphasizing humility. Step 2 reflects Romans 11:36, acknowledging God’s sovereignty. Step 3 mirrors Psalm 37:7, encouraging surrender to God. Each step is intentionally connected to scriptural truths, offering a faith-based approach to recovery. This alignment ensures participants are guided by God’s Word, fostering spiritual growth and transformation. The program seamlessly integrates biblical teachings with practical steps, creating a holistic path to restoration and freedom from life’s struggles.

4.3 The Role of Prayer and Meditation in Recovery

Prayer and meditation are integral to Celebrate Recovery, fostering a deeper connection with God. Step 11 emphasizes seeking spiritual growth through prayer and meditation, aligning with Colossians 3:16, which encourages letting Christ’s Word dwell richly in us. These practices help participants stay grounded in faith, guiding them through daily struggles and decisions. By cultivating humility and dependence on God, prayer and meditation empower individuals to surrender their will to His plan. This spiritual discipline is vital for ongoing recovery, providing strength and clarity as participants navigate life’s challenges with a heart centered on God’s truth and transformative power.

Success Stories and Testimonials

Celebrate Recovery testimonies highlight transformative journeys of healing and freedom. Participants share powerful stories of overcoming addiction and finding peace through faith and community support. Lives changed.

5.1 Personal Experiences of Recovery

Many participants in Celebrate Recovery share heartfelt stories of transformation. Through the 12 Steps and 8 Principles, individuals have found freedom from addiction and hurtful patterns. Personal testimonies reveal journeys of self-reflection, accountability, and spiritual growth. The program’s emphasis on faith and community provides a safe space for healing. Lives once controlled by habits are now marked by purpose and joy. These stories inspire others to seek recovery, demonstrating that lasting change is possible through surrender to God and active participation in the program.

5.2 The Impact of Celebrate Recovery on Communities

Celebrate Recovery has profoundly impacted communities by fostering healing, unity, and spiritual growth. Churches embracing the program report increased fellowship and transformed lives. The ripple effect extends beyond individuals, strengthening families and neighborhoods. Communities witness reduced struggles with addiction and improved mental health. Celebrate Recovery breaks down stigmas surrounding hurts, habits, and hang-ups, creating safe spaces for open dialogue. This collective transformation fosters a culture of compassion and support, empowering communities to thrive spiritually and socially. The program’s emphasis on faith and accountability has become a cornerstone for holistic healing, benefiting entire communities worldwide.

5.3 Overcoming Addiction Through Faith

Celebrate Recovery highlights the transformative power of faith in overcoming addiction. By surrendering struggles to God, individuals find strength and hope. The program’s biblical foundation encourages participants to rely on divine guidance, fostering resilience and spiritual growth. Many testimonials share how faith became the cornerstone of their recovery journey. Through prayer, meditation, and community support, Celebrate Recovery helps individuals break free from addiction’s grip, emphasizing that true healing comes from a deeper relationship with God. This approach not only addresses the physical aspects of addiction but also nurtures the spiritual and emotional well-being of participants.

Resources for Further Study

Celebrate Recovery offers workbooks, guides, and online resources to deepen understanding and support the recovery journey. Daily devotionals and community support are also available for encouragement.

6.1 Celebrate Recovery Workbooks and Guides

The Celebrate Recovery program offers comprehensive workbooks and guides designed to support individuals through their recovery journey. These resources provide practical tools, biblical teachings, and step-by-step guidance to help participants apply the 12 Steps and 8 Principles. The workbooks include therapeutic assignments, emotional management strategies, and reflective exercises to deepen spiritual growth. Daily devotionals and scripture-based messages are also available, offering encouragement and hope. These materials are essential for those seeking to integrate faith into their recovery process, fostering a deeper connection with God and community. They are widely used in both individual and group settings, promoting long-term transformation and healing.

6.2 Online Communities and Support Groups

Celebrate Recovery offers vibrant online communities and support groups, providing a safe space for individuals to share their journeys and connect with others. These platforms foster fellowship, encouragement, and accountability, helping participants stay committed to their recovery; Online forums and social media groups allow members to access resources, share testimonies, and receive prayer support. Additionally, virtual meetings and step studies are available, making the program accessible to those who cannot attend in-person gatherings. These digital spaces extend the reach of Celebrate Recovery, ensuring that no one feels isolated in their path to healing and spiritual growth.

6.3 Recommended Reading for Spiritual Growth

The Celebrate Recovery program offers a variety of resources to deepen spiritual growth, including workbooks, devotionals, and study guides. The foundational workbook, Celebrate Recovery: A Recovery Workbook, provides practical steps to apply biblical principles to everyday life. Daily devotionals like NLT Life Recovery Devotional offer encouragement and hope, aligning recovery with scripture. Additionally, The Beatitudes: An Application to Recovery explores how Jesus’ teachings can transform lives. These materials, along with the Bible, serve as powerful tools to guide individuals in their spiritual journey, fostering a deeper connection with God and a stronger foundation for lasting recovery.