sai satcharitra pdf in hindi

The Sai Satcharitra is a revered Hindu text detailing the life and teachings of Shirdi Sai Baba. Available in Hindi PDF, it offers spiritual guidance, miracles, and divine wisdom, enhancing worship and faith practices.

History of Sai Satcharitra

The Sai Satcharitra, compiled by Hemadpant, chronicles Shirdi Sai Baba’s life and teachings. Its origins trace back to 1912, serving as a divine guide. It is now widely accessible in Hindi PDF, preserving its spiritual legacy.

2.1 Background and Origins

The Sai Satcharitra has its roots in the early 20th century, compiled by Hemadpant, a devotee of Shirdi Sai Baba. Written in 1912, it was initially in Marathi and later translated into Hindi. The text captures the life, miracles, and teachings of Sai Baba, serving as a spiritual guide. Its origins stem from the collective experiences of devotees, aiming to spread Sai Baba’s message of love and faith. The Hindi PDF version has made it accessible to millions, preserving its cultural and religious significance. This sacred text has evolved over time, adapting to digital formats while maintaining its original essence, ensuring its teachings reach a broader audience globally.

2.2 The Author: Hemadpant

Hemadpant, born as Annasaheb Dabholkar, was a devout follower of Shirdi Sai Baba and the author of the Sai Satcharitra. A writer and musician by profession, his life transformed after meeting Sai Baba, inspiring him to document the guru’s life and teachings. Hemadpant began writing the Sai Satcharitra in 1912, initially in Marathi, aiming to share Sai Baba’s miracles and philosophy with the world. His work became a cornerstone of Sai Baba’s legacy, offering spiritual guidance to millions. The Hindi translation of the Sai Satcharitra further expanded its reach, making it accessible to a broader audience. Hemadpant’s dedication and faith in Sai Baba are celebrated, and his contributions remain vital in preserving Sai Baba’s teachings for future generations.

2.3 Evolution Over Time

The Sai Satcharitra has evolved significantly since its inception, transitioning from handwritten manuscripts to widely circulated printed versions. Initially written in Marathi by Hemadpant, it was later translated into Hindi and other languages, broadening its accessibility. The advent of digital technology has further transformed its dissemination, with PDF versions readily available online. This evolution ensures that Sai Baba’s teachings reach a global audience, catering to diverse linguistic and technological preferences. The text’s enduring relevance lies in its adaptability, allowing it to resonate with devotees across generations and geographies. Its digital formats, including Hindi PDFs, have made it easier for followers to engage with the scripture, fostering spiritual connection and community. This continuous adaptation underscores the timeless appeal of Sai Baba’s message, ensuring its preservation and proliferation in the modern era.

Content and Structure of Sai Satcharitra

The Sai Satcharitra is a comprehensive text divided into chapters, detailing Sai Baba’s life, miracles, and teachings. Its structure includes real-life incidents, emphasizing spiritual growth and faith. Hindi PDF versions simplify access for devotees worldwide, ensuring easy readability and understanding of Sai Baba’s divine message.

3.1 Structure of the Text

The Sai Satcharitra is meticulously organized into chapters, each detailing specific events and teachings from Sai Baba’s life. The text begins with his arrival in Shirdi and progresses chronologically, covering his interactions, miracles, and spiritual lessons. Each chapter is designed to convey moral and philosophical insights, blending storytelling with divine wisdom. The structure is straightforward, making it accessible to devotees. The Hindi PDF version maintains this organization, ensuring readability and ease of understanding. Chapters are concise, focusing on real-life incidents that highlight Sai Baba’s compassion and supernatural abilities. This arrangement allows readers to follow his journey and teachings systematically, fostering spiritual growth and faith. The text’s structure is both educational and inspirational, catering to diverse audiences seeking enlightenment and guidance. Its clear and methodical layout enhances the reader’s ability to absorb and reflect on Sai Baba’s profound messages.

3.2 Key Chapters and Their Significance

The Sai Satcharitra is divided into chapters, each highlighting pivotal events and teachings from Sai Baba’s life. Key chapters focus on his arrival in Shirdi, his divine miracles, and his spiritual discourses. These sections are significant as they provide insight into his philosophy of love, forgiveness, and self-realization. Chapters detailing his interactions with devotees, such as Govind Raghunath Dabholkar (Hemadpant), offer a personal connection to his teachings. The Hindi PDF version preserves the original structure, ensuring that readers can easily access these vital chapters. Each chapter serves as a testament to Sai Baba’s compassion and wisdom, inspiring devotion and spiritual growth. The narratives are simple yet profound, making the text accessible to all. The key chapters are not only historical accounts but also guides for living a virtuous and meaningful life, embodying the essence of Sai Baba’s teachings.

3.3 Teachings and Philosophy

The Sai Satcharitra embodies the core teachings of Shirdi Sai Baba, emphasizing faith, patience, and self-realization. His philosophy revolves around universal love, compassion, and the importance of an internal spiritual journey. Sai Baba’s teachings stress the rejection of materialism and the embrace of a simple, devout life. Central to his message is the principle of “Saburi” (patience) and “Shraddha” (faith), which are essential for overcoming life’s challenges. The text highlights his belief in the oneness of all religions and the importance of living a virtuous life. Through parables and real-life incidents, Sai Baba’s wisdom is made accessible to all, regardless of background. The Hindi PDF version of the Sai Satcharitra preserves these teachings, offering readers a profound guide for spiritual growth and moral living. His philosophy continues to inspire millions, fostering a deeper connection with the divine and promoting harmony in daily life.

Significance in Hindu Religion

The Sai Satcharitra holds immense significance in Hindu religion as a sacred text guiding spiritual practices. Its emphasis on faith and patience reflects Sai Baba’s teachings, influencing rituals, worship, and community bonding deeply.

4.1 Importance in Religious Practices

The Sai Satcharitra is deeply integrated into Hindu religious practices, serving as a guide for devotion and spiritual growth. Its availability in Hindi PDF has made it accessible to millions, fostering widespread worship. Devotees often recite the text during rituals, believing it strengthens faith and brings divine blessings. The concise and simple language of the Hindi version allows followers to easily incorporate it into daily prayers and ceremonies. Many Hindus include Sai Satcharitra in their worship routines, such as week-long readings from Thursday to Thursday, a practice known as Satcharitra Parayan. This ritual is believed to enhance spiritual clarity and resolve life challenges. The text’s emphasis on patience and faith aligns with core Hindu values, making it a central element in religious practices. Its digital accessibility further amplifies its role, enabling global devotees to connect with Sai Baba’s teachings effortlessly.

4.2 Role in Worship and Rituals

The Sai Satcharitra plays a pivotal role in worship and rituals, particularly through its Hindi PDF version, which has become a cornerstone of devotional practices. Many devotees incorporate the text into their daily worship, reciting chapters during poojas and ceremonies. The Satcharitra Parayan, a week-long reading from Thursday to Thursday, is a popular ritual believed to invoke Sai Baba’s blessings and resolve life’s challenges. The PDF format has made it easier for devotees to access and participate in such rituals, even remotely. Additionally, the text is often recited in temples and homes during special occasions, fostering a sense of community and shared spirituality. Its digital availability has further enhanced its role in worship, allowing devotees to carry the sacred text with them and perform rituals seamlessly, whether at home, in temples, or while traveling. This accessibility has deepened its integration into Hindu devotional life, making it an indispensable part of worship traditions.

4.3 Cultural and Spiritual Impact

The Sai Satcharitra has profoundly influenced both culture and spirituality, particularly through its Hindi PDF version, which has made the text widely accessible. It bridges generations, connecting devotees across regions and fostering a shared spiritual identity. The text’s emphasis on faith, patience, and self-surrender resonates deeply, inspiring countless individuals to embrace a more meaningful and purposeful life. Culturally, it has inspired art, literature, and media, including TV shows and films that highlight Sai Baba’s teachings. The availability of the Hindi PDF has further amplified its reach, allowing people from diverse backgrounds to engage with the text. Spiritually, it serves as a guide for navigating life’s challenges, promoting inner peace and devotion. The Sai Satcharitra’s impact extends beyond religion, influencing societal values and encouraging compassion and unity. Its digital form ensures that its timeless wisdom continues to inspire future generations, making it a cornerstone of both cultural and spiritual heritage.

Sai Satcharitra in Hindi

The Hindi version of Sai Satcharitra is widely available in PDF format, offering easy access to devotees. It can be downloaded from platforms like Google Drive, ensuring convenience for spiritual seekers and facilitating shared worship.

5.1 Availability of Hindi PDF

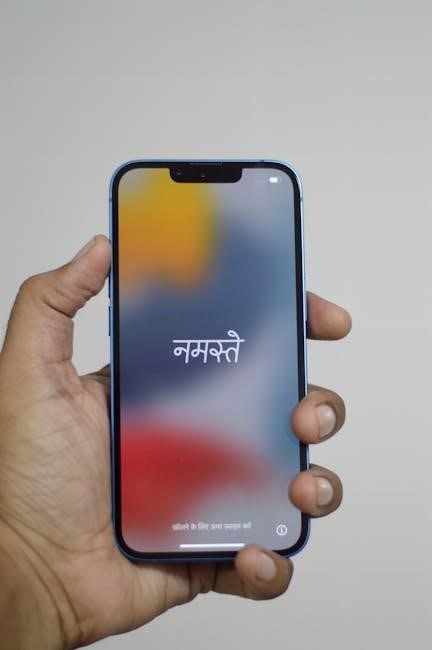
The Sai Satcharitra in Hindi PDF is widely accessible online, offering devotees a convenient way to read and download the text. Platforms like Google Drive provide easy access, ensuring the document is shareable and readable on smartphones. This version is particularly popular due to its clear formatting and user-friendly design, making it ideal for both personal and group recitals. Many websites offer free downloads, catering to the growing demand for digital spiritual resources. Additionally, the PDF includes features like bookmarks and chapter-wise navigation, enhancing the reading experience. Its availability has made it easier for followers to incorporate the teachings of Sai Baba into their daily worship and meditation practices. The Hindi PDF version remains a vital resource for those seeking spiritual enlightenment and divine connection through Sai Baba’s teachings.

5.2 Digital Versions and Accessibility

Digital versions of the Sai Satcharitra in Hindi have made it highly accessible to devotees worldwide. The PDF format is widely available on platforms like Google Drive, allowing seamless downloads and sharing. This digital accessibility ensures that followers can easily access the text using smartphones or tablets, enabling them to read and reflect on Sai Baba’s teachings anytime, anywhere. The digital version is particularly beneficial for those who prefer convenience or have limited access to physical copies. Features like searchable text and zoom functionality enhance readability, making it user-friendly for people of all ages. Additionally, the digital format supports environmental sustainability by reducing the need for printed materials. This ease of access has contributed to the growing popularity of the Sai Satcharitra, ensuring its timeless wisdom reaches a broader audience while maintaining its spiritual significance.

5.3 Popular Download Platforms

The Sai Satcharitra in Hindi PDF is widely available on various popular platforms, making it easily accessible to devotees. Google Drive is one of the most commonly used sources, offering a direct download link for the complete text. Additionally, official websites dedicated to Shirdi Sai Baba and religious forums provide free access to the PDF. These platforms ensure that the text is readily available for anyone seeking spiritual guidance. Many platforms also offer the option to share the PDF via social media or messaging apps, further increasing its reach. The ease of access and widespread availability of the Sai Satcharitra in Hindi have made it a convenient resource for daily worship and reflection. This digital accessibility has played a significant role in spreading Sai Baba’s teachings to a global audience, ensuring his message of love and compassion continues to inspire millions.

Benefits of Reading Sai Satcharitra

Reading Sai Satcharitra fosters spiritual growth, enlightenment, and divine experiences. It strengthens faith, offers solace, and inspires miracles, while promoting community bonding through shared worship and reflection on Sai Baba’s timeless teachings;

6.1 Spiritual Growth and Enlightenment

Reading the Sai Satcharitra in Hindi fosters profound spiritual growth and enlightenment. The text, filled with Sai Baba’s teachings, offers insights into moral values, patience, and faith. It guides seekers to introspect, letting go of worldly attachments and embracing inner peace. The narratives of Sai Baba’s miracles and divine interventions inspire devotion, helping readers connect with the divine. The simplicity and depth of the Hindi version make it accessible, allowing for a deeper understanding of spiritual truths. Regular reading enhances self-realization, nurtures empathy, and strengthens the bond with the divine. It serves as a pathway to spiritual awakening, encouraging followers to embrace a life of humility, love, and service. Through its timeless wisdom, the Sai Satcharitra illuminates the journey toward spiritual enlightenment, making it a cherished text for devotees seeking spiritual advancement and inner harmony.

6.2 Miracles and Divine Experiences

The Sai Satcharitra in Hindi is replete with accounts of Sai Baba’s miraculous interventions, offering devotees a glimpse into the divine. These stories, shared in simple yet profound language, inspire faith and devotion. Readers are captivated by narratives of healing, materialization of food, and resolution of life’s challenges through Sai Baba’s grace. The text highlights how Sai Baba’s miracles transcended physical boundaries, impacting lives spiritually and emotionally. Devotees often report experiencing similar divine interventions after reading the Satcharitra, deepening their connection with Sai Baba. These accounts serve as a testament to the power of faith and surrender, encouraging readers to trust in the divine plan. The Hindi version ensures these miraculous stories are accessible to a broader audience, fostering a sense of awe and reverence. Through these divine experiences, the Sai Satcharitra reinforces the belief in Sai Baba’s omnipresence and enduring blessings.

6.3 Community and Shared Worship

The Sai Satcharitra in Hindi fosters a sense of community among devotees, as it is often read collectively during spiritual gatherings and ceremonies. The PDF format of the text makes it easily accessible, allowing groups to come together for shared worship. Many devotees participate in Saptah (week-long) readings, reciting the entire text collectively, which strengthens spiritual bonds and fosters unity. These shared experiences create a supportive environment where believers can discuss the teachings, share personal insights, and reinforce their faith. The text’s availability in Hindi ensures that its message reaches a wide audience, transcending linguistic and cultural barriers. Shared worship enhances the spiritual impact of the Sai Satcharitra, as collective devotion amplifies the connection to Sai Baba’s teachings. This communal approach not only deepens individual faith but also builds a stronger, more connected spiritual community. The text’s accessibility in Hindi further promotes its role in uniting devotees worldwide.

The Sai Satcharitra in Hindi is a profoundly revered text that encapsulates the life, teachings, and divine grace of Shirdi Sai Baba. Its availability in PDF format has made it easily accessible to millions, fostering spiritual growth and enlightenment. The text serves as a guide for devotees, offering insights into faith, patience, and self-surrender. Its impact extends beyond individual devotion, creating a sense of community through shared worship and collective readings. The Hindi version ensures that Sai Baba’s message reaches a broader audience, transcending linguistic barriers. By providing digital access, the Sai Satcharitra in Hindi bridges tradition and modernity, allowing devotees to connect with its timeless wisdom effortlessly. This sacred text remains a cornerstone of spiritual practice, inspiring miracles, fostering unity, and deepening the connection to Sai Baba’s divine legacy.

battery tender user manual

A Battery Tender is a leading manufacturer of advanced battery chargers, jump starters, and solar solutions. Known for reliable, USA-engineered products, they provide efficient charging and maintenance for various vehicles and devices.

What is a Battery Tender?

A Battery Tender is a smart charging device designed to maintain and charge lead-acid batteries. Manufactured by Deltran, it ensures proper charging without overcharging, preserving battery life. The device is fully automatic and suitable for long-term use, making it ideal for vehicles, boats, and equipment. It supports various battery types, including flooded, AGM, and gel batteries. Models like the BT Junior and BT Plus offer selectable voltage and current settings, catering to different needs. The Battery Tender is widely used in automotive and marine applications, ensuring batteries remain at full charge and ready for use. Its advanced technology provides safe and efficient charging, making it a reliable solution for battery maintenance.

Importance of Using a Battery Tender

A Battery Tender is essential for maintaining optimal battery health and extending its lifespan. It prevents overcharging, which can damage batteries, and ensures they remain at full charge when not in use. Designed for long-term connectivity, it is ideal for vehicles, boats, and equipment that are not frequently used. The device automatically switches to maintenance mode once the battery is fully charged, preventing degradation. This makes it a crucial tool for preserving battery performance and reliability. By using a Battery Tender, users can avoid the hassle of dead batteries and ensure their vehicles are always ready to start. It is particularly beneficial for lead-acid batteries, including flooded, AGM, and gel types, providing safe and efficient charging. Its versatility and advanced technology make it a must-have for anyone seeking consistent battery performance and longevity.

Safety Precautions

Always follow important safety instructions to prevent accidents. Ensure proper ventilation, avoid exposure to water, and wear protective gear when handling batteries and chargers.

Important Safety Instructions

SAVE THESE INSTRUCTIONS: This manual contains critical safety and operating guidelines for Battery Tender chargers. CAREFULLY READ BEFORE USE. Do not expose the charger to rain, snow, or restricted ventilation. Avoid using attachments not recommended by the manufacturer. Study battery manufacturers’ precautions, such as not removing cell caps during charging. Do not use the charger for dry-cell batteries. Ensure proper voltage and charge rates are followed. Wear eye and clothing protection when handling lead-acid batteries. Keep children away from maintenance tasks. Understand all functions before operating. Follow these instructions carefully to ensure safe and effective use of your Battery Tender charger.

Ventilation Requirements

Proper ventilation is crucial when using a Battery Tender charger to ensure safe operation. Do not operate the charger in areas with restricted airflow, as this can lead to the accumulation of explosive gases, such as hydrogen, produced during charging. Ensure the charging area is well-ventilated to prevent gas buildup. Keep the charger away from open flames, sparks, or ignition sources. Avoid charging in confined or poorly ventilated spaces, such as small, unventilated rooms or sealed containers. Proper airflow helps dissipate heat and prevents potential hazards. Always follow the manufacturer’s guidelines for ventilation to maintain a safe charging environment. Failure to adhere to these requirements may result in dangerous conditions or equipment damage.

Protective Gear and Clothing

When working with a Battery Tender charger, it is essential to wear appropriate protective gear and clothing to ensure safety. Always wear complete eye protection, such as goggles or safety glasses, to shield your eyes from potential acid spills or debris. Use gloves to protect your hands from electrical currents and corrosive materials. Avoid wearing loose clothing or jewelry that could get caught in equipment. Ensure all clothing is non-conductive and made of durable materials to prevent accidental electrical exposure. Keep long hair tied back to avoid it coming into contact with the charger or battery. Never allow children to perform maintenance or charging tasks without adult supervision. Proper protective gear minimizes risks and ensures a safe charging experience.

Installation Guide

Begin by unpacking and inventorying all components. Set the charger to the correct voltage and amperage for your battery type. Carefully connect the charger, ensuring secure terminals.

Unpacking and Inventory

When you receive your Battery Tender charger, carefully unpack all components to ensure nothing is damaged. Verify the package includes the charger unit, charging cables, user manual, and any additional accessories. Inspect each item for signs of damage or wear. Before proceeding, ensure all parts are accounted for and in good condition. Familiarize yourself with the charger’s features and components, such as the voltage selector, LED indicators, and connection terminals. Read the manual thoroughly to understand proper usage and safety guidelines. Organize the cables neatly to avoid tangles or damage. If any item is missing or damaged, contact the manufacturer immediately. Proper unpacking and inventory ensure a safe and efficient setup process.

Voltage and Amperage Settings

Properly setting the voltage and amperage on your Battery Tender charger is essential for safe and effective charging. Start by identifying your battery type, whether it is 6V, 12V, or 24V, and ensure the charger is set to match this voltage. For most standard applications, the 12V setting is used, but verify your battery’s specifications in the vehicle’s manual. Next, adjust the amperage setting according to the battery’s capacity and charging needs. Lower amperage (e.g., 1.25A or 2.5A) is suitable for smaller batteries or maintenance charging, while higher settings (e.g., 5A or 10A) are better for faster charging of larger batteries. Always refer to your charger’s manual for specific guidance on voltage and amperage selection. Incorrect settings can lead to overcharging or damage, so double-check before connecting the charger to the battery.

Connecting the Charger

Connecting your Battery Tender charger requires careful attention to ensure safety and proper function. First, locate the battery and identify the positive (+) and negative (-) terminals. Always turn off the vehicle or device before connecting the charger. Use the provided alligator clip cables to attach the charger to the battery posts. Connect the positive (red) clamp to the positive terminal and the negative (black) clamp to the negative terminal or a suitable grounding point. Ensure the clamps are securely attached to avoid loose connections, which can cause sparks or electrical issues. Do not reverse the polarity, as this can damage the charger or battery. Once connected, plug in the charger and select the appropriate voltage and amperage settings. Refer to your specific Battery Tender model’s manual for detailed instructions, especially for models like the 12V 1.25A or 5A chargers. Always prioritize safety to prevent accidents.

Mounting Options

Battery Tender chargers offer versatile mounting options to suit various applications. For permanent installation, the charger can be mounted on a flat surface using the provided mounting brackets. Ensure the surface is sturdy and clear of obstructions. If portability is preferred, the charger can be placed on a shelf or in a dedicated storage compartment. For vehicle use, such as on motorcycles or RVs, secure the charger using adhesive-backed hooks or straps to prevent movement during transit. Always ensure the charger is mounted in a well-ventilated area, away from direct sunlight or moisture. Avoid mounting near flammable materials or in confined spaces. For specific models, like the 12V 1.25A or 5A chargers, refer to the user manual for recommended mounting hardware and configurations. Proper mounting ensures safe and reliable operation of your Battery Tender charger.

Operation Modes

The Battery Tender charger features automatic operation modes, including initialization, bulk charging, absorption, and maintenance. Indicator lights provide real-time status updates, ensuring safe and efficient battery charging.

Initial Setup and Configuration

Before using the Battery Tender charger, ensure it is properly configured. Start by carefully reading the user manual to understand all safety precautions and operating instructions. Plug in the charger and set the correct voltage and amperage settings according to your battery type. For 12V batteries, use the 12V 1.25A setting, and for 24V systems, select the 24V 2.5A option. Ensure the charger is placed in a well-ventilated area to prevent overheating. Once configured, connect the positive (red) and negative (black) leads to the battery terminals, making sure they are securely attached. The charger will automatically detect the battery type and begin the charging process. Always double-check connections to avoid any electrical issues.

Indicator Lights and Their Meanings

The Battery Tender charger features indicator lights that provide real-time feedback on its operation. The red light indicates the charger is actively charging the battery, while the green light signals that the battery is fully charged and the charger has switched to maintenance mode. Some models may also include a yellow light, which indicates a maintenance or conditioning phase. If the lights flash or display an unusual pattern, this could signify an error or issue, such as an overcharged battery or improper connection. Always refer to the user manual for specific light configurations and their meanings, as they may vary slightly between models. Understanding these indicators is crucial for ensuring proper charger function and battery health.

Charging Modes and Duration

Battery Tender chargers operate in multiple modes to ensure optimal charging and battery maintenance. The initial phase involves a brief diagnostic check to assess battery condition. Once connected, the charger enters bulk charging mode, delivering the maximum current to rapidly replenish the battery. This is followed by the absorption phase, where the charger maintains a consistent voltage to stabilize the charge. Finally, the maintenance or float mode keeps the battery at full charge without overcharging. Charging duration varies depending on the battery’s capacity and type, typically ranging from a few hours to overnight for complete charging. For deep-cycle batteries, the process may take longer to ensure full restoration of capacity. Always monitor the charger’s indicator lights to track progress and ensure safe, efficient charging. Proper adherence to these modes ensures prolonged battery life and reliable performance.

Maintenance and Upkeep

Regular cleaning of the charger and battery terminals ensures proper functionality. Inspect cables for damage and store the charger in a cool, dry place when not in use. Follow manufacturer guidelines for optimal performance and safety.

Cleaning the Charger and Battery

Regular cleaning of the charger and battery is essential for maintaining performance and safety. Use a soft cloth or brush to remove dust and debris from the charger’s exterior. For the battery, disconnect the terminals and clean them with a mixture of baking soda and water to prevent corrosion. Avoid using harsh chemicals or abrasive materials that could damage surfaces. Ensure the charger and battery are dry before reconnection. Inspect cables for frays or damage and replace them if necessary. Cleaning should be done by adults only, as it involves handling electrical components. Refer to the user manual for specific cleaning recommendations. Proper maintenance ensures longevity and prevents potential hazards, keeping your system functioning optimally. Always follow safety guidelines to avoid accidents during the cleaning process.

Storage Recommendations

Proper storage of your Battery Tender and battery is crucial for maintaining their performance and longevity. Store the charger in a cool, dry place, away from direct sunlight and moisture. Avoid basements, garages, or attics with extreme temperature fluctuations. Keep the battery in a well-ventilated area, away from flammable materials. If storing for extended periods, ensure the battery is fully charged and disconnected from the charger. For long-term storage, check the battery’s state of charge every 3-6 months and recharge if necessary. Always follow the manufacturer’s guidelines for storage conditions. Clean the battery terminals before storage to prevent corrosion. Do not store the charger and battery in the same container unless specified by the manual. Refer to the user manual for specific storage recommendations tailored to your Battery Tender model. Proper storage ensures safety and extends the life of your equipment.

Software and Firmware Updates

Regular software and firmware updates are essential to ensure optimal performance and safety of your Battery Tender charger. These updates often include improvements, bug fixes, and new features. To update, refer to the user manual for specific instructions, as different models may have varying procedures. Typically, updates can be performed via a computer or dedicated app, requiring a stable internet connection. Download the latest firmware from the official Battery Tender website and follow the on-screen instructions carefully. Do not interrupt the update process, as it may cause permanent damage to the charger. After completion, restart the device to apply the changes. Always verify the compatibility of the update with your specific model to avoid issues. If unsure, contact Battery Tender support for assistance. Keeping your charger updated ensures it functions at its best and remains compatible with the latest technologies. Regular updates are a key part of maintaining your Battery Tender’s reliability and efficiency.

Troubleshooting Common Issues

Refer to the user manual for guidance on identifying and resolving common problems. Check error codes, charger status lights, and battery connections. Contact Battery Tender support for further assistance.

Identifying Common Problems

Identifying common issues with your Battery Tender charger involves checking error codes, indicator lights, and battery connections. Error codes provide specific fault details, while status lights indicate charging modes or potential issues. Common problems include improper voltage settings, faulty connections, or incorrect battery type selection. Overcharging or undercharging can also occur if settings are misconfigured. Additionally, issues like insufficient ventilation or damaged cables may trigger alerts. Always refer to the user manual for detailed troubleshooting steps. If problems persist, contact Battery Tender support for assistance. Regular maintenance, such as cleaning terminals and updating software, can prevent many common issues. Ensure all safety precautions are followed during troubleshooting to avoid accidents. By systematically addressing each potential problem, you can restore your charger to optimal functionality and maintain your battery’s health effectively.

Error Codes and Solutions

Battery Tender chargers display error codes to indicate specific issues. Common codes include E01 for communication errors, E02 for overvoltage, and E03 for under-voltage. Each code corresponds to a particular problem, such as faulty connections, incorrect voltage settings, or battery defects. To resolve these issues, refer to the user manual for detailed solutions. For example, E01 may require resetting the charger or checking cable connections. E02 often involves adjusting the charger’s voltage settings or ensuring the battery type is correctly selected. E03 may indicate a deeply discharged battery that needs a longer charging period. Always follow safety guidelines when troubleshooting. If issues persist, contact Battery Tender support for further assistance. Regularly updating firmware and performing routine maintenance can help prevent error codes and ensure optimal performance. By addressing errors promptly, you can maintain your charger’s efficiency and extend your battery’s lifespan.

Resetting the Charger

To reset a Battery Tender charger, start by disconnecting it from both the AC power source and the battery. Locate the small reset button, typically found on the back or bottom of the unit. Use a small object like a paperclip to press and hold the reset button for 10-15 seconds. This will restore the charger to its factory settings. After resetting, reconnect the charger to AC power and the battery, ensuring all connections are secure. If the charger still does not function properly, check for loose connections or damaged cables. In some cases, a hard reset may require disconnecting the charger for 30 minutes to allow capacitors to discharge. Always refer to the user manual for specific reset procedures, as methods may vary by model. Resetting can resolve software glitches or incorrect settings, ensuring optimal charging performance.

The Battery Tender is a high-quality, efficient, and safe battery charging solution designed for lead-acid batteries. Its automatic charging and maintenance features ensure optimal battery health and longevity. By following the safety guidelines and instructions outlined in the user manual, users can enjoy reliable performance and extend the life of their batteries. The Battery Tender is suitable for a wide range of applications, including cars, motorcycles, boats, and other vehicles. Always remember to refer to the manual for specific instructions tailored to your model, as features may vary. Proper use and maintenance will ensure years of trouble-free service. For additional support, consult the resources and troubleshooting sections provided. With the Battery Tender, you can trust your battery is in good hands, giving you peace of mind and consistent performance.

Resources and Support

For comprehensive guidance, refer to the official Battery Tender user manuals available online. These manuals provide detailed instructions for installation, operation, and troubleshooting specific models, such as the Battery Tender Plus 12V 1-25A or the Waterproof Power Tender Plus 24V 2-5A. Additional resources, including PDF downloads and product specifications, can be found on the manufacturer’s website. Deltran Battery Tender also offers dedicated customer support for inquiries and technical assistance. Visit their official site or contact their support team for help with any model, from the Battery Tender Junior to advanced 8-Bay Battery Chargers. These resources ensure you have everything needed to troubleshoot, maintain, and optimize your charger for years of reliable service.

here i am lord lyrics pdf

“Here I Am, Lord” is a powerful hymn expressing devotion and surrender to God’s will. Its lyrics, available in PDF, resonate deeply in worship settings, inspiring believers to serve faithfully.

1.1. Overview of the Hymn

“Here I Am, Lord” is a beloved Christian hymn that embodies a profound response to God’s call to serve. The song’s lyrics, widely available in PDF formats online, reflect themes of surrender, obedience, and divine compassion. Composed by Dan Schutte, the hymn has become a staple in worship services worldwide, resonating with its message of devotion and service to God. The verses describe God’s presence in nature and His care for humanity, while the refrain emphasizes the believer’s commitment to follow His lead. The hymn’s structure, including its verses and refrain, creates a powerful call-and-response dynamic, making it a favorite in both liturgical and non-liturgical settings. Its timeless message continues to inspire believers to answer God’s call with faith and humility.

1.2. Importance of the Song in Worship Services

“Here I Am, Lord” holds a significant place in worship services due to its profound message of surrender and obedience to God’s will. The hymn’s ability to evoke a sense of personal and communal response makes it a powerful tool for congregational worship. Its lyrics, often downloaded as PDF files for easy access, resonate deeply with believers, inspiring them to commit to serving God and others. The song’s structure, with its reflective verses and a repetitive refrain, creates a dynamic that unites worshippers in prayer and devotion. Its widespread use in churches underscores its universal appeal and its ability to transcend cultural and denominational boundaries, making it a timeless favorite in Christian worship.

Background of the Song

“Here I Am, Lord” was written by Dan Schutte in 1981, becoming a beloved hymn in Catholic and Protestant traditions. Its creation reflects a call to serve God, resonating deeply in worship and inspiring devotion through its timeless message, widely available as PDF lyrics for congregational use.

2.1. Composer and Author

Dan Schutte, a renowned Catholic hymn composer, authored “Here I Am, Lord” in 1981. His work is cherished across Christian traditions for its profound spiritual depth. The song’s lyrics, widely available as PDFs, reflect Schutte’s ability to craft music that resonates with worshipers globally, inspiring devotion and service to God. His composition emphasizes surrender and obedience, themes central to the hymn’s message. Schutte’s contribution to liturgical music is significant, making “Here I Am, Lord” a staple in many churches. The song’s enduring popularity highlights his skill in blending meaningful lyrics with memorable melodies, ensuring its relevance in worship settings. PDF versions of the lyrics are easily accessible online, facilitating its use in congregational singing and personal reflection. Schutte’s legacy continues to inspire through this timeless hymn.

2.2. Historical Context and Inspiration

“Here I Am, Lord” was written by Dan Schutte in 1981, emerging during a period of liturgical music renewal. Inspired by Isaiah 6:8, the hymn captures the prophet’s response to God’s call, reflecting themes of surrender and service. Its creation coincided with a growing emphasis on participatory worship, making it a cornerstone in many church services. The song’s timeless message of obedience and compassion resonates across cultures, transcending denominational boundaries. PDF versions of the lyrics are widely available, ensuring its accessibility for congregations worldwide. Schutte’s inspiration from Scripture and his ability to convey deep spiritual truths have made this hymn a beloved choice for worshipers seeking to express their commitment to God’s will. Its enduring popularity highlights its universal appeal and relevance in modern worship. The hymn continues to inspire believers to answer God’s call with faith and humility.

Themes and Messages in the Lyrics

The song emphasizes surrender, obedience, and divine compassion, inspiring believers to respond to God’s call. Its lyrics highlight God’s love and guidance, fostering a commitment to serve humanity.

3.1. The Theme of Surrender and Obedience

The song “Here I Am, Lord” profoundly explores the themes of surrender and obedience, reflecting a deep commitment to God’s will. The lyrics, as seen in the PDF versions available online, emphasize the act of submitting one’s life to divine guidance. The refrain, “Here I am, Lord, Is it I, Lord? I have heard you calling in the night,” underscores a willingness to respond faithfully to God’s call. This theme is reinforced by verses that highlight trust in God’s providence and a readiness to serve humanity. The song encourages believers to let go of their own desires and embrace God’s plan, illustrating surrender as an act of courage and devotion. Through its lyrics, the hymn inspires listeners to live a life of obedience, trusting in God’s wisdom and love. This message resonates deeply, making the song a powerful tool for spiritual reflection and commitment.

3.2. The Message of Divine Compassion

The song “Here I Am, Lord” conveys a profound message of divine compassion, highlighting God’s deep love and care for humanity. The lyrics, readily available in PDF formats, depict God as a nurturing and merciful being. For instance, lines like “I have borne my people’s pain” and “I will tend the poor and lame” illustrate God’s empathy and commitment to healing. The hymn also emphasizes God’s desire to provide and satisfy the needs of His people, as seen in verses like “I will set a feast for them” and “My hand will save.” This portrayal of divine compassion inspires believers to trust in God’s goodness and to emulate His love in their own lives. The song’s message of mercy and care resonates deeply, offering comfort and hope to those who sing it.

3.3. The Concept of Divine Providence

The hymn “Here I Am, Lord” beautifully portrays the concept of divine providence, emphasizing God’s active involvement in the world. The lyrics, available in PDF, highlight God’s sovereignty over creation and His care for humanity. Verses like “I, the Lord of sea and sky” and “I, the Lord of snow and rain” illustrate God’s mastery over nature, symbolizing His providential control. The song also reflects God’s intimate concern for His people, as seen in lines like “I have heard my people cry” and “I will tend the poor and lame.” This divine providence is not just about creation but also about redemption and guidance. The refrain, “Here I am, Lord,” expresses trust in God’s plan and a willingness to follow His lead, embodying the belief that God’s providence shapes both individual lives and the world at large.

Structure of the Song

The song features verses highlighting God’s attributes and a refrain repeating the singer’s commitment. Verses like “I, the Lord of sea and sky” emphasize divine sovereignty, while the refrain underscores surrender. The structure blends simplicity with profound emotion, making it a powerful worship tool. The PDF lyrics reveal a consistent pattern, enhancing its accessibility and impact in religious settings.

4.1. Verse Analysis

The verses of “Here I Am, Lord” are structured to emphasize God’s attributes and His relationship with humanity. Each verse begins with a declaration of God’s sovereignty, such as “I, the Lord of sea and sky” or “I, the Lord of snow and rain,” highlighting His divine nature. These lines are followed by expressions of compassion, as God acknowledges the struggles and pain of His people. The verses also include promises of redemption and healing, such as “My hand will save” and “I will tend the poor and lame.” The lyrical structure creates a dialogue between God and the singer, setting the stage for the refrain’s response of surrender and obedience. The verses’ poetic imagery and emotional depth resonate deeply, making the song a powerful tool for worship and reflection.

4.2. The Role of the Refrain

The refrain in “Here I Am, Lord” serves as a powerful expression of surrender and commitment. It repeats after each verse, reinforcing the singer’s response to God’s call. The lyrics “Here I am, Lord. Is it I, Lord? I have heard you calling in the night. I will go, Lord, if you lead me” emphasize obedience and willingness to serve. This repeated section creates a rhythmic and emotional anchor, making the song memorable and engaging. The refrain also acts as a personal and communal affirmation, uniting worshippers in a shared declaration of devotion. Its simplicity and depth allow for both individual reflection and collective participation, making it a cornerstone of the hymn’s impact in worship settings.

“Here I Am, Lord” Lyrics PDF Downloads

The lyrics of “Here I Am, Lord” are widely available in PDF format, offering easy access for worship leaders and congregations. Websites like Trinity United Methodist Church provide downloadable files, ensuring the hymn’s reach and usability in various worship settings.

5.1. Availability of PDF Files Online

PDF files of “Here I Am, Lord” are easily accessible online, offering convenience for worship planning. Websites like Trinity United Methodist Church and other religious platforms provide free downloads, ensuring the hymn is readily available for congregational use. Additionally, platforms like Google Drive and religious song repositories host these files, making them accessible to a global audience. The PDF format ensures clarity and ease of printing, allowing worship leaders to distribute the lyrics for communal singing or personal reflection. Furthermore, these files often include musical notation and chord charts, catering to both vocalists and musicians. This widespread availability underscores the song’s popularity and enduring relevance in worship services worldwide.

5.2. Sources for Downloading the Lyrics

Several reliable sources offer free PDF downloads of “Here I Am, Lord” lyrics. Websites like Trinity United Methodist Church and religious song repositories provide easy access. Additionally, platforms such as Google Drive and church music archives host these files, ensuring widespread availability. Many sites include chord charts and musical notation, making them invaluable for worship leaders and musicians. These sources cater to both individual and communal use, allowing believers to access the hymn anytime. The ease of downloading and printing makes it a convenient resource for worship planning. With just a few clicks, users can obtain high-quality PDF versions, ensuring the song remains a staple in religious services worldwide.

Theological Aspects of the Song

The hymn emphasizes surrender, obedience, and divine compassion, reflecting God’s providence and love. It highlights His attributes, such as being the Lord of creation, and calls for a personal relationship with Him.

6.1. The Call to Serve God

The song profoundly embodies the call to serve God, urging believers to respond to His divine summons. The lyrics, readily available in PDF formats online, emphasize surrender and obedience, encouraging listeners to embrace their role in God’s plan. The refrain, “Here I am, Lord,” serves as a commitment to follow His lead without hesitation. This theological theme is central, inspiring individuals to dedicate their lives to serving others as an act of devotion. The hymn’s message aligns with the biblical mandate to love and serve, making it a powerful tool for spiritual reflection and communal worship. Its availability in downloadable PDFs ensures its accessibility for personal and congregational use.

6.2. Representation of God’s Attributes

The hymn “Here I Am, Lord” vividly portrays God’s attributes through its lyrics. The song describes God as the “Lord of sea and sky,” emphasizing His sovereignty and creative power. It also highlights His compassion, as He weeps for His people and bears their pain. The lyrics further depict God as a provider, promising to “set a feast” and “give my life to them,” showcasing His love and sacrifice. Additionally, the song reflects God’s justice and mercy, as He seeks to heal the brokenhearted and transform hearts of stone. These attributes are central to the hymn’s message, reinforcing the idea of a loving, omnipotent, and merciful God who calls His people to serve. The PDF versions of the lyrics amplify these themes, making them accessible for deeper reflection and worship.

Cultural and Religious Impact

“Here I Am, Lord” has become a beloved hymn in churches worldwide, resonating across cultures. Its themes of surrender and service inspire both communal worship and personal devotion, fostering spiritual growth.

7.1. Popularity in Church Services

The hymn “Here I Am, Lord” has gained remarkable popularity in church services globally. Its profound lyrics, emphasizing surrender and divine call, resonate deeply with congregations. Many churches incorporate it into liturgical settings, using its PDF lyrics for communal singing. The song’s universal themes of obedience and compassion make it a favorite for worship leaders. Its melodies are often accompanied by harmonious choir arrangements, enhancing its emotional impact. Additionally, the availability of its lyrics in PDF format has facilitated its widespread use, allowing worshippers to easily access and participate in singing. This hymn’s enduring popularity underscores its significance in modern religious practices, fostering a sense of unity and devotion among believers.

7.2. Use in Liturgical and Non-Liturgical Settings

“Here I Am, Lord” is widely used in both liturgical and non-liturgical contexts, making it a versatile hymn for various worship environments. In liturgical settings, it is often sung during communion, responsive readings, or as a call to mission, enhancing the spiritual atmosphere. Its availability in PDF format allows churches to easily incorporate it into service bulletins. Beyond formal worship, the song is popular in personal devotion, prayer groups, and retreats, fostering individual reflection and community bonding. The hymn’s themes of surrender and divine call resonate in both collective and private spiritual practices, making it a cherished resource for diverse faith expressions. Its adaptability ensures its relevance in multiple settings, further solidifying its place in modern worship traditions.

Musical and Lyrical Analysis

The song features a moving melody with harmonies that enhance its emotional depth. Poetic lyrics, rich in metaphor, emphasize surrender and divine calling, resonating spiritually with listeners.

8.1. Melody and Harmonization

The melody of “Here I Am, Lord” is simple yet profound, creating a sense of intimacy and prayerfulness. It flows gently, matching the lyrical themes of surrender and service. Harmonization adds depth, with chords that support the vocal line, enhancing emotional expression. The song’s musical structure, including verses and a memorable refrain, makes it accessible for congregational singing. The use of minor and major keys reflects the blend of humility and hope in the lyrics. Overall, the melody and harmonization work together to create a powerful, spirit-lifting worship experience, drawing believers into a deeper connection with God.

8.2. Poetic Elements in the Lyrics

The lyrics of “Here I Am, Lord” are rich in poetic elements, such as imagery and metaphor, which enhance their emotional and theological depth. The use of natural imagery—like “Lord of sea and sky,” “snow and rain,” and “wind and flame”—creates vivid pictures of God’s omnipresence and power. The refrain, with its repetitive structure, emphasizes the singer’s commitment and surrender. The verses employ a consistent rhythmic flow, making the song memorable and easy to sing. Metaphorical language, such as “My hand will save,” conveys divine compassion and providence. The poetic elements work together to inspire reflection, devotion, and a sense of connection to the divine, making the hymn both artistically and spiritually impactful.

Usage in Worship and Prayer

“Here I Am, Lord” is widely used in communal worship, fostering unity and devotion. Its lyrics, available in PDF, inspire personal reflection and deepen prayer life.

9.1. Role in Communal Worship

“Here I Am, Lord” plays a significant role in communal worship, uniting congregations in a shared expression of devotion. The hymn’s powerful lyrics, often distributed in PDF format, encourage believers to reflect on their commitment to God’s service. Sung collectively, it fosters a sense of unity and purpose, reminding worshippers of their shared mission to follow God’s call. The song’s refrain, repeated together, strengthens communal resolve and deepens spiritual connection. Its availability in PDF ensures accessibility for congregations worldwide, making it a beloved and enduring part of worship traditions. Through its message of surrender and obedience, it inspires collective prayer and action, enriching the worship experience for all participants.

9.2. Personal Reflection and Devotion

“Here I Am, Lord” serves as a powerful tool for personal reflection and devotion. The hymn’s lyrics, available in PDF, invite individuals to surrender to God’s will, fostering a deeper spiritual connection. Many use the song in private worship, finding comfort in its message of divine compassion and providence; The repetitive refrain, “Here I am, Lord,” becomes a personal prayer, encouraging introspection and commitment to serving God. The song’s themes of surrender and obedience resonate deeply, making it a popular choice for quiet moments of faith. Its availability in PDF format allows believers to easily access the lyrics for personal meditation, enhancing their journey of devotion and spiritual growth. Through this hymn, individuals find strength in surrendering to God’s call and trusting in His plan.

to sell is human pdf

Daniel H. Pink’s influential book explores how selling is an intrinsic part of human interaction, offering fresh insights into the art and science of persuasion in modern life.

The Concept of Selling in the Modern World

In the modern world, selling has evolved beyond traditional roles, becoming an integral part of daily life. Daniel H. Pink argues that everyone is in sales, whether it’s pitching ideas, influencing decisions, or persuading others. This shift reflects a broader understanding of sales as a human interaction rather than just a transaction. The rise of non-sales selling highlights how people navigate relationships, build trust, and collaborate to achieve shared goals. Pink emphasizes that selling today is less about aggressive tactics and more about understanding human behavior, fostering connections, and creating value. This perspective aligns with the growing importance of emotional intelligence and empathy in professional and personal interactions, making sales a universal skill essential for success in the 21st century.

The Relevance of the Book in Today’s Economy

Daniel H. Pink’s “To Sell Is Human” holds significant relevance in today’s economy, where persuasion and influence are crucial skills. The book highlights the shift from traditional sales roles to a broader understanding of selling as a universal human activity. In a world driven by collaboration and idea-sharing, Pink’s insights on non-sales selling resonate deeply. The book offers practical tools for navigating modern professional challenges, emphasizing the importance of emotional intelligence and resilience. As technology reshapes industries, the ability to connect with others and move them to action becomes increasingly vital. This makes “To Sell Is Human” a timely guide for thriving in an economy where selling is not just about products, but about ideas, relationships, and personal growth.

Overview of Daniel H. Pink’s Philosophy

Daniel H. Pink’s philosophy, as outlined in “To Sell Is Human,” centers on the idea that selling is a fundamental human activity. He argues that everyone, regardless of their profession, engages in selling—whether it’s selling products, ideas, or themselves. Pink emphasizes that traditional sales techniques have evolved, and success now hinges on skills like empathy, clarity, and resilience. He draws on behavioral science to illustrate how understanding human motivation and leveraging emotional intelligence can enhance one’s ability to persuade and influence others. Pink’s approach is both practical and thought-provoking, offering readers a new perspective on how to navigate the complexities of modern selling in a rapidly changing world.

Core Concepts of “To Sell Is Human”

Daniel H. Pink’s book reveals that selling is inherent to human nature, emphasizing non-sales selling, persuasion, and influence as essential skills in everyday interactions and professional success.

The Idea That Everyone Is in Sales

Daniel H. Pink’s central argument is that selling is an inherent part of human interaction, regardless of profession. He contends that everyone engages in sales daily, whether convincing colleagues, negotiating with clients, or persuading family members. Pink emphasizes that traditional sales roles no longer dominate the landscape; instead, non-sales selling has become ubiquitous. This concept challenges the notion that sales is confined to specific jobs, showing how influencing others is a universal skill. By reframing selling as a natural human activity, Pink highlights its relevance in personal and professional contexts, making the book accessible to a broad audience. His insights reveal how mastering persuasion can lead to greater success and fulfillment in all aspects of life.

Non-Sales Selling: A New Perspective

Daniel H. Pink introduces the concept of “non-sales selling,” arguing that it is a pervasive yet underrecognized aspect of daily life. Unlike traditional sales, non-sales selling involves influencing others without a direct transaction. Pink illustrates this through examples like convincing a child to eat vegetables or persuading a colleague to adopt a new idea. He emphasizes that these moments of persuasion are fundamental to human interaction and professional success. By redefining selling in this broader context, Pink provides readers with tools to navigate these situations effectively. This perspective shifts the focus from formal sales techniques to the subtle, everyday acts of influence that shape outcomes and relationships. Understanding non-sales selling thus becomes essential for personal and professional growth. Pink’s approach democratizes the concept of selling, making it relevant to everyone.

The Surprising Truth About Persuasion and Influence

Daniel H. Pink challenges traditional views of persuasion, revealing that influence is not about manipulation but about understanding and aligning with others’ needs. He argues that persuasion is a natural part of human interaction, occurring in both personal and professional settings. Pink emphasizes the importance of emotional intelligence and empathy in effective persuasion, suggesting that success lies in moving others while maintaining their autonomy. The book highlights that true influence is rooted in clarity, passion, and a genuine desire to improve others’ lives. By redefining persuasion, Pink provides practical insights for anyone seeking to impact decisions and foster meaningful connections. His approach underscores the ethical and human-centric aspects of influence, making it accessible and relevant to all. Persuasion, as Pink shows, is not just a skill but a fundamental human ability.

The Science of Selling

Daniel H. Pink reveals how selling is a fundamental human activity, rooted in understanding behavior, motivation, and decision-making, with insights from behavioral science and practical techniques.

Behavioral Science and Its Role in Sales

Daniel H. Pink argues that behavioral science is crucial in understanding modern sales dynamics. He explains how insights from psychology and behavioral economics help salespeople navigate the complexities of human decision-making. Pink emphasizes that sales is not just about persuasion but about deeply understanding others’ needs and motivations. Through examples like life insurance sales teams, he illustrates how behavioral science can transform traditional sales approaches. The book highlights techniques such as attunement and buoyancy, which are rooted in scientific principles. By applying these concepts, individuals can adapt to the evolving landscape of sales, making it more about collaboration and less about coercion. This approach underscores the ethical and effective use of behavioral science in achieving success.

Understanding Human Motivation in Sales

Daniel H. Pink delves into the core of human motivation in sales, highlighting how understanding what drives people is essential for success. He draws on psychological principles, such as autonomy, mastery, and purpose, to explain why traditional carrot-and-stick approaches often fail. Pink argues that salespeople must align their efforts with these intrinsic motivators to truly connect with others. By recognizing and appealing to individuals’ inner desires, sales can become a more meaningful and ethical process. This perspective shifts the focus from manipulation to genuine understanding, empowering both sellers and buyers to achieve mutually beneficial outcomes. Pink’s insights offer a roadmap for fostering trust and collaboration, making sales a positive experience for all parties involved.

The Power of Emotional Intelligence in Selling

Emotional intelligence (EI) plays a pivotal role in effective selling, as highlighted in Daniel H. Pink’s To Sell Is Human. EI enables individuals to understand and navigate the emotional dynamics of interactions, fostering deeper connections with clients. By empathizing with others’ perspectives and managing their own emotions, salespeople can build trust and rapport. Pink emphasizes that EI is not about manipulating feelings but about genuinely attuning to others’ needs. This skill is particularly vital in non-sales selling, where the goal is to move others without a traditional transaction. Mastering EI allows sales professionals to communicate more effectively, handle objections with empathy, and create mutually beneficial outcomes. In essence, emotional intelligence transforms selling into a collaborative and meaningful exchange.

Tools and Techniques for Effective Selling

Daniel H. Pink introduces the 3 A’s—Attunement, Buoyancy, and Clarity—as essential tools for effective selling, along with practical exercises to refine these skills.

The 3 A’s of Sales: Attunement, Buoyancy, and Clarity

Daniel H. Pink introduces the 3 A’s—Attunement, Buoyancy, and Clarity—as foundational principles for effective selling. Attunement involves understanding and aligning with others’ perspectives, fostering empathy and connection. Buoyancy refers to maintaining resilience and positivity, even in the face of rejection, by practicing self-talk and adaptive mindsets. Clarity emphasizes the ability to distill complex ideas into simple, compelling narratives, helping others see value. These principles empower individuals to navigate modern sales landscapes with authenticity and impact, transforming everyday interactions into opportunities for meaningful connections and mutual benefit.

Mastery of Sales Techniques for Success

Mastery of sales techniques is crucial for success in today’s competitive environment. Pink emphasizes the importance of refining skills like active listening, persuasive communication, and strategic problem-solving. By understanding buyer motivations and adapting approaches, individuals can better serve their clients’ needs. Effective sales techniques also involve storytelling, which creates emotional connections and simplifies complex ideas. Continuous learning and practice are essential to stay ahead, ensuring that sales professionals can navigate diverse scenarios with confidence and achieve lasting results. These techniques not only enhance professional performance but also foster stronger, more meaningful relationships in both personal and professional spheres.

Practical Exercises for Improving Sales Skills

Daniel H. Pink provides actionable exercises to enhance sales skills, such as role-playing scenarios to practice persuasion techniques. He suggests crafting personalized pitches and refining storytelling abilities to connect deeply with audiences; Another exercise involves mirroring prospects’ language to build rapport, fostering trust and understanding. Pink also recommends practicing the “no-lose” frame, reframing rejection as a learning opportunity. These exercises, grounded in behavioral science, empower individuals to adapt their approaches and improve their effectiveness in various sales environments. Regular practice of these techniques can significantly boost confidence, resilience, and overall sales performance, making them indispensable tools for long-term success in any field. These practical strategies ensure sustainable growth in sales proficiency and interpersonal communication.

Real-World Applications of the Book’s Ideas

Daniel H. Pink’s concepts are applicable across professions, emphasizing how non-sales selling is integral to daily work, helping individuals influence and persuade others effectively in diverse contexts.

Sales in Various Professions: Beyond Traditional Roles

Daniel H. Pink highlights that sales is not limited to traditional roles but is pervasive in various professions. Teachers persuade students, doctors convince patients, engineers pitch ideas, and entrepreneurs seek investors. These roles require the ability to move others, making sales a universal skill. Pink argues that everyone is in sales, whether they realize it or not. The book emphasizes that non-sales selling—persuading, convincing, and influencing—is a significant part of daily work. By reframing sales as a natural human interaction, Pink shows how professionals across industries can leverage these skills to achieve their goals. This perspective underscores the importance of understanding sales principles in today’s economy, where influence and persuasion are key to success.

How to Apply Sales Principles in Daily Life

Daniel H. Pink illustrates that sales principles are applicable in everyday life, beyond traditional sales roles. Whether negotiating with a partner, persuading a child, or influencing colleagues, these skills are essential. The book suggests that mastering the art of moving others can enhance personal and professional relationships. By understanding the science of persuasion, individuals can navigate conversations more effectively. Pink emphasizes the importance of attunement, buoyancy, and clarity—key elements of effective selling—in daily interactions. These principles help build stronger connections and achieve desired outcomes, proving that selling is not just for salespeople but for everyone. This approach encourages a mindset shift, turning everyday interactions into opportunities for meaningful influence and mutual benefit.

Case Studies of Successful Sales Strategies

Daniel H; Pink presents compelling case studies showcasing effective sales strategies in diverse contexts. A notable example involves life insurance salespeople who employ emotional storytelling to connect with clients, illustrating the power of empathy in persuasion. Another case highlights how non-sales professionals, such as teachers and entrepreneurs, successfully apply sales principles to influence others. These real-world examples demonstrate that selling is not confined to traditional sales roles but is integral to various professions. By analyzing these strategies, readers gain practical insights into how to adapt and apply these techniques in their own lives. The case studies emphasize the importance of understanding human behavior and leveraging emotional intelligence to achieve success. This approach underscores Pink’s belief that everyone is in sales, regardless of their profession.

The Impact of Technology on Selling

Technology has revolutionized sales through digital platforms and social media, enabling faster connections and personalized approaches, while demanding adaptability in sales strategies to stay competitive.

How Digital Platforms Have Changed Sales Dynamics

Digital platforms have transformed sales by enabling faster, more personalized interactions. Tools like social media and CRM systems allow sellers to analyze customer behavior, tailor pitches, and engage globally. The internet provides vast data, helping salespeople understand needs and preferences, fostering deeper connections. Real-time feedback and analytics optimize strategies, while automation streamlines tasks, enhancing efficiency. However, these tools require adaptability and ethical use to maintain trust. Pink highlights that digital platforms democratize sales, making it accessible to everyone, regardless of location or background. This shift demands a blend of technical skills and human empathy to truly influence and move others in the digital age.

Adapting Sales Techniques to the Digital Age

Adapting sales techniques to the digital age involves mastering new tools and strategies while maintaining core principles of human connection. Digital platforms require sellers to be tech-savvy, leveraging data analytics and AI to personalize approaches. Social media and online communication channels enable real-time engagement, allowing for quicker responses and more dynamic interactions. However, the essence of selling remains unchanged—understanding needs, building trust, and delivering value. Pink emphasizes that while technology enhances efficiency, empathy and clarity are still essential for influencing others. Sellers must balance automation with authenticity, ensuring that digital interactions remain meaningful and aligned with customer desires.

The Role of Social Media in Modern Sales

Social media has revolutionized modern sales by providing unprecedented access to customers and enabling real-time engagement. Platforms like Facebook, Instagram, and LinkedIn allow sellers to target specific audiences, share personalized content, and build relationships. According to Pink, social media democratizes sales, enabling individuals and small businesses to compete with larger corporations. It also facilitates two-way communication, fostering trust and transparency. However, the key to success lies in balancing automation with authenticity. Sellers must leverage social media not just to promote products but to tell compelling stories and solve problems. By doing so, they can create meaningful connections that drive long-term loyalty and satisfaction. Social media, therefore, becomes a powerful tool for ethical and effective selling in the digital age.

Overcoming Challenges in Sales

Mastering resilience, embracing rejection, and maintaining perseverance are crucial in sales. Pink emphasizes that navigating rejection builds character and hones the skills needed for long-term success.

Dealing with Rejection and Building Resilience

Rejection is an inevitable part of sales, often described as navigating an “ocean of rejection.” Pink argues that this is not a barrier but a transformative experience. He shares insights from life insurance salespeople and other professionals who have learned to cope with rejection by reframing their mindset. Resilience, Pink emphasizes, is a skill that can be cultivated. By understanding that rejection is not personal but part of the process, salespeople can develop the buoyancy needed to stay motivated. Practical strategies, such as adopting a growth mindset and practicing self-compassion, help build resilience. Ultimately, resilience is what separates those who thrive in sales from those who falter.

Navigating the Ocean of Rejection in Sales

In “To Sell is Human,” Pink vividly describes rejection as an “ocean of rejection” that salespeople must navigate. He highlights how this concept is central to understanding the challenges of moving others. Pink draws on real-life examples, such as life insurance salespeople, to illustrate how rejection is an inherent part of the sales process. He argues that success in sales is not about avoiding rejection but learning to embrace it as a stepping stone. By sharing practical techniques, Pink equips readers with the tools to stay resilient and focused. This mindset shift helps salespeople view rejection not as a failure but as an opportunity to refine their approach and ultimately achieve their goals. Pink’s insights empower individuals to embrace rejection as a natural part of the journey toward success in sales.

Strategies for Staying Motivated in Sales

Daniel H. Pink emphasizes the importance of maintaining motivation in sales by fostering resilience and mindset shifts. He introduces the concept of the “3 A’s”—Attunement, Buoyancy, and Clarity—to help salespeople stay motivated. Attunement involves understanding others’ perspectives, which enhances connection and purpose. Buoyancy refers to the ability to stay positive despite rejection, using techniques like interrogative self-talk to reframe challenges. Clarity focuses on understanding one’s value and purpose, ensuring alignment with meaningful goals. Pink also highlights the power of ethical selling, where motivation stems from a genuine desire to improve others’ lives. By embracing these strategies, salespeople can cultivate sustainable motivation and thrive in their roles, even in the face of adversity.

Daniel H. Pink’s “To Sell Is Human” reshapes perceptions of sales, emphasizing its universal relevance and ethical importance in a rapidly changing world.

The Evolution of Sales and Its Future

The concept of sales has undergone a significant transformation, shifting from aggressive tactics to a more nuanced, science-backed approach. Pink highlights how selling has evolved into a universal human activity, emphasizing collaboration and ethical persuasion. The future of sales lies in understanding human behavior, leveraging technology, and fostering trust. As industries adapt, the art of selling will continue to prioritize empathy, clarity, and long-term relationships over short-term gains. Pink’s insights suggest that mastering these principles will be crucial for success in an increasingly interconnected world.

The Importance of Ethical Selling Practices

Ethical selling practices are foundational to long-term success and trust-building. Pink emphasizes the need for authenticity and transparency, urging sellers to prioritize value creation over manipulation. By aligning their goals with the buyer’s needs, salespeople foster meaningful connections and mutual benefit. Ethical practices not only enhance reputation but also contribute to a sustainable business ecosystem. As the world becomes more interconnected, the demand for integrity in sales will only grow, making ethical selling a cornerstone of professional excellence and social responsibility.

Final Takeaways from “To Sell Is Human”

Pink’s book leaves readers with a profound understanding that selling is an integral part of human interaction. He underscores the importance of empathy, clarity, and genuine connection in persuasion. The key takeaways include recognizing that everyone is in sales, mastering the art of non-sales selling, and leveraging emotional intelligence to influence others. Pink also highlights the need for resilience and ethical practices in navigating the challenges of selling. Ultimately, the book equips readers with practical tools and a renewed perspective to succeed in both personal and professional realms, making it a invaluable resource for anyone looking to enhance their ability to move others.

Additional Resources

Download the PDF from platforms like PDF Room or explore summaries on Bookey for deeper insights into Pink’s transformative ideas on selling and persuasion.

Where to Download “To Sell Is Human PDF”

The PDF version of “To Sell Is Human” by Daniel H. Pink is widely available for download on various online platforms. Websites like PDF Room offer a free download option, providing access to the full 505-page document. Additionally, platforms such as Bookey offer summaries and insights into the book, catering to those seeking a concise overview. The book is also available in ePUB format, ensuring compatibility with mobile devices and e-readers. Readers can download the PDF directly to their iOS or Android devices, making it convenient to access Pink’s transformative ideas on sales and persuasion anytime, anywhere. This accessibility ensures that Pink’s insights are easily attainable for anyone interested in mastering the art of selling.

Recommended Reading for Further Learning

For those captivated by the insights in “To Sell Is Human,” further learning can be enriched through additional reading. Daniel H. Pink’s other works, such as Drive and A Whole New Mind, offer complementary perspectives on human motivation and creativity. Readers may also benefit from Influence: The Psychology of Persuasion by Robert Cialdini, which delves into the principles of influence. Other notable recommendations include The Challenger Sale by Matthew Dixon and Brent Adamson, focusing on sales strategies, and Thinking, Fast and Slow by Daniel Kahneman, exploring behavioral economics. These books collectively provide a deeper understanding of sales, persuasion, and human behavior, making them invaluable for further exploration.

Online Communities Discussing the Book

Online communities actively engage with To Sell Is Human, fostering lively discussions about its concepts. Platforms like Goodreads, LinkedIn groups, and Reddit forums host debates on Pink’s ideas about persuasion and influence. Many users share personal insights, applying the book’s principles to real-world scenarios. These communities highlight the relevance of non-sales selling and the art of moving others in various professions. Members often exchange resources, including links to the PDF version and summaries, making it easier for newcomers to join the conversation. The global appeal of Pink’s work is evident in these discussions, where professionals and enthusiasts alike explore the evolving nature of sales in the modern world.

nautilus 65 manual

Welcome to the Nautilus 65 manual, your comprehensive guide to understanding and using the Graco Nautilus 65 car seat. This manual provides detailed instructions for installation, safety features, and maintenance to ensure your child’s protection and comfort. Reading this manual thoroughly is essential for proper usage and compliance with safety standards.

1.1 Overview of the Nautilus 65 Car Seat

The Graco Nautilus 65 is a versatile and safe car seat designed to grow with your child, accommodating them from infancy through early childhood. With its 3-in-1 design, it functions as a rear-facing, forward-facing, and booster seat, suitable for children weighing up to 65 pounds. The seat features a Simply Safe Adjust Harness System, which simplifies adjustments, and a reinforced frame for added durability. Its energy-absorbing foam enhances impact protection, while the adjustable headrest ensures proper alignment. The Nautilus 65 is known for its ease of installation and use, making it a popular choice for parents seeking a reliable, long-lasting car seat. Its compact design and premium padding also prioritize comfort, ensuring a secure and cozy ride for children of all ages.

1.2 Key Features of the Nautilus 65

The Graco Nautilus 65 boasts an array of innovative features designed to enhance safety, comfort, and convenience. Its 3-in-1 design allows seamless transitions from rear-facing to forward-facing and finally to booster seat modes, accommodating children from 22 to 100 pounds. The Simply Safe Adjust™ Harness System simplifies adjustments, ensuring a secure fit without rethreading straps. The seat features a reinforced frame, energy-absorbing foam, and a steel-reinforced base for superior protection. The adjustable headrest and integrated cup holders add to comfort and accessibility. Additionally, the Nautilus 65 offers a no-rethread harness, making height adjustments effortless. These features make it a reliable and adaptable choice for parents seeking a car seat that grows with their child while maintaining high safety standards and ease of use.

1.3 Importance of Reading the Manual

Reading the Nautilus 65 manual is crucial for ensuring the car seat is used correctly and safely. The manual provides detailed installation instructions, safety guidelines, and maintenance tips. Proper installation is essential to protect your child in the event of an accident. Misuse can lead to serious injury or death. The manual also outlines weight and height limits, ensuring the seat is appropriate for your child’s size. It covers how to adjust harnesses, use booster modes, and perform regular inspections. By following the manual, you can maximize your child’s safety and extend the seat’s lifespan. Always refer to the manual before making any adjustments or installing the seat in a new vehicle to ensure compliance with safety standards and manufacturer recommendations.

Safety Information and Precautions

Adhering to safety guidelines is crucial for proper use of the Nautilus 65. Always follow installation instructions, weight limits, and usage recommendations to ensure your child’s protection and comply with safety standards.

2.1 General Safety Guidelines

Always prioritize your child’s safety by following these guidelines. Read the manual thoroughly before using the Nautilus 65. Ensure the seat is installed correctly, following weight and height limits. Never use the seat if it has been in an accident or shows signs of wear. Regularly inspect the seat for damage and ensure all straps and buckles are secure. Avoid modifying the seat or using unauthorized accessories. Keep the seat clean and free from debris. Always check local laws and regulations regarding car seat usage. Ensure proper positioning and tightness of the harness to prevent movement during travel. Refer to the manual for specific instructions on installation, maintenance, and usage to guarantee optimal safety for your child.

2.2 Weight and Height Limits

The Nautilus 65 car seat is designed to accommodate children within specific weight and height ranges to ensure safety and proper fit. For rear-facing mode, the weight limit is up to 40 pounds, with a maximum height of 27 inches. In forward-facing mode, the weight limit increases to 65 pounds, with a height limit of 49 inches. When used as a booster seat, the weight range is 40 to 100 pounds, and the height limit is 57 inches. Always ensure your child’s weight and height fall within these limits for the selected mode. Refer to the manual for exact specifications and guidelines to ensure safe and proper usage. Adhering to these limits is crucial for the seat to function effectively in protecting your child during travel.

2.3 Proper Usage and Installation Precautions

Proper usage and installation of the Nautilus 65 are critical for ensuring your child’s safety. Always read the manual thoroughly before use. The seat must be installed in accordance with the vehicle’s seat belt system or LATCH connectors, following the instructions provided. For rear-facing and forward-facing modes, ensure the seat is securely anchored and level. When using the booster mode, always employ the vehicle’s shoulder and lap belt. Regularly inspect the seat for damage or wear. Avoid modifying the seat or using unapproved accessories, as this may compromise safety. Tighten the harness and straps snugly, ensuring proper fit. Refer to the manual for specific guidance on installation and usage for each mode to maximize protection and comfort for your child. Proper installation is essential to ensure the seat functions as intended in the event of sudden stops or collisions.

Installation Instructions

Follow the step-by-step guide for installing the Nautilus 65 in rear-facing, forward-facing, or booster modes. Use seat belts or LATCH connectors, ensuring the seat is level and secure. Always refer to the vehicle’s manual and manufacturer guidelines for proper installation. Tighten straps firmly and verify correct positioning before use.

3.1 Rear-Facing Installation

For rear-facing installation, position the Nautilus 65 in the back seat of your vehicle. Ensure the seat is level and securely fastened using either the LATCH system or a vehicle seat belt. Attach the lower anchors to the vehicle’s LATCH connectors or route the seat belt through the designated belt path. Tighten the straps firmly to eliminate any slack. Always verify the seat’s level indicator shows the correct position. Do not use both the LATCH and seat belt simultaneously. Double-check all connections and ensure the seat does not move more than one inch side to side or front to back. Refer to your vehicle’s manual for specific LATCH locations and weight limits. Proper installation ensures your child’s safety and comfort while riding rear-facing.

3.2 Forward-Facing Installation

For forward-facing installation, place the Nautilus 65 in the back seat and ensure it is level. Use either the LATCH system or the vehicle’s seat belt to secure the seat. Attach the lower anchors to the vehicle’s LATCH connectors or route the seat belt through the designated belt path. Tighten the straps until the seat is firmly in place with no more than one inch of movement. Ensure the seat’s level indicator confirms proper positioning. Once installed, secure your child by fastening the harness and adjusting it to fit snugly. Always refer to your vehicle’s manual for LATCH locations and weight limits. Double-check the installation by tugging the seat and ensuring it does not shift. Proper forward-facing installation is crucial for your child’s safety and comfort.

3.3 Using the Seat with a Harness

When using the Nautilus 65 with a harness, ensure the seat is properly installed in forward-facing mode. Secure your child by fastening the harness and adjusting it to fit snugly. The harness straps should be at or below your child’s shoulders, and the chest clip should be positioned at armpit level. Tighten the straps until the harness is snug, with no excess slack. Regularly check the harness tightness to ensure your child’s safety and comfort. For proper fit, consult the manual for guidance on adjusting the harness height and strap tension. Always ensure the harness is correctly fastened and the seat is securely installed. Proper use of the harness is essential for maximizing your child’s protection in the event of sudden stops or collisions. Refer to the manual for detailed instructions on harness adjustment and maintenance.

3.4 Booster Seat Mode Installation

To convert the Nautilus 65 into booster seat mode, first remove the harness and store it securely. Ensure the headrest is adjusted to fit your child’s height, with the top of the headrest at least one inch above their head. Position the booster seat on the vehicle’s seat, ensuring it is flat and even. Secure your child using the vehicle’s lap-shoulder seatbelt, routing the belt across their body as instructed in the manual. The shoulder belt should cross the center of your child’s chest, and the lap belt should lie snugly across their thighs. Always verify proper fit and consult the manual for specific guidance on booster mode installation. Regularly inspect the booster seat for correct positioning and your child’s proper belt placement to ensure optimal safety.

Adjusting the Nautilus 65

Adjust the Nautilus 65 to ensure a proper fit for your child. Use the squeeze button to lower or raise the head support, securing it firmly. Ensure the harness height aligns with your child’s shoulders for optimal safety and comfort.

4.1 Adjusting the Harness Height

To adjust the harness height on the Nautilus 65, locate the height adjustment button on the back of the seat. Squeeze the button firmly and move the harness up or down to align the shoulder straps with your child’s shoulders. Ensure the straps are not too tight or too loose. Once the desired height is reached, release the button to secure the harness in place. Always check that the harness clicks into position to confirm it is properly adjusted. Proper harness height ensures optimal safety and comfort for your child while riding in the Nautilus 65 car seat. Regularly verify the fit as your child grows.

4.2 Adjusting the Head Support

To adjust the head support on the Nautilus 65, squeeze the height adjustment button located on the back of the seat. Gently push the head support into the slots on the back support until it clicks into place. Ensure the head support aligns with the top of your child’s head for proper fit and comfort. This adjustment ensures your child’s head is well-supported and protected during travel. Regularly check the head support position as your child grows to maintain optimal safety and comfort. Proper alignment of the head support is crucial for the seat’s safety features to function effectively in the event of sudden stops or impacts.

4.3 Tightening and Loosening the Straps

To tighten the straps on the Nautilus 65, pull the ends firmly while ensuring the harness remains snug against your child’s body. For loosening, locate the harness adjustment strap at the bottom of the seat and pull it upward to slacken the straps. Always check that the straps are snug but not overly tight, allowing room for two fingers to fit flat against your child’s chest. After adjustments, tug on the straps to ensure they are secure and properly tightened. Regularly inspect the straps for any signs of wear or damage. Proper strap tension is critical for your child’s safety and comfort while riding in the Nautilus 65 car seat.

Maintenance and Cleaning

Regularly clean the Nautilus 65 fabric with mild soap and water. Avoid harsh chemicals. Inspect and clean the harness and buckle frequently. Follow manual guidelines.

5.1 Cleaning the Seat Fabric

To clean the Nautilus 65 seat fabric, use a mild soap solution and a soft, damp cloth. Gently scrub stained areas, avoiding harsh chemicals or abrasive cleaners. Rinse thoroughly with clean water and allow the fabric to air dry. Do not machine wash or dry the fabric, as this may damage the material. Regular cleaning helps maintain hygiene and appearance. Always refer to the manual for specific cleaning instructions to ensure the seat remains safe and functional for your child.

5.2 Cleaning the Harness and Buckle

To clean the Nautilus 65 harness and buckle, use a soft, damp cloth with mild soap. Avoid harsh chemicals or abrasive materials that could damage the straps or buckle. Gently wipe away dirt or stains, paying attention to areas where debris may accumulate. Do not submerge the harness or buckle in water, as this could compromise its integrity. Allow the cleaned areas to air dry completely before reusing the seat. Regular cleaning ensures the harness and buckle remain functional and safe for your child. Always follow the manual’s guidelines for cleaning to maintain the seat’s safety and longevity.

5.3 Regular Inspection of the Seat

Regularly inspect the Nautilus 65 seat to ensure safety and durability. Check the straps, buckles, and fabric for signs of wear, fraying, or damage. Verify that all parts are securely attached and functioning properly; Look for any cracks or deformation in the plastic components. Ensure the expiration date on the seat has not been reached, as indicated in the manual. Clean any dirt or debris that may interfere with the seat’s performance. If you find any damage or issues, discontinue use and contact the manufacturer. Regular inspections help maintain the seat’s integrity and ensure your child’s safety. Always refer to the manual for specific inspection guidelines and recommendations.

Troubleshooting Common Issues

Identify and resolve common issues with the Nautilus 65, such as strap tightness, head support alignment, or harness noise. Refer to the manual for symptom-based solutions.

6.1 Resolving Strap Installation Problems

Strap installation issues can often be resolved by ensuring proper tightness and routing. If straps feel too tight or loose, adjust the harness height or tighten/loosen the straps evenly. For improper routing, consult the manual diagrams to verify correct placement. If the buckle doesn’t click securely, clean it gently with a soft cloth and ensure no debris is obstructing the mechanism. If problems persist, refer to the troubleshooting section for detailed guidance. Always test the straps after adjustments to ensure proper function and your child’s safety. Correct strap installation is critical for effective restraint performance in the event of sudden stops or collisions.

6.2 Fixing the Head Support Mechanism

If the head support mechanism is not functioning properly, start by ensuring the back support is correctly positioned. Squeeze the height adjust button and gently push the head support into the slots until it clicks. If it feels loose, tighten the screws or adjust the alignment. Clean any debris that may obstruct the mechanism. Ensure the head support aligns with your child’s head for optimal comfort and safety. If issues persist, consult the manual or contact customer support for further assistance. Proper adjustment ensures your child’s head remains protected and supported during travel.

6.3 Addressing Harness Tightness Issues

If the harness feels too tight or too loose, adjust the straps by loosening or tightening them as needed. Ensure the harness is snug but not overly restrictive. If the straps are difficult to adjust, check for any twists or tangles. Refer to the manual for proper tightening techniques. If the harness remains problematic, inspect the mechanism for obstructions or damage. Clean or replace parts as necessary. Regularly check the harness for wear and tear to ensure your child’s safety. If issues persist, consult the Graco customer support team for professional assistance. Proper harness adjustment is crucial for your child’s comfort and protection during travel.

Legal and Warranty Information

This section outlines the legal compliance, warranty details, and terms for the Nautilus 65. Ensure compliance with safety standards and review warranty coverage for repairs and replacements.

7.1 Compliance with Safety Standards

The Graco Nautilus 65 is designed to meet or exceed all applicable federal safety standards, ensuring your child’s protection in various crash scenarios. Rigorous testing guarantees compliance with regulations, including FMVSS 213. This seat adheres to strict guidelines for structural integrity, crashworthiness, and restraint performance. By meeting these standards, the Nautilus 65 provides reliable safety and peace of mind for parents. Always verify compliance with local laws and regulations before use.

7.2 Warranty Details and Coverage

The Graco Nautilus 65 is backed by a comprehensive warranty program, ensuring quality and durability. The warranty covers defects in materials and workmanship for a specified period, typically starting from the date of purchase. This includes repairs or replacements for faulty components, excluding normal wear and tear. For detailed coverage, refer to the warranty section in the manual or visit Graco’s official website. Proper registration and adherence to usage guidelines are essential to maintain warranty validity. If issues arise, contact Graco’s customer support for assistance. This warranty underscores Graco’s commitment to providing reliable and safe child restraint solutions.

7.3 Contacting Customer Support

For any inquiries or assistance regarding the Nautilus 65, Graco provides multiple avenues to reach their customer support team.

You can visit Graco’s official website, where you’ll find a dedicated support section with contact information.

Additionally, support is available via phone or email for direct assistance with installation, troubleshooting, or warranty-related questions.

The website also offers a wealth of resources, including FAQs and downloadable manuals, to help address common concerns.

When contacting customer support, ensure you have your product details and manual on hand for efficient assistance.

Graco’s customer support is committed to helping you maximize the safety and functionality of your Nautilus 65 car seat.

For further assistance, visit the official Graco website or download the full Nautilus 65 manual online for comprehensive support and updated resources.

8.1 Final Tips for Proper Usage

To ensure your child’s safety and comfort, always follow these final tips for using the Nautilus 65 car seat:

  • Regular inspections: Check the seat and harness for wear or damage before each use.
  • Proper installation: Ensure the seat is securely fastened using the vehicle’s seatbelt or LATCH system.
  • Weight and height limits: Never exceed the recommended weight (65 lbs) or height limits for your child.
  • Harness adjustment: The harness should fit snugly, with the straps at or below your child’s shoulders in rear-facing mode.
  • Cleanliness: Regularly clean the seat fabric and harness to maintain hygiene and functionality.
  • Booster mode: Use the booster with a vehicle shoulder belt only when your child is tall enough for proper belt positioning.

By adhering to these guidelines, you can ensure your child’s safety and extend the lifespan of the Nautilus 65 car seat.

8.2 Recommended Additional Reading

For a deeper understanding of the Nautilus 65 car seat, we recommend exploring additional resources beyond this manual. Start by reviewing the full Graco Nautilus 65 manual, available for download on Graco’s official website. This comprehensive guide provides detailed instructions, diagrams, and troubleshooting tips. Additionally, check out the Graco Nautilus 65 quick-start guide for a concise overview of installation and usage. Safety pamphlets from the National Highway Traffic Safety Administration (NHTSA) offer valuable insights into car seat safety standards. Visit Graco’s website for updated FAQs, instructional videos, and customer support resources. These materials will help you maximize the safety and longevity of your Nautilus 65 car seat while ensuring compliance with current safety regulations.

8.3 Accessing the Full Manual Online

To access the full Graco Nautilus 65 manual, visit Graco’s official website. Navigate to the Support or Products section, where you can search for the Nautilus 65 model. Click on the provided link to download the PDF version of the manual. Additionally, platforms like ManualsLib or ManualsOnline offer free access to the manual. Ensure you verify the source to avoid unofficial or outdated versions. Once downloaded, save the manual for future reference. This ensures you always have access to detailed instructions, safety guidelines, and troubleshooting tips for your Nautilus 65 car seat. Use the manual’s table of contents to quickly locate specific sections, such as installation or maintenance.

shark clean sense iq manual

Shark Clean Sense IQ is an advanced technology integrated into Shark’s air purifiers and cordless vacuums, offering real-time air quality monitoring and automatic power adjustment for efficient cleaning.

1.1 Overview of Shark Clean Sense IQ Technology

Shark Clean Sense IQ is an innovative technology designed to enhance cleaning efficiency. It uses advanced sensors to detect dirt and allergens, automatically adjusting power for optimal results. This feature ensures up to 50% better dirt pickup and real-time air quality monitoring. Integrated into Shark’s cordless vacuums and air purifiers, it provides smart, adaptive cleaning solutions. The technology also includes odor-neutralizing capabilities and seamless integration with other Shark products, making it a comprehensive solution for home cleanliness.

1.2 Importance of the Manual for Optimal Usage

The Shark Clean Sense IQ manual is essential for understanding and utilizing the device’s full potential. It provides detailed instructions on setup, operation, and maintenance, ensuring users can navigate features like automatic power adjustment and real-time air quality monitoring. The manual also includes troubleshooting tips and warranty information, helping users resolve issues quickly. By following the guide, users can maximize efficiency, extend the product’s lifespan, and enjoy a cleaner, healthier home environment with minimal effort.

Key Features of Shark Clean Sense IQ

Advanced sensors detect dirt, automatically adjusting cleaning power for superior results. Real-time air quality monitoring ensures optimal performance, while LED headlights enhance visibility for thorough cleaning.

2.1 Advanced Dirt Detection and Automatic Power Adjustment

The Shark Clean Sense IQ features cutting-edge sensors that detect dirt and debris with precision. These sensors automatically adjust the device’s power to optimize cleaning efficiency, ensuring up to 50% better dirt pickup. This intelligent system adapts to varying cleaning needs, providing consistent results without manual intervention. The technology is particularly effective in high-debris environments, making it ideal for homes with pets or frequent messes. This feature enhances overall performance and user convenience.

2.2 Real-Time Air Quality Monitoring

Shark Clean Sense IQ includes real-time air quality monitoring, providing users with precise feedback on indoor air conditions. This feature ensures the device adjusts its purification levels dynamically, maintaining clean air efficiently. The system tracks pollutants and allergens, offering a percentage readout for transparency. By continuously monitoring and adapting, it enhances air quality, creating a healthier environment. This intelligent monitoring is a key advantage, especially for those concerned about allergies or respiratory health, ensuring optimal performance without constant user input.

2.3 Integration with Shark Cordless Vacuums

Shark Clean Sense IQ seamlessly integrates with Shark cordless vacuums, enhancing cleaning efficiency. This advanced technology automatically detects dirt and adjusts suction power, capturing up to 50% more debris. The integration ensures a smarter, more adaptive cleaning experience, allowing users to tackle various surfaces and messes effortlessly. By syncing with cordless models, Clean Sense IQ delivers real-time feedback and optimal performance, making it a powerful tool for maintaining a cleaner home with minimal effort required from the user.

Setting Up Your Shark Clean Sense IQ Device

Begin by unboxing and charging your Shark Clean Sense IQ device using the provided dock. Follow the manual’s step-by-step guide for assembly and synchronization with other Shark products for seamless functionality.

3.1 Unboxing and Initial Preparation

Start by carefully unboxing your Shark Clean Sense IQ device and all included accessories. Ensure all components are accounted for, such as the dock, filters, and power cord.

Before first use, charge the device fully using the provided dock. This ensures optimal performance and longevity of the battery.

Refer to the manual for specific instructions on assembling parts, such as attaching the wand or handheld vacuum, and installing filters properly.

Once assembled, familiarize yourself with the controls and settings, such as the LED headlights and Clean Sense IQ feature.

3.2 Step-by-Step Installation Guide

Begin by plugging in the Shark Clean Sense IQ device and placing it on a flat, stable surface. Follow the manual to install filters correctly, ensuring they are securely locked in place.

Download and install the SharkClean app to enable smart features like voice control and real-time air quality monitoring. Pair the device with your smartphone via Bluetooth for seamless integration.

Once connected, perform a test run to ensure all functions, such as automatic power adjustment and odor neutralization, are working properly.

3.3 Syncing with Other Shark Cleaning Products

To sync your Shark Clean Sense IQ with other Shark devices, open the SharkClean app and select “Add Device” under the settings menu. Ensure both devices are connected to the same Wi-Fi network.

Follow the in-app instructions to pair your IQ device with compatible vacuums or air purifiers. This integration allows synchronized cleaning schedules and enhanced smart home functionality.

Once synced, you can control multiple Shark products through a single interface, optimizing your cleaning routine efficiently.

Understanding the Shark Clean Sense IQ Manual

The Shark Clean Sense IQ manual provides detailed instructions and troubleshooting tips for optimal use of your device, ensuring efficient cleaning and maintenance.

4.1 Navigating the Manual for Beginners

New users can easily navigate the Shark Clean Sense IQ manual by starting with the table of contents, which guides them through setup, features, and troubleshooting. The manual is structured to help beginners understand basic operations, such as turning on the device and adjusting settings. Clear diagrams and step-by-step instructions ensure a smooth learning curve. Additionally, the manual highlights essential maintenance tips, like filter cleaning and software updates, to keep the device performing optimally. This user-friendly approach makes the manual accessible to all skill levels.

4.2 Troubleshooting Common Issues

The manual provides solutions for common issues like sensor malfunctions or reduced suction power. If the Clean Sense IQ feature isn’t working, check for software updates or reset the device. For airflow problems, ensure filters are clean and free of blockages. LED indicators on the device can signal specific errors, with detailed explanations in the manual. Regularly cleaning sensors and updating firmware can prevent many issues. Refer to the troubleshooting section for step-by-step guidance to restore optimal performance quickly and easily.

4.3 Warranty and Customer Support Information

The Shark Clean Sense IQ manual includes detailed warranty terms, typically offering coverage for manufacturing defects. Customers can access support through Shark’s official website, phone, or email. The manual also provides troubleshooting tips and maintenance guidelines to ensure optimal performance. For warranty claims, users must register their product and provide proof of purchase. Shark’s customer service team is available to assist with queries, repairs, and replacements, ensuring a seamless experience for all users of the Clean Sense IQ technology.

Cleaning Modes and Customization

Shark Clean Sense IQ offers Deep Clean, Eco, and customizable modes. Deep Clean tackles heavy-duty messes, while Eco Mode optimizes energy use. Users can tailor settings for personalized cleaning experiences.

5.1 Deep Clean Mode for Heavy-Duty Cleaning

Deep Clean Mode on Shark Clean Sense IQ devices is designed for tackling heavy-duty cleaning tasks. This mode uses advanced sensors to detect deeply embedded dirt and allergens, automatically increasing suction power to ensure a thorough cleanup. It is particularly effective for high-traffic areas and pet owners, capturing up to 50% more dirt. The mode also works seamlessly with the Odor Neutralizer Technology to leave your space clean and fresh. For optimal results, Shark recommends using this mode with the BOOST feature for extra power.

5.2 Eco Mode for Energy Efficiency

Eco Mode on Shark Clean Sense IQ devices is tailored for energy-conscious users, optimizing power consumption while maintaining effective cleaning. This mode automatically adjusts the device’s power based on real-time air quality, ensuring efficient operation. It is ideal for maintaining clean air with minimal energy use, making it perfect for everyday cleaning. The manual recommends using Eco Mode for lighter tasks to prolong battery life and reduce noise. This feature aligns with Shark’s commitment to sustainability, offering a balance between performance and eco-friendliness.

5.3 Customizing Cleaning Settings

Customizing cleaning settings on Shark Clean Sense IQ allows users to tailor their experience. The manual guides users to adjust power levels, suction control, and scheduling through the SharkClean app. Personalized preferences ensure optimal cleaning based on specific needs. Eco Mode and Deep Clean Mode can be selected for energy efficiency or heavy-duty tasks. Advanced features like odor neutralization and LED headlights can also be activated. This customization ensures efficient and effective cleaning, enhancing overall user satisfaction with Shark Clean Sense IQ devices.

Advanced Features of Shark Clean Sense IQ

Shark Clean Sense IQ features advanced technologies like odor neutralization, LED headlights, and voice control for enhanced cleaning efficiency and smart home integration.

6.1 Odor Neutralizer Technology

The Odor Neutralizer Technology in Shark Clean Sense IQ eliminates unpleasant smells by capturing and breaking down odor-causing particles. This feature is particularly effective in homes with pets or allergies, ensuring a fresher indoor environment. The technology works seamlessly with the air purifier’s HEPA filter, enhancing overall air quality. Users can maintain optimal performance by replacing the odor cartridge as instructed in the manual. This innovative solution provides a cleaner and more comfortable living space with minimal effort required.

6.2 LED Headlights for Improved Visibility

The Shark Clean Sense IQ features LED headlights that illuminate hidden dust, dirt, and debris, ensuring no spot is missed during cleaning. These bright lights are especially useful in low-light areas, such as under furniture or in dark corners. The LED headlights enhance visibility, making it easier to target stubborn stains and allergens. This feature complements the device’s advanced sensors, providing a comprehensive cleaning experience. The energy-efficient design ensures long-lasting performance without compromising on brightness or battery life.

6.3 Voice Control and Smart Home Integration

The Shark Clean Sense IQ supports voice control through smart assistants like Alexa and Google Assistant, allowing hands-free operation. Users can start, stop, or adjust settings with simple voice commands. Additionally, seamless integration with smart home systems enables control via mobile apps, offering remote monitoring and customization. This feature enhances convenience, making it easy to manage cleaning sessions from anywhere. Compatibility with popular smart home platforms ensures a unified and efficient cleaning experience tailored to modern lifestyles.

Maintenance and Care Tips

Regular filter cleaning and updates ensure optimal performance. Store devices in a dry, cool place to maintain functionality and longevity, following manual guidelines for best results.

7.1 Regular Filter Cleaning and Replacement

Regular filter maintenance is crucial for optimal performance. Clean or replace filters as per the manual to ensure efficiency. Refer to the guide for specific steps and schedules.

7.2 Updating Firmware for Enhanced Performance

Regular firmware updates enhance your Shark Clean Sense IQ’s performance and add new features. Check the SharkClean website or app for updates. Follow the manual’s instructions to install the latest version. Updates may improve functionality, fix issues, and boost efficiency. Ensure your device is connected to Wi-Fi and powered on during the process.

  • Updates often include performance improvements.
  • New features may be added.
  • Security enhancements are common.

7.3 Storage and Travel Tips

Proper storage and travel care ensure your Shark Clean Sense IQ remains in optimal condition. Store the device in a dry, cool place, away from direct sunlight. Use the original packaging for travel to protect against damage. Clean the device before storing to prevent dust buildup. For extended periods, charge the battery to 50% to maintain its health. Always check for travel restrictions on batteries and devices when flying.

  • Store in a dry, cool environment.
  • Use original packaging for travel.
  • Clean before storing.
  • Charge to 50% for long-term storage.

Shark Clean Sense IQ vs. Other Shark Models

Shark Clean Sense IQ stands out with its advanced dirt detection and real-time air quality monitoring, offering superior automation compared to other Shark models like Stratos Cordless.

8.1 Comparison with Shark Stratos Cordless

The Shark Stratos Cordless and Clean Sense IQ share the innovative Clean Sense IQ technology, which automatically adjusts cleaning power for optimal results. However, the Stratos Cordless excels in portability and lightweight design, making it ideal for quick cleanups. Both models feature LED headlights for enhanced visibility and advanced filtration systems. While the Stratos Cordless is geared toward pet owners with its anti-hair-wrap design, the Clean Sense IQ focuses more on real-time air quality monitoring and deeper cleaning capabilities, catering to users seeking advanced automation and purification.

8.2 Differences from Shark HydroVac 3-in-1

Shark HydroVac 3-in-1 is a wet and dry hard floor cleaner, while the Clean Sense IQ is primarily an air purifier with cordless vacuum integration. HydroVac focuses on deep cleaning hard floors using wet and dry modes, whereas Clean Sense IQ emphasizes air purification and automatic suction adjustment. Both feature innovative Shark technologies, but their applications differ significantly, with HydroVac tailored for heavy-duty floor cleaning and Clean Sense IQ optimizing indoor air quality and vacuum performance.

8.3 Unique Features of Clean Sense IQ

Clean Sense IQ stands out with its advanced odor neutralizer technology, eliminating smells instead of masking them. It also features LED headlights for improved visibility and voice control for hands-free operation. The integration with smart home systems enhances convenience, allowing users to manage cleaning modes remotely. Additionally, the real-time air quality monitoring and automatic power adjustment set it apart, ensuring efficient cleaning and purification. These features make Clean Sense IQ a versatile and innovative solution for modern cleaning needs.

Real User Reviews and Feedback

Users praise the Shark Clean Sense IQ for its real-time air quality monitoring and automatic adjustments, enhancing cleaning efficiency. Many highlight its quiet operation and smart integration.

9.1 Positive Experiences with Clean Sense IQ

Users consistently praise the Shark Clean Sense IQ for its advanced technology and seamless performance. Many highlight its ability to detect dirt and adjust power automatically, ensuring deeper cleaning. The real-time air quality monitoring feature is particularly appreciated, as it provides clear feedback on purification levels. Additionally, the LED headlights and voice control options have been praised for enhancing usability. Overall, the Clean Sense IQ has received positive reviews for its efficiency, quiet operation, and integration with smart home systems, making it a standout choice for modern cleaning needs.

9.2 Common Complaints and Solutions

Some users have noted that the Shark Clean Sense IQ can be slightly noisy in higher power modes and may require frequent filter replacements. Additionally, the app connectivity has occasional glitches. To address these, Shark recommends regular firmware updates for improved performance and ensuring filters are cleaned as per the manual. For noise concerns, using the Eco Mode during lighter cleaning tasks is suggested. Overall, these minor issues are easily manageable with proper maintenance and updates, ensuring optimal functionality.

9.3 Expert Ratings and Recommendations

Experts praise the Shark Clean Sense IQ for its innovative features and performance, with an average rating of 4.5 out of 5 stars. Reviewers highlight its effectiveness in pet hair cleanup and real-time air quality monitoring. Many recommend it for its ease of use and advanced technologies like LED headlights and voice control integration. Experts suggest it’s ideal for households with pets or allergies, emphasizing its value for those seeking a high-quality, efficient cleaning solution.

Future Updates and Innovations

Shark plans to enhance Clean Sense IQ with advanced AI integration, improved smart home compatibility, and eco-friendly features, ensuring superior performance and sustainability in future models.

10.1 Upcoming Features in Shark Clean Sense IQ

Future updates may include enhanced AI-driven cleaning algorithms, improved voice control integration, and expanded compatibility with smart home systems. Additionally, Shark plans to introduce advanced filtration systems and eco-friendly modes. These features aim to optimize performance, reduce energy consumption, and provide users with a seamless cleaning experience. Shark is also exploring innovative technologies to further automate and personalize cleaning processes, ensuring Clean Sense IQ remains at the forefront of smart cleaning solutions.

10.2 Expected Improvements in Future Models

Future Shark Clean Sense IQ models are expected to feature enhanced battery life, improved sensor accuracy, and quieter operation. Advanced filtration systems may be introduced to capture even smaller particles. Additionally, Shark could expand smart home integration, offering more voice control options and compatibility with emerging platforms. Eco-friendly modes and energy-saving technologies are also anticipated, ensuring a more sustainable cleaning experience. These improvements aim to deliver unparalleled performance and user convenience, solidifying Shark’s leadership in smart cleaning solutions.

10.3 Shark’s Commitment to Innovation

Shark consistently demonstrates a strong commitment to innovation, investing in cutting-edge technologies to enhance cleaning efficiency. By prioritizing research and development, Shark ensures its products like Clean Sense IQ remain at the forefront of smart cleaning solutions. The brand actively listens to customer feedback, using it to drive improvements and introduce groundbreaking features. Shark’s dedication to innovation not only sets industry standards but also reflects its mission to provide superior cleaning experiences tailored to modern lifestyles and evolving consumer needs.

little giant incubator instruction manual

The Little Giant Incubator is a reliable, user-friendly device designed for poultry hobbyists, offering models like 9200, 10200, 9300, and 10300․ It provides a controlled environment for hatching eggs, ensuring optimal conditions with minimal adjustments, making it ideal for those new to incubation․

1․1 Overview of the Little Giant Incubator

The Little Giant Incubator is a versatile and reliable device designed for poultry enthusiasts, offering models like the 9200, 10200, 9300, and 10300․ It provides a controlled environment for hatching eggs, ensuring consistent temperature and humidity levels․ Built with durable materials, these incubators feature digital control boards, built-in fans, and varying egg capacities․ They are ideal for hobbyists, supporting the incubation of chicken, quail, turkey, and duck eggs․ The incubators require a stable room temperature and are equipped with accessories like egg turners and fan kits for optimal performance․

1․2 Benefits of Using the Little Giant Incubator

The Little Giant Incubator offers numerous benefits, including ease of use, reliable temperature regulation, and versatility for various egg types․ Its durable construction ensures long-term performance, while the digital control board and built-in fan provide consistent environmental conditions; The incubator is ideal for hobbyists, supporting chicken, quail, turkey, and duck eggs․ With minimal adjustments needed in stable environments, it simplifies the incubation process, making it a cost-effective and efficient choice for successful hatching results․

1․3 Target Audience for the Little Giant Incubator

The Little Giant Incubator is primarily designed for general poultry hobbyists, including backyard chicken keepers and enthusiasts of quail, pheasant, turkey, and duck egg hatching․ It is not intended for professional or commercial use, nor for incubating exotic birds or reptiles․ This incubator is ideal for individuals seeking a reliable, easy-to-use tool for small-scale egg hatching, making it a perfect choice for those new to incubation or managing a small flock;

Key Features of the Little Giant Incubator

The Little Giant Incubator features durable construction, a digital control board, built-in fan, large egg capacity, and moisture rings․ It offers clear viewing windows and easy operation․

2․1 Design and Construction

The Little Giant Incubator boasts a sturdy, well-insulated design with durable materials, ensuring reliable performance․ Its compact structure includes a solid base and two large viewing windows for easy monitoring․ The incubator is built to withstand regular use, making it a long-lasting investment for poultry enthusiasts․ The design focuses on simplicity and functionality, allowing users to maintain optimal conditions for egg incubation․ This construction ensures minimal temperature fluctuations and consistent humidity levels, crucial for successful hatching․

2․2 Digital Control Board and Built-In Fan

The Little Giant Incubator features a user-friendly digital control board for precise temperature and humidity adjustments․ The built-in fan ensures even air circulation, maintaining consistent conditions across the incubator․ This advanced system is particularly notable in models like the 10300, which offers digital functionality for accurate monitoring․ The fan operates quietly and efficiently, preventing hot spots and ensuring optimal airflow․ Together, these features simplify the incubation process, allowing users to maintain ideal conditions effortlessly, even for novice hobbyists․

2․3 Egg Capacity and Versatility

The Little Giant Incubator models vary in egg capacity, accommodating different needs․ The 9200 holds up to 84 chicken eggs, while larger models like the 10200 and 10300 can handle more, with adjustable racks․ These incubators also support various poultry types, including quail, duck, and turkey eggs, using optional accessories like quail rails․ This versatility makes them suitable for hobbyists with diverse flock interests, ensuring efficient and successful hatching across multiple bird species․

2․4 User-Friendly Interface

The Little Giant Incubator features an intuitive design with a clear digital control board, making it easy to monitor and adjust settings․ The interface provides straightforward navigation for temperature, humidity, and timer functions, ensuring a seamless experience․ Hobbyists can quickly access essential controls without complexity․ The built-in fan and digital display enhance usability, while the overall design minimizes the learning curve․ This user-friendly approach makes it accessible for both beginners and experienced poultry enthusiasts to achieve optimal incubation results with minimal effort․

Models of the Little Giant Incubator

The Little Giant Incubator is available in multiple models, including the 9200, 10200, 9300, and 10300, each offering unique features like still or circulated air options and digital controls․

3․1 Little Giant 9200 Still Air Incubator

The Little Giant 9200 Still Air Incubator is a popular choice for poultry hobbyists, offering a reliable and straightforward hatching experience․ It features a solid-state thermostat, a built-in thermometer, and moisture rings for humidity control․ The incubator includes two 4×8 viewing windows, allowing users to monitor the hatching process without disturbing the eggs․ Designed for stable room temperatures between 65°F and 72°F, it is ideal for those seeking an affordable and efficient incubator for small-scale egg hatching․ The model is not recommended for professional or exotic bird use․

3․2 Little Giant 10200 Circulated Air Incubator

The Little Giant 10200 Circulated Air Incubator is a high-quality, digital model designed for poultry enthusiasts․ It features a digital control board, built-in fan for even air circulation, and a large egg capacity, making it ideal for hatching chicken, quail, turkey, and duck eggs․ The incubator is user-friendly and provides precise temperature and humidity control․ With durable construction, it offers a reliable environment for successful hatching․ However, it is not recommended for professional or commercial use, focusing instead on hobbyists seeking efficient and consistent results․

3․3 Little Giant 9300 Still Air Incubator

The Little Giant 9300 Still Air Incubator is a durable and efficient model designed for hobbyists․ It features two 4×8 viewing windows for easy monitoring, a solid-state thermostat, and built-in moisture rings for humidity control․ Operating in a room temperature range of 65°F to 72°F, it ensures stable conditions for hatching․ The incubator is simple to use and maintain, making it ideal for those looking to hatch chicken, quail, or other poultry eggs․ It is not recommended for professional or commercial use but excels for personal incubation projects․

3․4 Little Giant 10300 Digital Incubator

The Little Giant 10300 Digital Incubator is a high-quality, user-friendly model designed for poultry enthusiasts․ It features a digital control board for precise temperature regulation and a built-in fan for air circulation, ensuring consistent conditions for egg incubation․ This model is ideal for hatching chicken, quail, duck, and turkey eggs․ With its advanced digital interface, it offers ease of operation and reliable performance․ The incubator is suitable for hobbyists and small-scale breeders, providing a stable environment for successful hatching․ Its durability and simplicity make it a popular choice among backyard poultry keepers․

Setup and Installation

Setting up the Little Giant Incubator involves unboxing, selecting a stable location, and connecting accessories․ Place it in a draft-free area, avoiding direct sunlight for optimal performance․

4․1 Choosing the Right Location for the Incubator

Place the Little Giant Incubator in a stable, draft-free environment, ideally in a room with consistent temperatures between 65°F and 72°F․ Avoid areas exposed to direct sunlight or near windows, as this can cause temperature fluctuations․ The incubator should not be located in garages, porches, or areas prone to drafts, as these conditions can disrupt the incubation process․ Ensure the location is level and away from potential sources of vibration or interference․ A stable room temperature is crucial for maintaining optimal incubator performance and successful hatching․

4․2 Unboxing and Initial Setup

Unbox the Little Giant Incubator carefully and place it on a level, stable surface․ Inspect the device for any damage or defects․ Remove all packaging materials and ensure the incubator is clean before use․ Install any accessories, such as the thermometer or moisture rings, according to the manual․ Plug in the incubator and allow it to reach the desired temperature before adding eggs․ This initial setup ensures proper function and prepares the unit for successful incubation․ Always refer to the manual for specific instructions tailored to your model․

4․3 Connecting Accessories (Fan Kit, Egg Turner)

Begin by unboxing the accessories, such as the fan kit (Model 7200) and automatic egg turner (Model 6300)․ Plug the egg turner into the incubator’s power outlet and gently place the rails inside, ensuring proper alignment․ For the fan kit, install it in the designated area to improve air circulation․ Follow the manual’s instructions for secure connections․ Once connected, test the accessories to ensure they function correctly before adding eggs․ Proper installation of these accessories enhances temperature regulation and egg turning, crucial for successful incubation․

Temperature Regulation

Temperature regulation is crucial for successful incubation․ The Little Giant Incubator maintains optimal heat levels, ensuring a stable environment for egg development․ A consistent room temperature of 70°F is recommended․

5․1 Understanding the Importance of Temperature

Temperature plays a critical role in the incubation process, directly impacting embryo development․ Maintaining the correct temperature ensures proper growth and hatching rates․ The Little Giant Incubator is designed to regulate and maintain a consistent temperature, essential for optimal incubation conditions․ A stable environment minimizes risks of developmental issues, ensuring healthy hatching․ Monitoring and adjusting temperature levels as per the manual’s guidelines are vital to achieve successful outcomes․

5․2 Setting Up the Thermometer and Thermostat

Proper setup of the thermometer and thermostat is crucial for maintaining optimal temperature in your Little Giant Incubator․ Ensure the incubator is placed in a stable room temperature, ideally around 70°F, avoiding drafts and direct sunlight․ The built-in thermometer and thermostat are pre-set for accurate temperature control․ For precise monitoring, consider using a secondary calibrated thermometer․ Follow the manual’s guidelines to adjust the thermostat as needed, ensuring consistent heat distribution for successful incubation․ Regular checks will help maintain the desired temperature range for healthy egg development․

5․3 Monitoring and Adjusting Temperature Levels

Regularly monitor the incubator’s temperature using the digital control board and a secondary thermometer for accuracy․ Ensure the room temperature remains stable, ideally between 65°F and 72°F․ Avoid placing the incubator in drafty areas or direct sunlight․ If the room temperature fluctuates, the incubator may require more frequent adjustments․ Small temperature changes can significantly impact egg development, so adjustments should be made cautiously․ Always refer to the manual for guidance on fine-tuning settings to maintain optimal conditions for successful incubation․

Humidity Control

The Little Giant incubator features built-in moisture rings for humidity control․ Maintaining proper humidity is crucial for successful incubation․ Adjust water levels as eggs develop․

6․1 The Role of Humidity in Incubation

Humidity plays a crucial role in incubation, ensuring proper egg development․ It prevents excessive evaporation and maintains the right environment for embryo growth․ Proper humidity levels, typically between 50-60%, are essential for successful hatching․ The Little Giant incubator includes moisture rings to help manage humidity effectively, allowing users to monitor and adjust levels as needed during the incubation process․ Maintaining consistent humidity ensures healthy development and increases the chances of successful hatching․

6․2 Using Moisture Rings for Humidity Management

Moisture rings in the Little Giant incubator are essential for maintaining optimal humidity levels․ Located in the base, they can be filled with water to increase humidity as needed․ Regularly check and refill the rings to ensure consistent moisture levels․ Clean the rings before use to prevent bacterial growth․ Avoid overfilling, as this can lead to excessive humidity․ Proper management of moisture rings helps create a stable environment for egg development, ensuring healthy incubation and successful hatching outcomes․

6․3 Adjusting Humidity Levels During Incubation

Humidity levels in the Little Giant incubator should be adjusted based on the incubation stage․ Maintain 50-60% humidity during the first 18 days․ Increase to 70-80% during the final days before hatching to support proper egg development․ Use the built-in moisture rings to add water as needed․ Monitor humidity with a hygrometer for accuracy․ Avoid over-humidification, as it can lead to poor hatch rates․ Regularly check and adjust moisture levels to ensure optimal conditions for successful hatching․ Proper humidity management is crucial for healthy egg development and successful incubation outcomes․

Sanitation and Maintenance

Adjust humidity levels by adding water to the moisture rings as needed․ Maintain 50-60% humidity for the first 18 days, then increase to 70-80% before hatching․ Monitor with a hygrometer to ensure optimal conditions for egg development and successful hatching․ Avoid over-humidification to prevent poor hatch rates․ Regular checks and adjustments are essential for maintaining the right environment․ Proper humidity management supports healthy growth and maximizes hatch success․

7․1 Cleaning the Incubator Before Use

Clean the incubator thoroughly before first use․ Remove all packaging materials and wash the interior with mild soap and warm water․ Use a soft cloth to avoid scratching surfaces․ Rinse thoroughly to eliminate any soap residue․ Dry the incubator with a clean towel, paying attention to moisture rings and vents․ Disinfect using a diluted bleach solution, ensuring all surfaces are covered․ Allow the incubator to air dry completely before plugging it in․ Proper cleaning ensures a sanitary environment for incubation and prevents contamination․ Regular cleaning also maintains optimal performance and hygiene․

7․2 Disinfecting the Incubator

Disinfect the incubator using a diluted bleach solution (1 part bleach to 10 parts water)․ Use a soft cloth to wipe down all surfaces, paying attention to moisture rings and vents․ Avoid harsh chemicals that may damage components․ After disinfecting, rinse thoroughly with clean water to remove any residue․ Ensure the incubator is dry before use to prevent mold growth․ Regular disinfection maintains a sanitary environment and prevents bacterial contamination, ensuring healthy egg development and successful hatching․ This step is crucial for optimal incubation results and long-term performance of the unit․

7․3 Regular Maintenance Tips

Regular maintenance ensures optimal performance and extends the incubator’s lifespan․ Clean the exterior and interior with a damp cloth, avoiding harsh chemicals․ Check and replace worn-out parts like moisture rings and seals annually․ Inspect electrical components for damage․ Ensure vents are free from dust and debris to maintain proper airflow․ Regularly sanitize to prevent contamination․ Follow these tips to keep your Little Giant Incubator in top condition for successful hatching․

The Incubation Process

The incubation process involves preparing eggs, placing them in the incubator, monitoring development, and managing conditions until hatching․ Consistent temperature and humidity levels are crucial․

8․1 Preparing Eggs for Incubation

Preparing eggs for incubation involves selecting clean, dry, and normal-shaped eggs․ Avoid cracked or damaged eggs, as they may not hatch successfully․ Ensure eggs are at room temperature before placing them in the incubator to prevent thermal shock․ Store eggs point-down with the large end up if not incubating immediately․ This step ensures optimal conditions for embryo development․ Proper preparation is essential for successful incubation and healthy hatching outcomes․

8․2 Placing Eggs in the Incubator

Gently place eggs into the incubator, ensuring they are positioned with the pointed end down․ This orientation helps prevent the embryo from sticking to the shell․ Turn on the incubator and allow it to stabilize before adding eggs․ For models like the Little Giant 9200 or 10200, ensure the egg trays are securely in place․ Avoid touching the thermostat or adjusting settings during placement․ Handle eggs carefully to prevent damage․ Once placed, monitor the incubator’s temperature and humidity to maintain optimal conditions for successful incubation․

8․3 Monitoring Egg Development

Regularly monitor egg development by observing through the incubator’s viewing windows․ Candle the eggs weekly to check for signs of growth, such as veins and movement․ Ensure temperature and humidity levels remain stable, as fluctuations can disrupt development․ Avoid excessive handling of eggs during monitoring․ Track progress using a developmental timeline specific to your egg type․ If abnormalities are noticed, such as cracks or discoloration, remove the affected egg to prevent contamination․ Consistent observation helps ensure a healthy hatching process․

8․4 The Hatching Process

The hatching process typically begins around day 21 for chicken eggs․ Monitor for signs like peeping and pip, where the chick breaks through the shell․ Maintain stable temperature and humidity levels during this critical phase․ Avoid opening the incubator excessively to prevent disrupting the environment․ Allow the chicks to fully emerge on their own, as interference can hinder the process․ Once hatched, keep the incubator closed for 24-48 hours to ensure all chicks are fully developed before moving them to a brooder․

Accessories for the Little Giant Incubator

Enhance your incubation experience with accessories like the Automatic Egg Turner (Model 6300) and Circulated Air Fan Kit (Model 7200) for improved efficiency and versatility․

  • Automatic Egg Turner (Model 6300) ⸺ Simplifies egg turning process․
  • Circulated Air Fan Kit (Model 7200) ⸺ Ensures even temperature distribution․
  • Quail Rails Kit (Model 6302) ⸺ Adds flexibility for smaller eggs․

9․1 Automatic Egg Turner (Model 6300)

The Model 6300 Automatic Egg Turner is a convenient accessory for the Little Giant Incubator, designed to gently rotate eggs during incubation․ This feature ensures even heating and promotes healthy embryo development․ The egg Turner is easy to install and operates quietly, reducing the need for manual turning․ It is compatible with various Little Giant models and is a popular choice among poultry enthusiasts․ Regular maintenance, like cleaning, is essential for optimal performance․ This accessory is ideal for hobbyists aiming to maximize hatching success rates․

9․2 Circulated Air Fan Kit (Model 7200)

The Circulated Air Fan Kit (Model 7200) enhances air circulation within the incubator, ensuring a consistent temperature distribution․ It is designed to work seamlessly with models like the 9200 and 10200․ This accessory is particularly useful for maintaining stable conditions, which is crucial for successful incubation․ The fan kit is easy to install and operates quietly, providing peace of mind for hobbyists․ It is a recommended addition for users aiming to optimize their incubator’s performance and improve hatching success rates․

9․3 Quail Rails Kit (Model 6302)

The Quail Rails Kit (Model 6302) is specifically designed for incubating smaller eggs, such as quail eggs․ It ensures proper spacing and organization within the incubator, preventing overcrowding and promoting healthy development․ This accessory is compatible with various Little Giant incubator models, including the 9200 and 10200․ It is a practical addition for hobbyists who want to expand their incubation capabilities to include smaller poultry species․ The kit is easy to install and enhances the overall efficiency of the incubation process․

Troubleshooting Common Issues

The Little Giant Incubator may face issues like temperature fluctuations or humidity problems․ Regular monitoring and adjustments, along with proper maintenance, can resolve most common concerns effectively․

10․1 Temperature Fluctuations

Temperature fluctuations in the Little Giant Incubator can disrupt the incubation process․ Ensure the incubator is placed in a stable, draft-free environment, avoiding direct sunlight․ Ideal room temperature is 70°F, with the incubator operating between 65°F and 72°F․ If room temperature fluctuates, the incubator may require adjustments․ Use a secondary thermometer to monitor accuracy and maintain consistent heat levels․ Avoid placing the incubator near windows, garages, or porches to minimize environmental interference․ Regular checks and adjustments will help stabilize temperature for optimal hatching conditions․

10․2 Humidity Level Problems

Humidity level issues in the Little Giant Incubator can affect egg development․ Low humidity may cause excessive evaporation, while high humidity can lead to poor hatch rates․ Use moisture rings to regulate humidity, ensuring proper water levels․ Avoid over-humidification, as it can prevent proper airflow․ Monitor humidity closely during incubation, especially during the hatching phase․ Adjustments may be needed to maintain optimal conditions․ Regularly check and refill water in the moisture rings as instructed․ Proper humidity control is crucial for successful hatching and healthy chick development․

10․3 Malfunctioning Accessories

Malfunctioning accessories like the egg turner or fan kit can disrupt incubation․ Ensure the egg turner is properly installed and functioning․ If it stops rotating, check for blockages or power issues․ For the fan kit, verify it is securely connected and operating smoothly․ Clean any debris that may hinder performance․ Refer to the manual for troubleshooting steps․ If issues persist, contact Little Giant customer support for assistance or replacement parts․ Properly functioning accessories are essential for maintaining optimal conditions during incubation․ Always follow the manufacturer’s guidelines for repair or replacement to ensure reliability and success․ Regular maintenance can help prevent such issues and ensure smooth operation of all components․

Safety Guidelines

Always follow safety precautions when using the Little Giant Incubator․ Keep it away from drafts, direct sunlight, and children․ Ensure the incubator is placed on a stable, level surface in a room with consistent temperature․ Avoid exposing it to extreme heat or moisture․ Never touch electrical components with wet hands․ Keep the incubator away from flammable materials․ Regularly inspect cords and connections for damage․ Follow the manual’s instructions for safe operation to prevent accidents and ensure reliable performance․ Maintain a safe environment for optimal incubation results․

11․1 General Safety Precautions

Ensure the Little Giant Incubator is placed on a stable, level surface away from direct sunlight and drafts․ Keep children and pets away from the device to prevent accidental damage․ Avoid exposing the incubator to extreme temperatures or humidity․ Regularly inspect the power cord and connections for damage or wear․ Never operate the incubator with damaged components․ Always follow the manufacturer’s instructions for setup and operation․ Maintain a clean environment around the incubator to prevent contamination․ By adhering to these precautions, you can ensure safe and effective incubation․

11․2 Avoiding Drafts and Direct Sunlight

Placing the Little Giant Incubator in a stable environment is crucial for successful incubation․ Avoid positioning it near drafty areas like windows, doors, or garages, as sudden temperature changes can harm developing embryos․ Direct sunlight should also be avoided to prevent overheating․ Ensure the incubator is kept away from direct sun exposure and placed in a room with a consistent temperature between 65°F and 72°F․ Check the room temperature periodically to ensure it remains within this range, especially during peak sun hours․

11․3 Handling Electrical Components Safely

Always handle the electrical components of the Little Giant Incubator with care․ Keep the incubator away from water to avoid electrical shocks․ Ensure the power cord is undamaged and avoid overloading circuits․ Never touch electrical parts with wet hands or while standing on a damp surface․ Keep children away from the incubator’s electrical components․ Regularly inspect the cord and plug for signs of wear․ If damage is detected, unplug the incubator immediately and contact a professional for repairs․ Always unplug the unit before cleaning or performing maintenance․

The Little Giant Incubator is a reliable, user-friendly tool for hobbyists, offering a comprehensive guide to successful egg incubation with ease and precision, ensuring optimal hatching results․

12․1 Summary of Key Points

The Little Giant Incubator is a reliable tool for poultry hobbyists, offering detailed instructions for setup, operation, and maintenance․ It emphasizes the importance of stable temperature and humidity levels for successful hatching․ Designed for ease of use, the incubator supports various bird species, including chickens, quails, and turkeys․ Regular sanitation and proper handling of accessories are highlighted to ensure optimal performance․ Users are encouraged to follow the manual closely for troubleshooting and maintenance tips, ensuring a successful incubation process every time․

12․2 Final Tips for Successful Incubation

For optimal results with the Little Giant Incubator, ensure the unit is placed in a stable, draft-free environment, avoiding direct sunlight․ Regularly inspect and maintain the incubator to prevent contamination․ Use a secondary thermometer to verify temperature accuracy and monitor humidity levels closely․ Follow the manual’s guidelines for egg preparation, placement, and hatching timelines․ Keep the incubator clean and disinfected after each use․ By adhering to these tips and the manual’s instructions, you’ll achieve consistent success in hatching healthy, thriving birds․

quad cortex manual

Welcome to the Quad Cortex Manual‚ your comprehensive guide to unlocking the full potential of this powerful digital effects modeler. This manual provides detailed insights into setup‚ features‚ and optimal use‚ ensuring you harness its advanced DSP capabilities and create exceptional sounds. Explore configuration tips‚ effects management‚ and troubleshooting to enhance your musical experience. With this guide‚ you’ll master the Quad Cortex’s intuitive interface and advanced features‚ making it an indispensable tool for your music production and performance needs.

Overview of the Quad Cortex

The Quad Cortex is a cutting-edge‚ floor-based digital effects modeler designed for guitarists and bassists‚ offering unparalleled processing power and versatility. With dual combo inputs‚ high-resolution displays‚ and robust connectivity options‚ it provides a seamless experience for both live performance and studio recording. Its advanced DSP capabilities support a wide range of effects‚ from classic to modern tones‚ while intuitive navigation and customization options empower users to craft unique sounds effortlessly. This powerful unit is a cornerstone for musicians seeking precision‚ flexibility‚ and exceptional audio quality in their sound design journey.

Key Features and Capabilities

The Quad Cortex boasts an impressive array of features‚ including dual SHARC DSP processors and a quad-core ARM Cortex-A5‚ delivering unmatched processing power for complex effects. It supports up to four independent instruments with unique effects chains‚ ensuring versatile sound design. The unit offers extensive connectivity options‚ including USB‚ MIDI‚ and XLR outputs‚ making it ideal for both studio and live settings. With a user-friendly interface and customizable controls‚ the Quad Cortex allows for deep parameter tweaking and seamless workflow integration‚ catering to both professional and aspiring musicians seeking high-quality audio processing.

Importance of the Manual for Optimal Use

Importance of the Manual for Optimal Use

The Quad Cortex manual is essential for unlocking the device’s full potential. It provides clear instructions on setup‚ operation‚ and troubleshooting‚ ensuring users can navigate its complex features effectively. The manual highlights the importance of proper shutdown procedures‚ which are crucial for maintaining data integrity and preventing hardware damage. By following the guidelines‚ users can ensure optimal performance and longevity of the Quad Cortex‚ making it an indispensable resource for both professionals and hobbyists alike.

Hardware Specifications and Requirements

The Quad Cortex features 6 cores for robust processing‚ dual combo inputs‚ and extensive connectivity‚ enabling versatile sound design and seamless integration into any rig.

Processing Power and DSP Capabilities

The Quad Cortex boasts unparalleled processing power with 6 dedicated DSP cores—4x SHARC and 2x ARM Cortex-A5—operating at 500MHz each. This architecture enables simultaneous processing of up to four instruments‚ each with independent effects chains‚ ensuring flawless performance. The dual-core setup allows for efficient multitasking‚ handling complex effects and time-based processing with ease. This robust DSP configuration ensures zero latency and pristine sound quality‚ making it ideal for professional-grade sound design and live performances. The processing capabilities are further enhanced by CorOS version 3.0.0‚ providing optimized stability and functionality.

Input/Output and Connectivity Options

The Quad Cortex offers extensive input/output and connectivity options‚ ensuring seamless integration into any setup. It features dual combo inputs‚ supporting both XLR and 1/4″ connections‚ and can handle up to four instruments simultaneously. Outputs include balanced XLR and 1/4″ options‚ ideal for connecting to mixers‚ amplifiers‚ or recording interfaces. MIDI I/O enables control of external gear‚ while USB-C provides high-speed connectivity for recording and firmware updates. Additionally‚ the Quad Cortex includes a dedicated headphones jack for silent practice and an expression pedal input for enhanced control‚ making it a versatile and adaptable tool for musicians and producers.

Powering the Quad Cortex Safely

To ensure optimal performance and longevity‚ power the Quad Cortex using the provided adapter or a high-quality equivalent. Avoid unplugging the device directly from the power source; instead‚ use the Power and Locking functions screen to shut it down safely. This prevents potential damage to the internal components. Keep the unit in a well-ventilated area to prevent overheating. Always unplug the power cable when not in use for extended periods. Refer to the manual for specific voltage requirements and follow all safety precautions to maintain the device’s functionality and extend its lifespan.

Software and Firmware Overview

The Quad Cortex operates seamlessly with Cortex Control software‚ offering real-time syncing and intuitive parameter adjustments. Regular firmware updates enhance functionality‚ ensuring optimal performance and compatibility with the latest features.

Cortex Control Software Features

Cortex Control software offers seamless integration with the Quad Cortex‚ enabling real-time synchronization and instant access to your current state. The intuitive interface allows for smooth navigation and efficient parameter tweaking. With optimized mouse actions and keyboard shortcuts‚ managing files‚ effects chains‚ and workflows becomes effortless. The software also provides a comprehensive platform for preset management and sound design‚ ensuring a streamlined experience. Regular updates enhance functionality‚ keeping your Quad Cortex at peak performance. This powerful tool is essential for unlocking the full creative potential of your unit.

Firmware Updates and Installation

Firmware updates are crucial for maintaining optimal performance and unlocking new features on your Quad Cortex. The process is straightforward: connect your unit to a computer‚ download the latest firmware from Neural DSP’s official website‚ and follow the on-screen instructions. Ensure the device is powered via its adapter to avoid interruptions. Regularly checking for updates ensures you have the latest enhancements and improvements. Always backup your presets before updating to prevent data loss. This ensures a smooth transition to the newest CorOS version‚ keeping your Quad Cortex up-to-date and functioning flawlessly.

CorOS Version 3.0.0 Updates and Enhancements

CorOS version 3.0.0 introduces significant improvements to the Quad Cortex‚ enhancing performance and user experience. Key updates include optimized DSP algorithms for better sound quality‚ improved preset management with enhanced organization features‚ and expanded compatibility with third-party plugins. The update also addresses power management‚ emphasizing safe shutdown practices to protect internal components. Additionally‚ the firmware now supports advanced routing options‚ offering greater flexibility for complex effects chains. These enhancements ensure the Quad Cortex remains at the forefront of digital effects modeling‚ providing guitarists and producers with unparalleled creative tools and reliability.

Setting Up the Quad Cortex

Setting up the Quad Cortex involves initial configuration‚ connecting to your rig‚ and optimizing workflow with peripherals. Begin by powering on and updating firmware to CorOS 3.0.0 for optimal performance. Connect your guitar to the dual combo inputs‚ ensuring proper signal routing to avoid noise. Use a mouse and keyboard to navigate Cortex Control efficiently‚ utilizing shortcuts for quick adjustments. Explore expression pedal configuration and dual switch functions for enhanced control; Organize custom presets and sync with your DAW for seamless recording. Refer to the manual or online resources for troubleshooting common issues and ensuring longevity.

Initial Setup and Configuration

Begin by powering on the Quad Cortex and ensuring it runs CorOS 3.0.0 for optimal performance. Connect your guitar to the dual combo inputs‚ selecting the appropriate input type. Navigate to Cortex Control‚ where you’ll configure basic settings like USB channel routing and global preferences. Assign expression pedals or dual switches for enhanced control. Sync your unit with your DAW for recording‚ ensuring proper signal flow. Refer to the manual for detailed steps to avoid common setup issues and ensure a smooth experience. Proper initial configuration is crucial for unlocking the Quad Cortex’s full potential.

Connecting to Your Rig

Connect your guitar to the Quad Cortex using the dual combo inputs‚ ensuring proper input type selection (instrument or line level). Route the output to your amplifier or audio interface via balanced XLR or 1/4″ outputs. For live performance‚ use the stereo outputs to send your signal to a mixer or effects loop. In the studio‚ configure the Quad Cortex as an audio interface for direct recording. Assign outputs to different destinations for flexible routing. Properly integrating the Quad Cortex into your rig ensures optimal sound quality and seamless workflow‚ whether on stage or in the studio.

Optimizing Workflow with Mouse and Keyboard

Using a mouse and keyboard with the Quad Cortex enhances efficiency‚ allowing quick navigation and parameter adjustments. Drag and drop effects‚ assign functions to switches‚ and tweak settings with precision. Keyboard shortcuts streamline tasks like saving presets‚ copying effects‚ and switching between views. Customize your workflow by assigning frequently used functions to keys‚ reducing the need for menu diving. This setup ensures a seamless and intuitive experience‚ enabling you to focus on creating music without workflow interruptions.

Effects and Sound Design

The Quad Cortex offers a wide range of effects and amp models‚ enabling deep customization and precise sound shaping. Its advanced DSP capabilities deliver organic‚ responsive tones‚ meeting diverse musical needs with exceptional quality and flexibility.

Types of Effects and Models Available

The Quad Cortex features an extensive library of effects and models‚ including over 50 amplifiers‚ 50 cabinets‚ and a wide variety of pedals. It also offers time-based effects like reverb‚ delay‚ and chorus‚ as well as modulation effects such as flanger and phaser. The unit supports third-party IRs and includes a looper with up to 60 seconds of recording time. Additionally‚ it offers unique models like the Tosin Abasi and Darkglass Ultra‚ catering to both guitarists and bassists. These options provide limitless sound design possibilities for any musical style or preference.

Creating and Managing Effects Chains

Creating and managing effects chains on the Quad Cortex is intuitive and flexible. Users can easily drag and drop effects to build custom chains‚ with the ability to reorder and adjust parameters in real-time. The unit supports up to four independent effects chains‚ allowing for complex routing and signal flow. Presets can be saved and recalled quickly‚ making it ideal for live performances and studio work. The Cortex Control software simplifies chain management‚ enabling seamless tweaks and organization. This flexibility ensures that musicians can craft unique sounds tailored to their musical style and performance needs.

Time-Based Effects and Their Applications

Time-based effects on the Quad Cortex‚ such as reverb‚ delay‚ and tremolo‚ offer unparalleled versatility for shaping your sound. These effects are ideal for adding depth and texture to your music‚ creating immersive sonic landscapes. Reverb simulates natural spaces‚ while delay generates rhythmic echoes‚ enhancing musicality. Tremolo adds dynamic modulation‚ perfect for vintage tones. With precise parameter control‚ you can tailor these effects to suit any genre‚ from lush ambient soundscapes to tight‚ punchy rhythms. The Quad Cortex’s organic feel ensures these effects integrate seamlessly into your playing style‚ elevating your creative expression.

Using the Quad Cortex as an Audio Interface

The Quad Cortex excels as an audio interface‚ offering high-quality recording capabilities with low latency. Its dual combo inputs and robust routing options ensure professional-grade sound capture. Easily integrate it into your DAW for seamless recording sessions‚ leveraging its advanced DSP processing for studio-quality results. This versatility makes it an ideal choice for both live performances and studio environments.

Configuring for Recording

To configure the Quad Cortex for recording‚ start by connecting your instruments or microphones to the dual combo inputs. Select the appropriate USB channel configuration in the settings menu‚ ensuring optimal signal flow. Adjust input levels to avoid clipping‚ and enable phantom power if using condenser microphones. Refer to the manual for specific routing options. Once connected‚ sync the Quad Cortex with your DAW for seamless recording. This setup ensures high-quality audio capture with minimal latency‚ making it ideal for professional-grade productions. Follow the manual’s guidance for a smooth recording experience.

_routing and Signal Flow

Routing and Signal Flow

Understanding the routing and signal flow within the Quad Cortex is crucial for achieving optimal audio quality. The device features dual combo inputs‚ allowing you to route signals independently or in parallel. Configure your signal path by selecting from various routing options‚ such as serial‚ parallel‚ or wet/dry configurations. Each effect chain can be tailored to your needs‚ ensuring precise control over your tone. Proper signal routing prevents latency and ensures clear audio transmission‚ whether you’re using the Quad Cortex live or in the studio. Follow the manual’s guidance to optimize your setup for professional-grade sound.

Syncing with DAWs

Syncing the Quad Cortex with your DAW ensures seamless integration for recording and production. Connect via USB to enable low-latency audio transmission and MIDI control. In your DAW‚ select the Quad Cortex as the audio interface and configure buffer sizes for optimal performance. Enable sync in the device settings to align clock speeds with your DAW‚ ensuring precise timing. This setup allows for direct monitoring and real-time effects processing‚ making it ideal for studio use. Proper synchronization enhances your workflow‚ enabling you to record and produce with professional-grade accuracy and efficiency.

Advanced Features and Customization

The Quad Cortex offers dual switch functions‚ allowing for versatile control of multiple parameters. Customize expression pedal configurations to tailor your sound. Create and manage custom presets seamlessly‚ ensuring your unique tones are always accessible.

Utilizing Dual Switch Functions

The Quad Cortex’s dual switch functions offer enhanced control and flexibility. Configure the switches to toggle effects‚ switch scenes‚ or adjust parameters. For example‚ assign one switch to bypass an effect and the other to engage a boost. These customizable controls streamline your workflow‚ allowing seamless transitions during performances. Access the configuration menu via the system page to tailor the switches to your needs. This feature ensures intuitive operation‚ making it easier to focus on your music while maintaining advanced control over your sound.

Expression Pedal Configuration

Configure the expression pedal to control various parameters‚ such as wah‚ volume‚ or pitch. Assign functions via the system page to customize your setup. Adjust the pedal’s range to suit your playing style for precise control. Enable real-time manipulation of effects‚ enhancing your live performances. This feature allows seamless integration of dynamic expressions‚ making your sound more engaging and responsive. Experiment with different assignments to unlock new sonic possibilities and tailor the pedal’s behavior to your creative needs.

Custom Preset Creation and Management

Easily create and manage custom presets on the Quad Cortex to tailor sounds to your style. Use the intuitive interface to design unique tones and effects chains. Organize presets into banks for quick access during performances. Backup and restore your creations via USB or software. Share presets with the community or download new ones to expand your sonic palette. This feature allows you to craft personalized sounds and maintain a well-organized library‚ ensuring your music stays fresh and dynamic. Utilize tags and descriptions for easy navigation and retrieval of your custom presets.

Troubleshooting and Maintenance

Troubleshooting and Maintenance. Identify and resolve common issues with the Quad Cortex. Regular firmware updates and proper power-down procedures ensure optimal performance and longevity.

Common Issues and Solutions

Common issues with the Quad Cortex include connectivity problems‚ audio glitches‚ and firmware update errors. For connectivity issues‚ restart the unit and ensure all cables are securely connected. Audio glitches may require adjusting buffer settings or updating drivers. Firmware errors can often be resolved by reinstalling the update or resetting the device to factory settings. Regular maintenance‚ such as cleaning inputs and updating software‚ helps prevent these issues. Always refer to the official manual for detailed troubleshooting steps to ensure optimal performance and longevity of your Quad Cortex.

Updating and Backing Up Your Unit

Regular updates are essential for maintaining the Quad Cortex’s performance. Before updating‚ backup your presets and settings to avoid data loss. Use the Cortex Control software to check for firmware updates and follow on-screen instructions to install them. Ensure your unit is connected to power and avoid interruptions during the update process. After updating‚ restart the device and verify that all functions operate correctly. Backups can be stored locally or in the cloud for safekeeping; Always refer to the manual for detailed backup and update procedures to ensure a smooth experience.

Best Practices for Longevity

To ensure the Quad Cortex’s longevity‚ use the official power supply and avoid power surges. Regularly clean the unit with a soft cloth to prevent dust buildup. Handle the device with care‚ avoiding screen contact to prevent oil residue. Use high-quality USB cables for reliable connections. Always update firmware through Cortex Control to maintain optimal performance. Store the unit in a protective case when not in use. By following these practices‚ you’ll extend the lifespan of your Quad Cortex and preserve its advanced functionality for years to come.

Community and Resources

Explore official documentation‚ user forums‚ and third-party tools to enhance your Quad Cortex experience. Connect with experts and enthusiasts for support‚ tips‚ and shared resources.

Official Documentation and Support

The official Quad Cortex manual and support resources are essential for mastering the device. Neural DSP provides comprehensive guides‚ firmware updates‚ and troubleshooting tips to ensure optimal performance. Access detailed setup instructions‚ effect parameter explanations‚ and advanced customization options. The support team is responsive‚ offering expert assistance via the official website. Regular updates and patches are available to keep your Quad Cortex up-to-date with the latest features and improvements. Utilize these resources to maximize your creative potential and resolve any technical issues efficiently.

User-Generated Content and Forums

The Quad Cortex community thrives on user-generated content and forums‚ where players share presets‚ tips‚ and setups. These platforms foster collaboration and innovation‚ allowing users to learn from each other. From custom effect chains to troubleshooting‚ forums provide valuable insights and solutions. Many users share their experiences‚ creating a rich resource for optimizing the Quad Cortex. This collaborative environment ensures that musicians can continually evolve their sound and techniques‚ supported by a vibrant and knowledgeable community.

Third-Party Plugins and Tools

Third-party plugins and tools enhance the Quad Cortex experience‚ offering additional functionality and customization. These include software editors‚ MIDI controllers‚ and preset management tools. Users can integrate plugins to expand sound design capabilities and streamline workflows. Community-developed tools‚ such as preset editors and effect chain organizers‚ are widely shared. Additionally‚ third-party apps provide innovative ways to interact with the Quad Cortex‚ ensuring compatibility with DAWs and other gear. These resources‚ while not officially supported‚ are popular among users for unlocking new creative possibilities and optimizing their setups.

Future Updates and Developments

Neural DSP regularly releases updates for the Quad Cortex‚ enhancing features and performance. Stay informed about upcoming improvements through official announcements and community updates. Anticipate exciting new capabilities and optimizations‚ ensuring your unit remains cutting-edge. The future of the Quad Cortex is bright‚ with continuous innovation driven by user feedback and technological advancements.

Anticipated Features and Improvements

Neural DSP is continuously enhancing the Quad Cortex with exciting updates. Future improvements may include expanded DSP capabilities‚ enhanced effects models‚ and improved routing options. Users can expect better integration with third-party tools and potential advancements in AI-driven sound design. The developers are also considering user feedback to refine workflow efficiency and add requested features. Stay tuned for official announcements from Neural DSP to learn about the latest enhancements and how they will elevate your creative possibilities with the Quad Cortex.

Staying Updated with Neural DSP

To ensure you’re always experiencing the latest advancements‚ Neural DSP regularly releases firmware and software updates for the Quad Cortex. Stay informed by checking their official website‚ signing up for their newsletter‚ or following their social media channels. Additionally‚ the Neural DSP support team is actively engaged with the community‚ providing updates and insights. By staying connected‚ you’ll be the first to know about new features‚ improvements‚ and best practices for maximizing your Quad Cortex’s potential. Regular updates are crucial for maintaining optimal performance and accessing the latest enhancements.

Community Feedback and Feature Requests

Neural DSP actively engages with its community‚ valuing user feedback to enhance the Quad Cortex experience. Through forums and social media‚ players share insights‚ suggest features‚ and discuss improvements. The company often incorporates these ideas into updates‚ ensuring the Quad Cortex evolves with user needs. This collaborative approach fosters innovation and strengthens the connection between the brand and its users‚ making the Quad Cortex a continuously improving tool for musicians worldwide.

dometic 3 way fridge manual

Welcome to the Dometic 3-Way Fridge Manual. This guide provides essential information for installation, operation, maintenance, and troubleshooting. Ensure optimal performance and safety with this comprehensive resource.

1.1 Overview of the Dometic 3-Way Fridge

The Dometic 3-Way Fridge is a versatile absorption refrigerator designed for recreational vehicles, campers, and boats. It operates on three energy sources: propane gas, 12V DC, and 230-240V AC, making it ideal for off-grid and on-grid use. Known for its efficient cooling performance, the fridge uses absorption technology to maintain consistent temperatures. Its compact design saves space while providing ample storage for food and drinks. Popular models like the RM2356 and DM2652 offer reliability and durability, making them a top choice for outdoor enthusiasts.

1.2 Importance of Reading the Manual

Reading the Dometic 3-Way Fridge Manual is crucial for safe and efficient operation. It provides detailed instructions for installation, energy source selection, and maintenance. Understanding the manual ensures proper functioning, prevents safety hazards, and extends the appliance’s lifespan. It also covers troubleshooting common issues, saving time and effort. Always pass the manual to future owners to maintain correct usage and safety standards. Failure to follow guidelines may lead to performance issues or safety risks, emphasizing the necessity of thorough review before operation.

Key Features and Benefits of the Dometic 3-Way Fridge

The Dometic 3-Way Fridge offers energy efficiency, versatile power options (gas, electric, 12V DC), and a compact, space-saving design. These features ensure reliable performance in various settings, making it ideal for RVs and caravans.

2.1 Energy Efficiency

The Dometic 3-Way Fridge is designed with energy efficiency in mind, utilizing absorption technology to minimize power consumption. It operates effectively across gas, electric, and 12V DC modes, ensuring optimal performance while conserving energy. The fridge automatically selects the most economical power source, reducing reliance on higher-energy options. This feature is particularly beneficial for RV and caravan users, where energy conservation is crucial. By balancing performance and efficiency, the Dometic 3-Way Fridge provides reliable cooling while keeping energy costs low, making it an eco-friendly choice for outdoor adventures.

2.2 Versatile Power Options

The Dometic 3-Way Fridge offers unmatched flexibility with its ability to operate on three power sources: 230-240V AC, 12V DC, and LP gas. This versatility ensures reliable cooling in diverse settings, from mains-powered campsites to off-grid adventures. The system automatically selects the available energy source, prioritizing efficiency and performance. This feature is ideal for RV and caravan users, as it adapts seamlessly to varying power availability. The 3-way functionality enhances convenience, allowing uninterrupted cooling regardless of your location or energy source.

2.3 Compact and Space-Saving Design

The Dometic 3-Way Fridge is designed to maximize space efficiency, making it ideal for RVs and caravans. With dimensions like 521mm width and 756mm height, it fits seamlessly into compact areas. The slim profile ensures minimal footprint without compromising on capacity. Installation is streamlined, with secure mounting options to prevent movement during travel. This space-saving design allows for easy integration into tight kitchen layouts, providing ample storage while maintaining a sleek appearance. Its compact size ensures optimal use of available space in recreational vehicles.

Understanding the Dometic 3-Way Fridge Manual

This section explains the structure and content of the manual, ensuring users understand key sections like installation, operation, and troubleshooting. Symbols and abbreviations are also clearly defined.

3.1 Structure and Content of the Manual

The Dometic 3-Way Fridge Manual is organized into clear sections for easy navigation. It begins with an introduction, followed by installation and setup guidelines. Detailed operating instructions explain how to select energy sources, use the control panel, and manage temperatures. Maintenance and troubleshooting sections provide solutions for common issues, while technical specifications outline dimensions, power ratings, and components. Safety precautions and warranty information are also included. The manual uses symbols and abbreviations, defined within, to ensure clarity. This logical structure helps users quickly find the information they need, making operation and maintenance straightforward and efficient.

3.2 Symbols and Abbreviations Used

The manual uses specific symbols and abbreviations to convey important information. Common symbols include warning signs for safety precautions, electrical notations, and gas-related indicators. Abbreviations like “LP” for liquefied petroleum gas and “DC” for direct current are frequently used. These symbols and abbreviations are defined within the manual to ensure clarity and safe operation. Referencing these explanations helps users understand technical details and follow instructions accurately. This consistent use of symbols and abbreviations enhances the manual’s readability and user experience.

Installation and Setup of the Dometic 3-Way Fridge

Ensure proper installation by following the step-by-step guide, checking electrical and gas connections, and securing the fridge. Adequate ventilation and leveling are crucial for optimal performance and safety.

4.1 Pre-Installation Checklist

Before installing your Dometic 3-Way Fridge, ensure the installation site is level, well-ventilated, and clear of flammable materials. Verify that electrical and gas connections meet specifications. Check for proper ventilation openings to avoid gas accumulation. Ensure the fridge is securely fastened to prevent movement during transit. Review local safety codes and manufacturer guidelines. Confirm all components, including power sources and vents, are in good condition. Proper preparation ensures safe and efficient operation of your fridge.

4.2 Step-by-Step Installation Guide

Position the fridge in a level, well-ventilated area, ensuring proper clearance for doors and vents; 2. Connect the electrical supply according to the manual’s wiring diagram. 3. Attach the gas line securely, ensuring no leaks. 4. Install ventilation kits as specified to prevent gas accumulation. 5. Secure the fridge to prevent movement during travel. 6. Test all power sources (electric, gas, and 12V) to ensure proper operation. Follow these steps carefully to ensure safe and efficient installation of your Dometic 3-Way Fridge.

4.3 Ventilation Requirements

Proper ventilation is critical for the safe and efficient operation of your Dometic 3-Way Fridge. Ensure the installation area has adequate airflow to prevent gas accumulation. Install ventilation kits as specified in the manual to maintain air circulation. Keep vents unobstructed and maintain minimum clearance around the fridge for optimal performance. Failure to meet these requirements may lead to reduced efficiency or safety hazards. Always follow the manufacturer’s guidelines for ventilation to ensure reliable operation and compliance with safety standards.

Operating the Dometic 3-Way Fridge

The Dometic 3-Way Fridge operates on 230-240V, 12V, or LP gas, automatically selecting the available energy source for efficient performance. Follow the control panel instructions for smooth operation.

5.1 Selecting the Energy Source

The Dometic 3-Way Fridge operates on three energy sources: 230-240V AC, 12V DC, and LP gas. The system automatically selects the available energy source in the following order: 1. 230-240V AC, 2; 12V DC, and 3. LP gas. For LP gas-only operation, ensure the AES (Automatic Energy Selection) function is turned off. This feature ensures optimal performance and efficiency. Always refer to the control panel for mode selection and adjustments. Proper energy source selection is crucial for safety and functionality. Follow manual guidelines for seamless operation across all power options.

5.2 Basic Operating Instructions

To operate the Dometic 3-Way Fridge, start by turning the knob to the desired mode (GAS, ECO, or MAX). Press and hold the button to activate the system. Adjust the thermostat knob to set the temperature. The control panel displays the current mode and temperature. Ensure the AES function is enabled for automatic energy selection. Always follow safety guidelines and refer to the manual for specific instructions. Proper operation ensures efficient cooling and longevity of the appliance. Monitor the display for status updates and adjust settings as needed for optimal performance.

5.3 Using the Control Panel

The control panel is located above the refrigerator door and features a display screen, buttons for menu navigation, and a knob for temperature adjustment. Use the knob to select the desired mode (GAS, ECO, or MAX) and adjust the temperature. The display shows the current mode, temperature, and error codes. Press the buttons to access the menu, adjust settings, or enable features like AES (Automatic Energy Selection). Ensure the AES function is on for automatic energy source selection. Refer to the manual for troubleshooting codes and advanced settings to ensure smooth operation.

5.4 Temperature Management

The Dometic 3-Way Fridge allows precise temperature control to maintain optimal cooling. Use the control knob to set the desired temperature, ensuring food stays fresh. The thermostat regulates cooling performance across all power modes. For energy efficiency, select the ECO mode, while MAX mode provides faster cooling. Regularly monitor temperature levels to prevent over-freezing or insufficient cooling. Adjust settings based on load and ambient conditions. Proper temperature management ensures reliable operation and extends the lifespan of your refrigerator. Always refer to the manual for specific temperature recommendations and adjustments.

Safety Precautions and Guidelines

Ensure proper ventilation to avoid gas leaks. Never touch electrical switches if gas is smelled. Keep children away from controls and moving parts. Follow manual guidelines to prevent hazards.

6.1 General Safety Tips

Always ensure proper ventilation to prevent gas leaks. Never touch electrical switches if you smell gas. Keep flammable materials away from the appliance. Avoid overloading the refrigerator. Regularly inspect gas hoses and connections for damage. Ensure the unit is installed on a level, stable surface to prevent tipping. Follow all instructions in the manual for safe operation. Keep children away from controls and moving parts. Use only genuine Dometic parts for repairs. Never use natural gas; only propane or butane is permitted. Maintain a safe distance from water sources to avoid electrical hazards.

6.2 Handling Gas and Electrical Components

Always turn off the manual LP gas valve before servicing. Disconnect the 12V DC power supply before performing maintenance. Ensure correct polarity when connecting electrical components. Never use the vehicle’s chassis as a substitute for electrical conductors. Avoid using natural gas; only propane or butane is permitted. Handle gas hoses and connections with care to prevent leaks. Regularly inspect for damage or wear. Never attempt DIY repairs on gas or electrical systems. Always use genuine Dometic parts for replacements. Follow proper safety protocols to avoid electrical shocks or gas-related hazards.

6.3 Emergency Procedures

In case of an emergency, such as a gas leak or electrical issue, act promptly. If you smell gas, open windows, do not touch electrical switches, and extinguish open flames. Turn off the manual LP gas valve and disconnect power. Secure the area and avoid re-entry until safe. Contact a qualified technician or gas supplier immediately. Never attempt to repair gas or electrical components yourself. Follow all safety guidelines to prevent accidents and ensure your safety while using the Dometic 3-Way Fridge.

Maintenance and Troubleshooting

Regular maintenance ensures optimal performance. Check for dust buildup, proper ventilation, and tighten connections. Troubleshoot common issues like cooling problems by verifying power sources and ventilation efficiency.

7.1 Regular Maintenance Checks

Regular maintenance is crucial for optimal performance. Clean dust from vents and condenser coils to ensure proper airflow. Check for gas leaks if using LP mode. Verify power sources are stable and connections are secure. Inspect door seals for tightness to prevent air leaks. Defrost the freezer compartment periodically to maintain efficiency. Ensure ventilation openings are clear to avoid overheating. Refer to the manual for specific maintenance schedules and procedures to keep your Dometic 3-Way Fridge functioning at its best.

7.2 Common Issues and Solutions

Common issues with the Dometic 3-Way Fridge include poor cooling performance, gas leaks, or electrical malfunctions. If the fridge isn’t cooling, check power sources, ensure proper ventilation, and verify gas connections. For gas odors, open windows, avoid sparks, and contact a technician. Electrical issues may require resetting fuses or checking circuit connections. If the fridge overheats, clean condenser coils and ensure adequate airflow. Refer to the manual for troubleshooting guides or contact Dometic support for persistent problems. Regular maintenance can prevent many of these issues.

7.3 Defrosting and Cleaning

Regular defrosting and cleaning are crucial for maintaining your Dometic 3-Way Fridge’s performance. Turn off the fridge, remove all contents, and leave doors open to thaw ice buildup. Clean interior surfaces with a mild detergent and warm water, avoiding abrasive cleaners. Wipe down shelves and drawers, and ensure drains are clear. For the exterior, use a soft cloth to prevent scratches. Regular cleaning prevents mold and bacteria growth, ensuring fresh storage and optimal cooling efficiency. Always follow manual guidelines for safe and effective maintenance.

Technical Specifications and Components

The Dometic 3-Way Fridge features precise engineering with advanced components. Its dimensions, power ratings, and internal systems ensure efficient cooling across gas, electric, and battery modes. Built to last.

8.1 Dimensions and Weight

The Dometic 3-Way Fridge models vary in size, with the RM2356 measuring 521mm in width and 756mm in height, making it compact for RVs. Weight is optimized for mobility, ensuring stability without compromising interior space. Dimensions are designed to fit standard cabinetry, while the sturdy construction ensures durability. Proper measurement consideration is crucial for installation to ensure optimal performance and ventilation. Always refer to the specific model’s specs for precise details, as sizes may vary slightly across the range.

8.2 Power Consumption and Ratings

The Dometic 3-Way Fridge operates efficiently across its three power modes: 230-240V AC, 12V DC, and LP gas. Power consumption varies depending on the energy source and usage patterns. For example, in AC mode, it typically draws around 120W, while in DC mode, it consumes approximately 40Ah per day. LP gas operation is highly efficient, making it ideal for off-grid use. Always refer to the product label or technical specifications for exact ratings, as these may vary slightly across models to ensure optimal energy efficiency and performance.

8.3 Internal and External Components

The Dometic 3-Way Fridge features a robust design with essential internal and external components. Internally, it includes shelves, compartments, and a evaporator for cooling. Externally, the control panel, condenser, and burner assembly (for gas operation) are key elements. The terminal block and power module ensure safe electrical connections. These components work together to provide efficient cooling across all three power modes, ensuring reliable performance in various settings. Regular inspection and maintenance of these parts are crucial for optimal functionality and longevity.

Warranty and Customer Support

Dometic offers a comprehensive warranty program, ensuring coverage for parts and labor. Dedicated customer support teams are available to assist with inquiries, repairs, and maintenance; Authorized service centers provide reliable solutions, guaranteeing optimal performance and extending product lifespan.

9.1 Warranty Terms and Conditions

The Dometic 3-Way Fridge is backed by a comprehensive warranty program. The warranty covers parts and labor for defects in materials and workmanship during the specified period. Registration is required within 30 days of purchase to activate coverage. The warranty duration varies by product and region, typically ranging from 1 to 2 years for parts and 1 year for labor. Proper installation, maintenance, and operation in accordance with the manual are essential for warranty validity.

Exclusions include damage from misuse, neglect, or unauthorized modifications. Original purchase documentation must be provided for warranty claims. For detailed terms, refer to the warranty section in the manual or contact Dometic support.

9.2 Contacting Customer Service

For assistance with your Dometic 3-Way Fridge, contact customer service via phone, email, or the official website. The Dometic headquarters can be reached at +46 8 501 025 00. Regional offices include Dometic Corp. in Elkhart, IN (phone: 574-294-2511) and Dometic Canada (phone: 519-720-9578). Visit the official website for detailed contact information, support resources, and service center locations. Ensure to have your product model and serial number ready for efficient support.

9.4 Service Centers and Repair Options

Dometic operates authorized service centers worldwide to ensure professional repair and maintenance of your 3-Way Fridge. In Australia, service centers like Texcelus offer expert support. For international users, locations such as Parkway Elkhart, IN, and Dometic Canada in Brantford, ON, provide reliable services. Visit the official Dometic website to locate your nearest service center. Trained technicians use genuine parts to ensure optimal performance. Contact customer service for assistance in finding a certified repair center near you. Regular maintenance by authorized centers guarantees warranty compliance and longevity of your appliance.

This manual has provided a comprehensive guide to understanding, installing, and maintaining your Dometic 3-Way Fridge. By following the instructions and safety precautions outlined, you can ensure optimal performance and longevity of your appliance. The fridge’s versatility, energy efficiency, and compact design make it a reliable choice for various applications. Regular maintenance and proper usage will enhance your experience. Refer to the warranty and customer support sections for any further assistance. Enjoy the convenience and reliability of your Dometic 3-Way Fridge for years to come.

powersmart 209cc lawn mower manual

Welcome to the comprehensive guide for the PowerSmart 209cc Lawn Mower. This manual provides detailed instructions for safe operation‚ maintenance‚ and troubleshooting. Explore its features and capabilities to maximize efficiency.

1.1 Overview of the PowerSmart 209cc Lawn Mower

The PowerSmart 209cc Lawn Mower is a versatile and efficient gardening tool designed for homeowners seeking reliable performance. Equipped with a 4-stroke‚ OHV‚ single-cylinder engine‚ it delivers consistent power for cutting various grass types. Featuring a 21-inch cutting deck‚ this mower offers three-in-one functionality‚ allowing for mulching‚ bagging‚ and side discharge. Its forced air-cooling system ensures optimal engine performance even during extended use. With a focus on ease of operation‚ the mower is designed for maneuverability and durability‚ making it suitable for both small and medium-sized lawns. The 209cc displacement ensures ample power to handle tough grass‚ while the compact design simplifies storage and transportation. This mower is an ideal choice for those looking to maintain a well-groomed lawn with minimal effort and maximum efficiency.

1.2 Safety Precautions and Warnings

Before operating the PowerSmart 209cc Lawn Mower‚ it is essential to review and follow all safety precautions to ensure safe and effective use. Always wear protective gear‚ including gloves‚ safety glasses‚ and sturdy footwear. Avoid operating the mower in wet conditions‚ as this can lead to slipping hazards. Keep children and pets at a safe distance while mowing. Never leave the mower unattended while it is running. Be cautious of loose clothing or long hair that could get caught in moving parts. Ensure the area is clear of debris‚ toys‚ or obstacles that could cause accidents or damage the mower. The muffler and surrounding areas become extremely hot during operation‚ so avoid touching them. Follow all instructions carefully and never modify the mower without authorization. Proper adherence to these guidelines will help prevent injuries and ensure optimal performance. Always refer to the manual for detailed safety information.

Product Specifications

The PowerSmart 209cc Lawn Mower features a 4-stroke OHV engine‚ 21-inch cutting deck‚ and 3-in-1 mulching‚ bagging‚ and side-discharge capabilities‚ designed for efficient mowing performance and versatility.

2.1 Engine Type and Displacement

The PowerSmart 209cc Lawn Mower is equipped with a 4-stroke OHV (Overhead Valve) single-cylinder engine. This engine type is known for its fuel efficiency and reliable performance. The displacement of 209cc ensures sufficient power to handle various mowing tasks efficiently. The forced air-cooling system helps maintain optimal engine temperature‚ preventing overheating during extended use. This configuration makes the mower suitable for both small and medium-sized lawns‚ delivering consistent results. Proper engine maintenance‚ such as regular oil changes‚ is essential to prolong its lifespan and ensure peak performance.

2.2 Mower Features and Capabilities

The PowerSmart 209cc Lawn Mower offers a 21-inch cutting deck‚ ideal for efficient mowing of larger areas. It features a 3-in-1 design‚ allowing for mulching‚ bagging‚ and side discharge options to suit different lawn care needs. The adjustable cutting height ensures a precise cut‚ ranging from 1.2 to 3.5 inches‚ catering to various grass types and preferences. The mower is designed for ease of use‚ with a durable steel deck and a smooth push mechanism. Additional features include a recoil start system and a compact design for easy storage. These capabilities make it a versatile and practical choice for homeowners seeking a reliable lawn mowing solution.

2.3 Dimensions and Weight

The PowerSmart 209cc Lawn Mower features a compact design with assembled dimensions of 39.4 inches in length‚ 24.8 inches in width‚ and 40.9 inches in height‚ making it easy to maneuver and store. The cutting deck measures 21 inches‚ providing an efficient cutting swath for faster mowing sessions. Weighing approximately 90 pounds‚ the mower is lightweight enough for easy handling while maintaining durability. The handlebar is ergonomically designed and measures 38.6 inches in height‚ ensuring comfort during operation. These dimensions and weight make the mower suitable for various yard sizes‚ offering a balance between portability and cutting performance. The overall design ensures stability and ease of use‚ making it an ideal choice for homeowners seeking a reliable and efficient lawn mowing solution.

Assembly and Setup

Begin by carefully unboxing and inventorying all parts. Follow the manual to assemble hardware‚ ensuring proper alignment and tightening of bolts. Complete the setup with oil and gasoline preparation before first use.

3.1 Unboxing and Inventory of Parts

Upon receiving your PowerSmart 209cc Lawn Mower‚ carefully unbox and inspect all components. Ensure the package includes the mower deck‚ handlebars‚ wheels‚ and small hardware. Check for a complete set of tools like wrenches and screws. Verify the presence of the owner’s manual‚ parts list‚ and safety guidelines. Compare the items with the provided parts diagram to confirm completeness. If any parts are missing or damaged‚ contact customer support immediately. Organize the components neatly to avoid misplacement during assembly. Review the manual to familiarize yourself with each part’s purpose and location. This step ensures a smooth and efficient assembly process. Note: For models like DB8621PH and PSM2521PH‚ additional accessories may be included‚ so double-check the inventory list provided. Proper organization and verification are key to successful setup. Always refer to the manual for specific instructions tailored to your model.

3.2 Hardware Setup and Assembly

Begin by assembling the handlebars‚ attaching them securely to the mower deck using the provided bolts and wrenches. Tighten all connections firmly to ensure stability. Next‚ install the wheels‚ ensuring they are properly aligned and attached according to the manual. For models like DB8621PH and PSM2521PH‚ refer to the exploded parts diagram for precise guidance. Once the main structure is assembled‚ attach any additional features such as the grass catcher or mulching kit if included. Double-check all bolts and screws for tightness to prevent loosening during operation. If unsure about any step‚ consult the instruction manual or contact customer support. Proper assembly is crucial for optimal performance and safety. Take your time to ensure every component is correctly fitted and secured. This step lays the foundation for efficient mowing and longevity of your PowerSmart 209cc Lawn Mower.

3.3 Oil and Gasoline Setup

Before first use‚ fill the engine with the recommended SAE 10W30 oil. The oil capacity for the 209cc engine is approximately 0.5 liters. Pour the oil slowly into the filler neck‚ checking the dipstick regularly to avoid overfilling. For gasoline‚ use fresh‚ unleaded fuel with an octane rating of 87 or higher. Do not mix oil with gasoline‚ as this can damage the engine. Fill the fuel tank slowly‚ allowing the fuel to settle before replacing the cap. Refer to the manual for specific oil and fuel recommendations. Always perform this step in a well-ventilated area‚ away from open flames or sparks. Proper oil and fuel setup ensures optimal engine performance and longevity. If unsure‚ consult the instruction manual or contact customer support for guidance. This step is critical for the safe and efficient operation of your PowerSmart 209cc Lawn Mower.

Operating Instructions

Start the engine‚ engage the mowing lever‚ and adjust speed as needed. Maintain a steady pace‚ overlap passes for even cutting‚ and empty the bag regularly. Stop the engine before leaving the mower unattended.

4.1 Starting the Engine

To start the PowerSmart 209cc lawn mower‚ ensure the area is clear of debris and obstacles. Wear proper personal protective equipment (PPE) such as gloves and safety glasses. Locate the ignition switch and ensure the choke is in the correct position for a cold start. Prime the engine by pressing the primer bulb 2-3 times to ensure fuel flow. Pull the starter cord gently until resistance is felt‚ then pull sharply to engage the engine. Once the engine starts‚ allow it to warm up for a few seconds before adjusting the choke to the “run” position. Always refer to the manual for specific starting procedures‚ as improper techniques may damage the engine or pose safety risks. Proper starting ensures optimal performance and longevity of your mower. Follow these steps carefully to avoid any issues during operation.

4.2 Mowing Techniques and Tips

For optimal performance with your PowerSmart 209cc lawn mower‚ adopt proper mowing techniques. Maintain the mower deck at the recommended height based on your grass type to ensure even cutting. Overlap your mowing passes slightly to achieve a uniform appearance. Always mow in a consistent pattern‚ such as up and down or side to side‚ to avoid missing spots. Avoid cutting wet grass‚ as it can clog the mower and leave clumps. Regularly sharpen the blade to prevent tearing the grass and promote healthy growth. Use the bagging feature for clean results or leave the clippings on the lawn as a natural fertilizer. Adjust your mowing speed according to grass height and thickness to maintain engine efficiency. Proper techniques enhance cutting quality‚ reduce wear on the mower‚ and ensure a well-manicured lawn. Follow these tips for the best mowing experience with your PowerSmart lawn mower.

4.3 Handling and Maneuvering

Proper handling and maneuvering of your PowerSmart 209cc lawn mower ensure efficient mowing and safety. Grip the handlebars firmly to maintain control‚ especially when turning or navigating uneven terrain. Walk at a steady pace‚ allowing the mower to move smoothly without jerking. To turn‚ pivot the mower by angling the handlebars while stepping forward. For tight spaces‚ raise the mowing deck slightly to maneuver without damaging the grass. When mowing slopes‚ always go uphill to prevent the mower from slipping or losing traction. Use the self-propelled feature to ease effort on larger areas. Avoid sudden stops or sharp turns‚ as this could destabilize the mower. Practice turning in open areas to get accustomed to the mower’s responsiveness. By mastering these techniques‚ you can achieve precise control and a professional-looking lawn. Always stay alert to obstacles and adjust your path accordingly for safe and effective mowing.

4.4 Stopping the Engine

To stop the PowerSmart 209cc lawn mower‚ follow these steps for safe engine shutdown. First‚ release the blade control lever to disengage the cutting blade. Next‚ move the mower to a flat‚ stable surface away from flammable materials. Turn the ignition switch to the “OFF” position and remove the key to prevent accidental restarts. Allow the engine to cool for a few minutes before storing or servicing. Always ensure the surrounding area is clear of debris and obstacles. For extended storage‚ consider draining the fuel tank or using a fuel stabilizer. Never leave the mower unattended while the engine is running. Proper shutdown helps maintain the mower’s longevity and ensures safety. Refer to the manual for additional guidelines on engine stopping and storage preparation.

Maintenance and Servicing

Regular maintenance ensures optimal performance and longevity. Check oil levels‚ sharpen blades‚ and clean air filters. Store properly and address issues promptly for reliable operation.

5.1 Regular Maintenance Tasks

Regular maintenance is crucial for the optimal performance and longevity of your PowerSmart 209cc Lawn Mower. Start by checking the oil level before each use and top it up as needed‚ ensuring the engine stays lubricated. The air filter should be cleaned or replaced monthly to maintain proper airflow and combustion efficiency. Additionally‚ inspect the mower blade regularly and sharpen it when necessary to ensure clean cuts and even grass distribution. After each use‚ clean the deck and chute of debris to prevent blockages and rust formation. Finally‚ store the mower in a dry‚ protected area during the off-season to prevent damage from moisture and pests. By following these routine tasks‚ you can ensure your mower remains in excellent working condition for years to come.

5.2 Servicing Schedule

Adhering to a consistent servicing schedule ensures the longevity and performance of your PowerSmart 209cc Lawn Mower. Service the mower every 5-10 hours of use by changing the engine oil and filter. Clean or replace the air filter every 10-20 hours to maintain proper airflow. Inspect the spark plug every 20 hours and replace it as needed to ensure reliable engine ignition. Sharpen the mower blade every 25-50 hours to maintain cutting efficiency and prevent tearing the grass. Additionally‚ check the tire pressure monthly and adjust it according to the manufacturer’s specifications. Finally‚ lubricate moving parts such as the wheels and pivot points every 50 hours to reduce friction and wear. Following this schedule will help prevent mechanical issues and keep your mower running smoothly throughout the season.

5.3 Winter Storage Preparation

Proper winter storage is essential to maintain the performance and longevity of your PowerSmart 209cc Lawn Mower. Before storing‚ drain the fuel tank or add a fuel stabilizer to prevent degradation. Change the engine oil and filter to remove contaminants and protect the engine. Clean the mower deck thoroughly to prevent rust and residue buildup. Sharpen and grease the blade to maintain its condition. Store the mower in a dry‚ cool place‚ away from direct sunlight and moisture. Cover the mower with a breathable cover to protect it from dust. Disconnect the spark plug wire for safety. Consult the manual for specific storage recommendations to ensure your mower is ready for the next mowing season.

5.4 Troubleshooting Common Issues

If your PowerSmart 209cc Lawn Mower experiences issues‚ troubleshooting can often resolve the problem. Common issues include the mower not starting‚ poor cutting performance‚ or excessive vibration. For a non-starting engine‚ check the fuel level‚ air filter cleanliness‚ and spark plug condition. Ensure the choke is properly adjusted and the ignition coil is functioning. If the mower vibrates excessively‚ inspect the blade for balance and damage‚ and ensure all bolts are tightened securely. For uneven cutting‚ adjust the mower deck height evenly and check for dull or bent blades. Refer to the manual for specific diagnostic steps and solutions. If problems persist‚ contact PowerSmart customer support or visit an authorized service center for professional assistance. Regular maintenance can often prevent these issues from arising. Always follow safety guidelines when troubleshooting to avoid accidents.

Safety Precautions

Always wear protective gear‚ including gloves and safety goggles‚ when operating the mower. Avoid loose clothing and keep children away. Follow all safety guidelines to prevent accidents.

6.1 Common Hazards to Avoid

When operating the PowerSmart 209cc Lawn Mower‚ be mindful of several common hazards to ensure safe and effective use. First‚ avoid mowing on uneven or steep slopes‚ as this can cause the mower to tip over‚ leading to potential injury. Additionally‚ never mow in reverse unless absolutely necessary‚ and always be cautious of obstacles such as rocks‚ toys‚ or debris‚ which can be thrown by the mower blades and cause harm. Keep children and pets at a safe distance from the mowing area to prevent accidents. Also‚ avoid mowing in wet conditions‚ as this can reduce traction and increase the risk of slipping or electrical hazards. Finally‚ never touch the mower blades with your hands or any part of your body‚ even when the engine is off‚ as they can still pose a danger. By being aware of these hazards‚ you can significantly reduce the risk of accidents and ensure a safer mowing experience.

6.2 Personal Protective Equipment (PPE)

Operating the PowerSmart 209cc Lawn Mower requires the use of proper personal protective equipment to ensure your safety. Always wear sturdy gloves to protect your hands from vibrations and cuts. Safety glasses or goggles are essential to shield your eyes from debris thrown by the mower blades. Additionally‚ wear closed-toe shoes or boots with good traction to prevent foot injuries and slips. Long pants or sturdy work clothing can protect your legs from potential debris. Consider wearing hearing protection‚ as the engine can produce loud noise during operation. Finally‚ keep loose clothing or long hair tied back to avoid entanglement with moving parts. By wearing the appropriate PPE‚ you can significantly reduce the risk of injury while mowing. Ensure all safety gear is worn correctly and remains secure throughout the mowing process.

6.3 Best Practices for Safe Operation

Always read and follow the instructions provided in the PowerSmart 209cc Lawn Mower manual. Before starting‚ inspect the area for obstacles‚ toys‚ or debris. Wear appropriate personal protective equipment‚ such as gloves‚ safety glasses‚ and sturdy footwear. Ensure the mower is on level ground when starting the engine. Never leave the mower unattended while it is running. Keep children and pets at a safe distance. Avoid mowing in reverse unless necessary‚ and always look down and behind you when walking backward. Use the mower’s mulching feature wisely to avoid clogging the discharge chute. When mowing on slopes‚ mow across the slope‚ not up or down‚ to maintain stability. Always shut off the engine and allow the blade to stop before leaving the mower or performing maintenance. Stay alert and avoid distractions while operating the mower. Follow these guidelines to ensure safe and efficient mowing.

Accessories and Parts

Explore a wide range of PowerSmart 209cc Lawn Mower accessories to enhance functionality. Refer to the detailed parts diagram for easy identification and replacement parts information to maintain optimal performance.

7.1 Available Accessories

The PowerSmart 209cc Lawn Mower offers a variety of accessories to enhance its functionality and performance. Key accessories include mulch kits‚ grass catchers‚ and replacement blades‚ ensuring versatile mowing options. Additionally‚ maintenance tools like spark plug testers and compression testers are available to support routine upkeep. Owners can also purchase protective covers for storage and transportation. For convenience‚ replacement parts such as air filters‚ oil filters‚ and belts can be easily sourced. These accessories are designed to optimize the mower’s efficiency and extend its lifespan. Refer to the official parts diagram or the manufacturer’s website for a comprehensive list of compatible accessories tailored to your specific model. Always ensure compatibility with your mower’s specifications before making a purchase to maintain optimal performance and safety. Accessories are readily available through authorized retailers or online marketplaces‚ making it easy to find what you need.

7.2 Parts Diagram

The PowerSmart 209cc Lawn Mower parts diagram provides a detailed visual representation of all components‚ ensuring easy identification and location of parts. This diagram is essential for troubleshooting‚ repairs‚ and maintenance. It includes labels for major assemblies such as the engine‚ cutting deck‚ wheels‚ and handlebars. Users can refer to the exploded view to understand how parts are assembled and connected. The diagram also lists part numbers‚ making it easier to order replacement components. For models like DB8621PH and DB2194PH‚ the parts diagram is available in the official manual or on the manufacturer’s website. Always cross-reference the diagram with your specific mower model to ensure accuracy. This resource is invaluable for DIY enthusiasts and professionals alike‚ helping to maintain and extend the lifespan of your PowerSmart mower. Regularly consulting the parts diagram ensures proper maintenance and safe operation.

7.3 Replacement Parts Information

Replacement parts for the PowerSmart 209cc Lawn Mower are readily available through authorized dealers and online retailers. To ensure compatibility‚ always verify the part number using the provided parts diagram or the manufacturer’s website. Common replacement parts include blades‚ air filters‚ spark plugs‚ and belts. For models like DB8621PH and DB2194PH‚ specific part numbers are listed in the manual or online database. When ordering‚ cross-reference the part number with your mower’s model to avoid mismatches. Genuine PowerSmart parts are recommended to maintain performance and warranty validity. For convenience‚ users can search by model number on the official PowerSmart website or through trusted retailers like eBay. Always follow the assembly instructions provided with replacement parts to ensure proper installation and safety. This ensures your mower operates efficiently and maintains its durability over time. Regularly updating worn or damaged parts extends the lifespan of your lawn mower.

Warranty and Support

PowerSmart offers a comprehensive warranty program for the 209cc lawn mower‚ ensuring coverage for defects in materials and workmanship. Register your product online to activate warranty benefits. For support‚ contact customer service at 1131 W Bryn Mawr Ave‚ Itasca‚ IL 60143‚ or visit the official website for assistance and troubleshooting resources.

8.1 Product Registration

Register your PowerSmart 209cc Lawn Mower to activate warranty benefits and ensure proper coverage. Visit the official PowerSmart website and navigate to the support section. Fill out the product registration form with your personal and product details‚ including the model number and purchase date. Ensure all information is accurate to avoid delays. A valid purchase receipt may be required for verification. Once registered‚ you will receive a confirmation email. This process helps PowerSmart maintain a record of your ownership and provides access to exclusive support services. For assistance‚ contact customer service at 1131 W Bryn Mawr Ave‚ Itasca‚ IL 60143. Registration is a crucial step to enjoy hassle-free warranty claims and dedicated customer support.

8.2 Warranty Terms and Conditions

Your PowerSmart 209cc Lawn Mower is backed by a limited warranty that covers defects in materials and workmanship for a period of two (2) years from the date of purchase. This warranty applies to the original purchaser only and is non-transferable. To maintain warranty validity‚ ensure proper maintenance and adhere to the guidelines outlined in this manual. Damage resulting from misuse‚ neglect‚ or unauthorized modifications is not covered. For warranty claims‚ contact PowerSmart customer service or visit their official website for detailed instructions. Keep your proof of purchase and registration handy for verification. The warranty does not cover normal wear and tear or consumable parts. For specific details‚ refer to the warranty section in this manual or contact PowerSmart directly at 1131 W Bryn Mawr Ave‚ Itasca‚ IL 60143.

8.3 Customer Support Contact Information

For assistance with your PowerSmart 209cc Lawn Mower‚ contact our dedicated customer support team. Reach us by phone at (800) 668-4348 or via email at support@powersmartusa.com. Our team is available Monday through Friday‚ 8:30 AM to 5:00 PM CST. For general inquiries or warranty-related questions‚ visit our official website at https://www.powersmartusa.com. You can also mail correspondence to PowerSmart USA‚ 1131 W Bryn Mawr Ave‚ Itasca‚ IL 60143. Ensure to include your product model number and a detailed description of your inquiry for prompt assistance. Additionally‚ the website offers downloadable manuals‚ parts diagrams‚ and troubleshooting guides to help you resolve issues independently. For the most efficient service‚ register your product online and maintain your proof of purchase. Our support team is committed to ensuring your satisfaction with your PowerSmart 209cc Lawn Mower.