stihl guide bar dressing tool

The Stihl Guide Bar Dressing Tool is an essential accessory for maintaining guide bars, ensuring optimal chainsaw performance and chain longevity by removing burrs and leveling rails effectively.
It is specifically designed for Stihl chainsaws, making it a vital tool for professionals and homeowners alike to keep their equipment in top working condition.
1.1 Overview of the Tool and Its Purpose
The Stihl Guide Bar Dressing Tool is a specialized maintenance tool designed to ensure the optimal performance of Stihl chainsaws. Its primary function is to dress and maintain the guide bar by removing burrs and leveling the rails, which are essential for smooth chain operation and cutting efficiency. The tool features a flat file made from hardened steel, allowing for precise adjustments and repairs. It is specifically engineered to address common guide bar issues, such as uneven wear and burrs, ensuring prolonged chain life and consistent cutting performance.
1.2 Importance of Guide Bar Maintenance
Proper guide bar maintenance is crucial for ensuring optimal chainsaw performance and longevity. A well-maintained guide bar prevents issues like poor cutting efficiency, increased chain wear, and uneven bar damage. Burrs and uneven wear on the guide bar rails can lead to chain misalignment, reduced cutting precision, and increased risk of damage to the chainsaw. Regular maintenance with the Stihl Guide Bar Dressing Tool ensures smooth operation, extends the life of both the bar and chain, and maintains overall tool reliability.
What is the Stihl Guide Bar Dressing Tool?
The Stihl Guide Bar Dressing Tool is a specialized tool designed to maintain guide bars by removing burrs and leveling rails, ensuring smooth chainsaw operation and chain longevity.
2.1 Design and Features of the Tool
The Stihl Guide Bar Dressing Tool features a durable design with a flat file made from hardened tool steel, ensuring long-lasting performance. It is specifically crafted to remove burrs and level guide bar rails, maintaining precise alignment for optimal chainsaw operation. The tool’s compact design allows for easy handling and storage, making it a must-have for both professionals and homeowners. Its compatibility with various Stihl chainsaw models ensures versatility and effectiveness in maintaining guide bars efficiently.
2.2 Compatibility with Stihl Chainsaws
The Stihl Guide Bar Dressing Tool is universally designed to work with a wide range of Stihl chainsaw models, including popular options like the MS291, MS231, and FS series. Its compatibility ensures that users can maintain their guide bars effectively across different Stihl equipment. Whether for older models or newer releases, the tool’s design allows for seamless integration, making it a versatile accessory for any Stihl chainsaw owner. This broad compatibility enhances its utility and ensures optimal performance across the Stihl product lineup.
Why Use the Stihl Guide Bar Dressing Tool?
The Stihl Guide Bar Dressing Tool ensures proper guide bar maintenance, preventing damage and promoting smooth chain operation. It enhances cutting efficiency and extends chainsaw lifespan by removing burrs and leveling rails effectively.
3.1 Benefits of Proper Guide Bar Maintenance
Proper guide bar maintenance ensures smooth chain operation, reduces wear, and enhances cutting efficiency. By removing burrs and leveling rails, it prevents chain derailment and extends bar lifespan. This maintenance also reduces vibration, improving user control and safety. Regular use of the Stihl Guide Bar Dressing Tool keeps the chainsaw performing optimally, minimizing downtime and maintenance costs. A well-maintained guide bar contributes to consistent cutting performance and overall tool longevity.
3.2 Preventing Damage to the Chainsaw
Proper guide bar maintenance with the Stihl Guide Bar Dressing Tool prevents damage to the chainsaw by ensuring smooth chain operation. Burrs and uneven wear can cause chain derailment, leading to costly repairs. By leveling and smoothing the guide bar rails, the tool reduces friction and prevents excessive wear on the chain and other components. This maintenance step helps avoid premature damage to the chainsaw’s engine and other critical parts, ensuring long-term reliability and performance.
How to Use the Stihl Guide Bar Dressing Tool
The Stihl Guide Bar Dressing Tool is used to maintain guide bars by removing burrs and leveling rails. It includes a flat file for precise adjustments, ensuring smooth chain operation and extending bar life.
4.1 Step-by-Step Guide to Dressing the Guide Bar
To dress the guide bar, start by inspecting it for burrs or uneven wear. Secure the chainsaw and position the Stihl Guide Bar Dressing Tool on the bar. Use the flat file to remove burrs by filing in one direction only. Ensure the tool is aligned with the bar’s edges to maintain evenness. After filing, inspect the bar to confirm smoothness and repeat if necessary. Proper dressing ensures optimal chain performance and extends the bar’s lifespan.
4.2 Tips for Effective Guide Bar Maintenance
Regularly inspect the guide bar for burrs or uneven wear to prevent chain misalignment. Always use the Stihl Guide Bar Dressing Tool to ensure precise filing; Maintain the tool at the correct angle to avoid damaging the bar. Clean the bar thoroughly after dressing to remove metal shavings. Store the tool in a dry place to prevent rust. Avoid over-filing, as this can weaken the bar. By following these tips, you can extend the lifespan of your guide bar and chainsaw.
Maintenance and Care of the Dressing Tool
Regularly clean the Stihl Guide Bar Dressing Tool to remove metal shavings. Store it in a dry place to prevent rust; Sharpen the flat file periodically to maintain its effectiveness in dressing guide bars properly.
5.1 Cleaning and Storing the Tool
Clean the Stihl Guide Bar Dressing Tool regularly by brushing off metal shavings with a soft-bristled brush or cloth. For tougher residue, use a mild solvent and dry thoroughly to prevent rust.
Store the tool in a dry, secure location to avoid damage. Consider using a protective case to maintain its condition and ensure longevity. Proper storage and cleaning ensure the tool remains effective for future use.
5.2 Sharpening the Flat File
To maintain the effectiveness of the Stihl Guide Bar Dressing Tool, sharpen the flat file periodically. Use a diamond stone or sharpening steel to hone the edge, ensuring the original angle is preserved for optimal performance.
After sharpening, inspect the file for evenness and remove any metal particles with a soft cloth. A well-maintained flat file ensures precise guide bar dressing, extending the tool’s lifespan and maintaining chainsaw efficiency.
Identifying Common Issues with the Guide Bar
Common issues include burrs and uneven wear, which can hinder chainsaw performance. Regular inspection and use of the Stihl Guide Bar Dressing Tool help maintain optimal guide bar condition.
6.1 Recognizing Burrs and Uneven Wear
Burrs and uneven wear on the guide bar can significantly impact chainsaw performance. Burrs are sharp metal fragments that form due to chain friction or improper cutting techniques. Uneven wear occurs when the guide bar rails are not evenly maintained, leading to poor chain alignment. These issues can cause the chain to cut inefficiently or even bind during operation. Regular inspection and use of the Stihl Guide Bar Dressing Tool help identify and address these problems before they escalate, ensuring smooth and precise cutting.
6.2 Assessing the Need for Dressing
Regular inspection is crucial to determine if the guide bar requires dressing. Look for visible burrs, uneven wear, or a rough surface texture. If the chain cuts unevenly or the saw vibrates excessively, it may indicate the need for dressing. Additionally, if the guide bar rails are misaligned or show signs of damage, dressing is necessary to restore proper chain alignment and ensure efficient cutting performance. The Stihl Guide Bar Dressing Tool simplifies this process, helping maintain optimal guide bar condition.
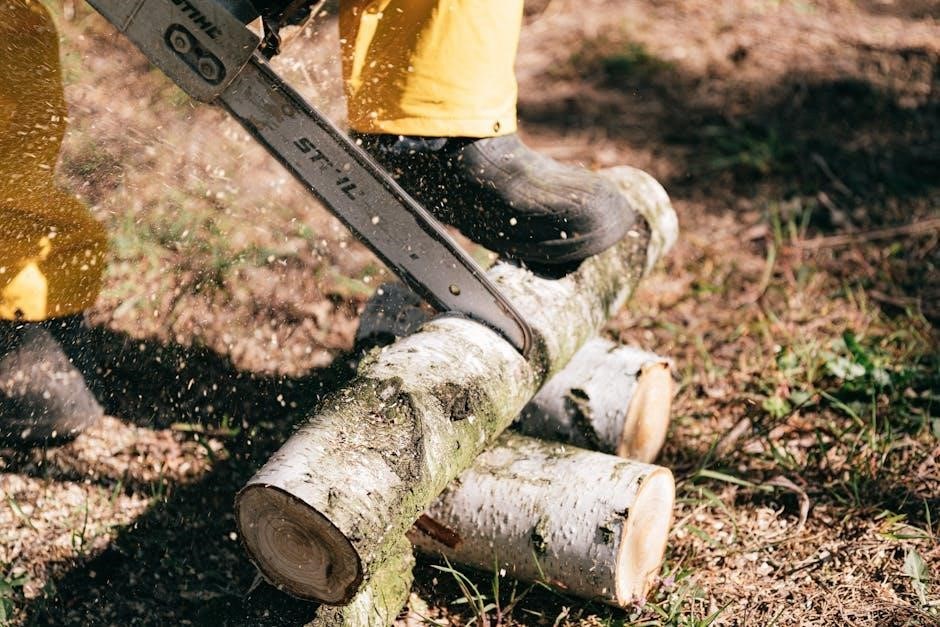
The Role of the Guide Bar in Chainsaw Performance
The guide bar plays a crucial role in chainsaw performance by maintaining proper chain alignment and preventing uneven wear. It ensures efficient cutting and consistent operation.
7.1 How the Guide Bar Affects Cutting Efficiency
A well-maintained guide bar ensures smooth chain operation, reducing vibrations and improving cutting precision. Burrs and uneven wear can disrupt chain alignment, leading to inefficient cuts and increased wear. Proper dressing with the Stihl Guide Bar Dressing Tool restores the bar’s surface, enabling consistent performance and extending the chain’s lifespan. A damaged or neglected guide bar can significantly slow down cutting tasks, making regular maintenance essential for optimal efficiency and reliability in chainsaw operations.
7.2 Impact of a Damaged Guide Bar on Chainsaw Operation
A damaged guide bar can severely disrupt chainsaw performance, causing poor chain alignment and increased wear. Burrs and uneven surfaces lead to inefficient cutting and reduced precision. Over time, this can result in premature chain and bar wear, increasing maintenance costs. A damaged guide bar may also cause vibrations, making the chainsaw harder to control and potentially unsafe to operate. Regular maintenance with the Stihl Guide Bar Dressing Tool is crucial to prevent these issues and ensure smooth operation.

Safety Precautions When Using the Dressing Tool
Always wear protective gear, including gloves and safety glasses, when using the Stihl Guide Bar Dressing Tool. Ensure the chainsaw is secure and stationary during maintenance to prevent accidents.
Handle the tool with care, as improper use can lead to injury or damage to the guide bar. Follow all safety guidelines provided by Stihl for optimal safety.
8.1 Essential Safety Measures
When using the Stihl Guide Bar Dressing Tool, always wear safety glasses and gloves to protect against metal shavings and tool slippage. Ensure the chainsaw is stationary and secure to prevent accidental movement.
Keep loose clothing and long hair tied back, and avoid wearing jewelry that could get caught in the tool. Maintain a clean, well-lit workspace to minimize hazards. Follow the manufacturer’s instructions carefully to avoid improper use, which could lead to injury or damage to the guide bar.
8.2 Avoiding Accidents During Maintenance
Always ensure the chainsaw is turned off and the chain is stationary before using the Stihl Guide Bar Dressing Tool. Secure the saw to prevent movement during maintenance.
Work in a well-lit area to clearly see the guide bar and tool. Keep children and pets away to avoid distractions. Never apply excessive force, as this can cause loss of control.
Use the correct file size and technique to avoid damaging the tool or guide bar. Avoid over-filing, as it can weaken the bar and lead to premature wear.
Compatibility with Other Stihl Chainsaw Models
The Stihl Guide Bar Dressing Tool is compatible with a wide range of Stihl chainsaw models, including MS291, MS231, and FS series, ensuring universal applicability and convenience for users.
9.1 Supported Chainsaw Models
The Stihl Guide Bar Dressing Tool is compatible with a variety of Stihl chainsaw models, including the MS291, MS231, and FS series. Its universal design ensures it works seamlessly with multiple Stihl saws, making it a versatile tool for maintaining guide bars across different models. This compatibility allows users to keep their equipment in optimal condition without needing multiple tools, ensuring efficiency and convenience for both professionals and homeowners alike.
9.2 Universal vs. Model-Specific Tools
The Stihl Guide Bar Dressing Tool offers a universal design, making it compatible with multiple Stihl chainsaw models. While some tools are tailored for specific models, this tool’s versatility reduces the need for multiple accessories. Its adaptability ensures consistent performance across different saws, providing a cost-effective solution for users with various Stihl equipment. This universal approach enhances convenience, allowing seamless maintenance without the hassle of model-specific tools, making it a practical choice for professionals and homeowners with diverse chainsaw needs.
Troubleshooting Common Guide Bar Issues
The Stihl Guide Bar Dressing Tool helps identify and address issues like uneven wear and burrs, ensuring proper guide bar maintenance and optimal chainsaw performance always.
10.1 Diagnosing Uneven Wear Patterns
Uneven wear on the guide bar can be diagnosed by inspecting the rails for inconsistent grooves or excessive wear on one side; This often results from improper chain tension or angled cuts.
The Stihl Guide Bar Dressing Tool helps identify such issues by revealing uneven surfaces during the dressing process, ensuring precise maintenance for optimal performance and chain alignment.

10.2 Resolving Burr-Related Problems
Burrs on the guide bar can cause poor chain performance and increased wear. The Stihl Guide Bar Dressing Tool effectively removes these burrs by filing the edges smooth.
Regular use of the tool ensures rails remain even, preventing further burr formation and maintaining proper chain alignment for efficient cutting and reduced damage to the chainsaw.
Accessories and Additional Tools for Guide Bar Maintenance
Essential accessories include flat files, hardened steel tools, and storage cases. These complement the Stihl Guide Bar Dressing Tool, ensuring comprehensive guide bar maintenance and longevity.
11.1 Recommended Files and Tools
The Stihl Guide Bar Dressing Tool is often paired with a flat file made from hardened tool steel, designed to effectively remove burrs and level guide bar rails.
Additional tools like depth gauges and chain sharpening files complement the dressing tool, ensuring comprehensive maintenance. Storage cases are also recommended to keep tools organized and protected.
11.2 Storage and Organization Solutions
Proper storage of the Stihl Guide Bar Dressing Tool is crucial to maintain its effectiveness. A durable storage case or pouch is recommended to protect the tool from damage and corrosion.
Organizing the tool alongside its accessories, such as files and gauges, ensures easy access and reduces the risk of misplacement. Cleaning the tool before storage prevents rust and maintains its condition for future use. These storage solutions are essential for both professionals and homeowners to keep their maintenance tools in optimal shape.

Comparing the Stihl Guide Bar Dressing Tool to Other Brands
The Stihl Guide Bar Dressing Tool stands out for its durability and precision, offering superior burr removal and rail leveling compared to other brands on the market.
12.1 Key Differences and Advantages
The Stihl Guide Bar Dressing Tool excels with its hardened tool steel flat file, ensuring durability and precision in removing burrs and leveling guide bar rails.
Its ergonomic design enhances user comfort and control during maintenance, setting it apart from competitors. Additionally, its compatibility with various Stihl chainsaw models makes it a versatile choice for professionals and homeowners alike, providing consistent results and extending the lifespan of guide bars more effectively than other brands on the market.
12.2 User Preferences and Reviews
Users praise the Stihl Guide Bar Dressing Tool for its effectiveness in maintaining guide bars, with many highlighting its ease of use and durability.
Positive reviews often mention its ability to restore guide bars to optimal condition, ensuring smoother chainsaw operation. Some users note it is slightly more expensive than other brands but emphasize its superior quality and compatibility with Stihl chainsaws. Overall, it is highly recommended for professionals and homeowners seeking reliable guide bar maintenance.
User Reviews and Testimonials
The Stihl Guide Bar Dressing Tool is highly praised for its effectiveness in maintaining guide bars, with users highlighting its ease of use and durability, making it a recommended accessory for chainsaw maintenance.
13.1 Positive Feedback and Success Stories
Users praise the Stihl Guide Bar Dressing Tool for its effectiveness in maintaining guide bars. Many highlight how it effortlessly removes burrs and levels rails, ensuring smooth chain operation. Professionals and homeowners alike appreciate its durability and ease of use, noting it extends chain life and improves cutting efficiency. Testimonials often mention how the tool restores guide bars to like-new condition, preventing costly replacements. Overall, it’s a highly recommended accessory for anyone serious about chainsaw maintenance and performance.
13.2 Common Complaints and Criticisms
Some users have noted that the Stihl Guide Bar Dressing Tool can be slightly cumbersome to use for novice operators. A few critics mention that the flat file’s durability could be improved for heavy-duty applications. Additionally, there are occasional complaints about the tool’s storage case not being as robust as expected. Despite these minor issues, the tool remains highly regarded for its effectiveness in maintaining guide bars and ensuring optimal chainsaw performance.
The Stihl Guide Bar Dressing Tool is a vital accessory for maintaining guide bars, ensuring optimal chainsaw performance and longevity by effectively removing burrs and leveling rails.
14.1 Summary of the Tool’s Importance
The Stihl Guide Bar Dressing Tool is crucial for maintaining guide bars by removing burrs and leveling rails, ensuring smooth chain operation and preventing premature wear. Its design, featuring a flat file made from hardened tool steel, allows for precise adjustments, enhancing cutting efficiency and chain longevity. Regular use of this tool prevents damage to the chainsaw and ensures optimal performance, making it an indispensable accessory for professionals and homeowners alike. Its compatibility with various Stihl models further underscores its value in maintaining equipment longevity and functionality.
14.2 Final Tips for Optimal Guide Bar Maintenance

Regularly use the Stihl Guide Bar Dressing Tool to maintain smooth chain operation and prevent wear. Always clean the guide bar after use to remove debris. Store the tool in a dry place to avoid rust. Sharpen the flat file periodically for consistent results. Follow Stihl’s maintenance guidelines for optimal performance. By adhering to these practices, you ensure your chainsaw operates efficiently and extends the lifespan of both the guide bar and chain.