texas cheese toast cooking instructions
Texas Cheese Toast is a beloved appetizer and side dish, originating in Texas, celebrated for its simplicity and rich, cheesy flavor․
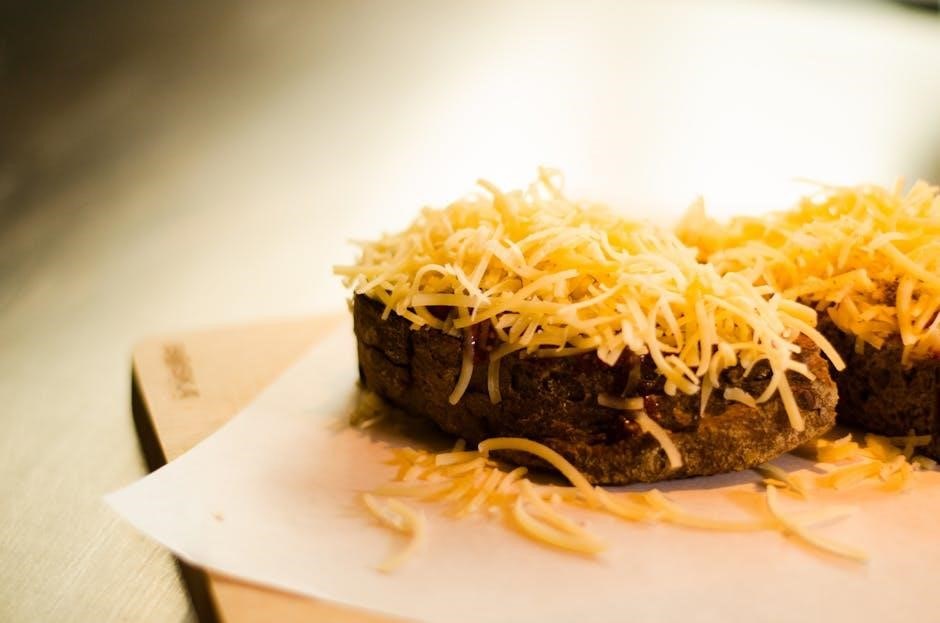
This delightful treat typically features thick-cut bread, generously layered with melted cheese – often cheddar or Monterey Jack – and broiled to golden perfection․
Its origins are rooted in Texan comfort food traditions, evolving from simple toasted cheese snacks into a regional culinary staple enjoyed across the state․
What is Texas Cheese Toast?
Texas Cheese Toast transcends a simple snack; it’s a culinary emblem of Texan hospitality and comfort․ Imagine thick slices of bread, typically Texas toast – known for its substantial size and soft interior – lavishly coated with a blend of melted cheeses․
Cheddar and Monterey Jack are classic choices, creating a gooey, flavorful experience․ The toast is then broiled until the cheese bubbles and turns golden brown, offering a delightful contrast of textures․ It’s often seasoned simply, allowing the cheese to shine, but variations abound!
History and Origins
The precise origins of Texas Cheese Toast are somewhat hazy, evolving organically within Texan culinary traditions․ It likely emerged as a variation of classic cheese toast, amplified by Texas’s penchant for generous portions and bold flavors․ Early iterations probably appeared in diners and cafes across the state during the mid-20th century․
The use of thick-cut Texas toast itself played a crucial role, providing a sturdy base for copious amounts of melted cheese․ Over time, it became a beloved staple, representing Texan comfort food at its finest․

Ingredients for Authentic Texas Cheese Toast
Creating genuine Texas Cheese Toast requires just a few key components: thick-cut bread, your preferred cheeses, quality butter, and simple seasonings for enhanced flavor․
Bread Selection: The Foundation
Choosing the right bread is paramount for authentic Texas Cheese Toast․ Thick-cut Texas toast, naturally, is the traditional choice, providing a sturdy base for generous cheese coverage․ However, challah or brioche can offer a richer, slightly sweeter alternative․
The bread should be substantial enough to withstand the weight of melted cheese without becoming soggy․ Day-old bread works exceptionally well, as it holds its shape better during broiling․ Avoid thin-sliced breads, as they tend to burn quickly before the cheese fully melts․
Cheese Choices: Cheddar, Monterey Jack, and Blends
The cheese is the star! While cheddar is a classic choice for Texas Cheese Toast, Monterey Jack offers a wonderfully mild and melty texture․ Many prefer a blend of both for a complex flavor profile․ Sharp cheddar provides a bolder taste, while medium cheddar offers a balanced option․
Experimenting with other cheeses like Colby Jack or pepper jack can add unique twists․ Pre-shredded cheese is convenient, but freshly grated cheese melts more smoothly and evenly․
Butter & Seasonings: Enhancing the Flavor
Butter is essential for achieving a golden-brown, crispy base on your Texas Cheese Toast․ Softened butter spreads more easily and evenly across the bread․ Garlic powder is a popular addition, lending a savory aroma and taste․ Onion powder complements garlic beautifully, adding depth of flavor․
A dash of paprika provides a subtle smokiness and vibrant color․ Consider a pinch of cayenne pepper for a touch of heat, or Italian seasoning for an herbaceous note․

Essential Equipment
Creating Texas Cheese Toast requires a baking sheet, a reliable broiler, and a cheese grater․ A spreader helps evenly distribute butter and seasonings for optimal flavor․
Baking Sheet Requirements
For crafting perfect Texas Cheese Toast, a sturdy baking sheet is paramount․ Opt for a sheet with a slight lip to contain any melted cheese that might bubble over during broiling․
Non-stick surfaces are incredibly helpful for easy cleanup, preventing the toast from adhering and ensuring effortless removal․
Aluminum baking sheets distribute heat evenly, promoting consistent melting and browning․
The size should comfortably accommodate the bread slices without overcrowding, allowing for proper air circulation and optimal results․
Broiler Considerations
Utilizing your broiler effectively is key to achieving that signature golden-brown Texas Cheese Toast․ Position the oven rack approximately 6-8 inches from the broiler element for optimal heat exposure․
Preheating the broiler is crucial for consistent results; allow it to heat fully before placing the toast inside․
Close supervision is essential, as broilers heat rapidly and can quickly burn the cheese or bread․
Keep a watchful eye and rotate the pan for even browning, ensuring a perfectly melted and bubbly finish․
Cheese Grater & Spreader
Selecting the right tools for cheese preparation significantly impacts the final product․ A box grater with medium-sized holes is ideal for shredding cheddar or Monterey Jack, ensuring even melting․
Alternatively, pre-shredded cheese offers convenience, but freshly grated cheese generally melts more smoothly․
A flexible spatula or offset spreader is invaluable for distributing the cheese evenly across the buttered bread surface․
Generous coverage is key to that classic Texas Cheese Toast experience!
Step-by-Step Cooking Instructions
Creating Texas Cheese Toast is straightforward! Begin by preparing the bread, applying butter and seasonings, then generously layering cheese before broiling to golden, bubbly perfection․
Preparing the Bread
Selecting the right bread is crucial for authentic Texas Cheese Toast․ Opt for thick-cut Texas toast, known for its sturdy texture capable of supporting generous cheese toppings․
Alternatively, any robust, white bread will suffice, ensuring it’s at least ¾ inch thick․
Lightly toast the bread slices – this prevents sogginess when the cheese melts․
A brief toasting also enhances the bread’s structural integrity, creating a delightful contrast to the gooey cheese․
Ensure even toasting for consistent results!
Applying the Butter and Seasonings
Generously spread softened butter across the toasted bread slices, ensuring complete coverage․ This creates a flavorful base and aids in achieving a golden-brown crust․
Next, sprinkle with your preferred seasonings – garlic powder, onion powder, paprika, and a dash of cayenne pepper are popular choices․
Don’t be shy with the seasoning; it complements the richness of the cheese․
A light seasoning of salt and freshly ground black pepper enhances the overall flavor profile․
Adding the Cheese: Generously!
Now for the star: the cheese! Pile a generous amount of shredded cheese onto each buttered and seasoned bread slice․ Cheddar, Monterey Jack, or a blend of both are traditional choices․
Ensure the cheese extends to the edges for maximum melted goodness․
Don’t skimp – a thick layer of cheese is key to authentic Texas Cheese Toast․
Consider a second layer for extra indulgence, creating a bubbly, golden-brown masterpiece when broiled․
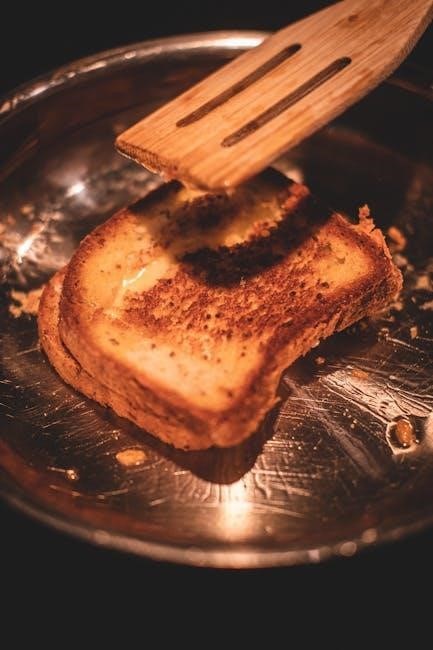
Broiling to Golden Perfection
Time for the broiler! Position the baking sheet approximately 6-8 inches below the broiler element․ Broil for 2-4 minutes, watching very closely to prevent burning; The cheese should be melted, bubbly, and golden brown, with slightly toasted edges on the bread․
Rotation may be needed for even browning․
Remove immediately once desired color is achieved, as it can quickly go from perfect to burnt!

Tips for Perfect Texas Cheese Toast
Success hinges on attention! Ensure even cheese distribution, monitor the broiler constantly to avoid burning, and adjust toasting time based on bread thickness․
Achieving Even Cheese Coverage
Consistent cheese distribution is key to a truly satisfying Texas Cheese Toast experience․ Begin by using freshly grated cheese; pre-shredded varieties often contain anti-caking agents that hinder melting․ Spread the butter evenly across the bread surface, acting as a ‘glue’ for the cheese․
Then, sprinkle the cheese generously, ensuring it reaches all edges․ A light pressing of the cheese into the butter can further aid adhesion․ For larger pieces of toast, consider using your hands to gently pat the cheese down, guaranteeing uniform coverage and preventing bare spots during broiling․
Preventing Burning: Broiler Watch
Broilers vary significantly, making vigilant monitoring crucial when preparing Texas Cheese Toast․ Position the oven rack approximately 6-8 inches from the broiler element․ Initial broiling should take 1-2 minutes, then check frequently – every 30 seconds thereafter – to prevent burning․
Look for a bubbly, golden-brown cheese and lightly toasted bread․ If the bread browns too quickly, reduce the broiler power or move the rack further away․ Remember, cheese continues to cook from residual heat even after removal from the broiler!
Bread Thickness and Toasting Time
Texas Cheese Toast demands substantial bread; typically, slices should be ¾ to 1 inch thick to support the generous cheese topping․ Thicker slices require longer broiling times, generally 2-4 minutes, but necessitate closer observation to avoid burning․
Thinner slices will toast faster, potentially in under 2 minutes․ Adjust broiling time based on your bread’s thickness and broiler’s intensity․ Consistent monitoring is key to achieving perfectly toasted bread and melted cheese․
Variations and Customizations
Elevate your Texas Cheese Toast! Add jalapeños for spice, bacon for smokiness, or garlic and herbs for savory depth – personalize to your taste!
Spicy Texas Cheese Toast
For a fiery kick, incorporate sliced jalapeños – fresh or pickled – directly onto the bread alongside the cheese before broiling․ A dash of cayenne pepper mixed into the butter spread also amplifies the heat․ Consider using pepper jack cheese for an inherent spiciness, or drizzle with a hot sauce after it’s cooked․
Experiment with different chili powders for nuanced flavors․ Remember to adjust the amount of spice to your preference, starting with a small quantity and adding more as needed․ A sprinkle of red pepper flakes offers a subtle warmth․
Garlic Herb Texas Cheese Toast
Elevate your toast by infusing the butter with minced garlic and a blend of fresh herbs like parsley, chives, or oregano․ Rub this flavorful butter generously across the bread before adding the cheese․ Dried Italian seasoning also works wonderfully for convenience․
For a more intense garlic flavor, roast a head of garlic and mash the cloves into the butter․ A sprinkle of parmesan cheese alongside the cheddar adds a savory depth․ Freshly cracked black pepper complements the herbs beautifully․
Adding Bacon or Jalapeños
For a smoky kick, sprinkle cooked, crumbled bacon over the cheese before broiling․ Crispy bacon bits provide a delightful textural contrast to the melted cheese and soft bread․ Alternatively, thinly sliced jalapeños introduce a spicy element – remove the seeds for milder heat․
Consider pickled jalapeños for a tangy bite․ Combining both bacon and jalapeños creates a sweet, savory, and spicy flavor explosion․ A dash of chili powder enhances the overall heat profile․
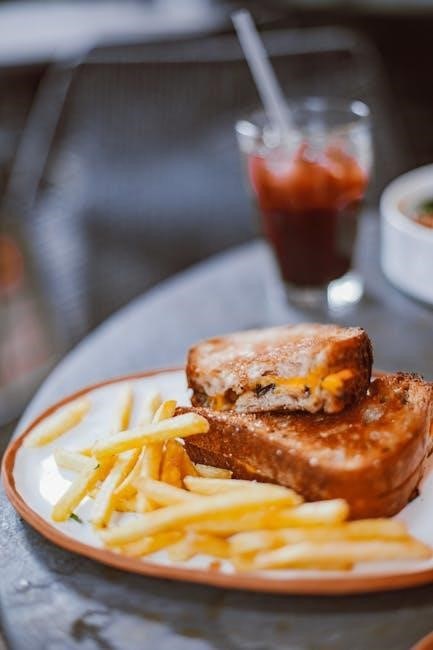
Serving Suggestions
Texas Cheese Toast pairs wonderfully with hearty soups, fresh salads, or as a classic side to smoky BBQ․ It’s also a fantastic appetizer for gatherings!
Pairing with Soups and Salads
Texas Cheese Toast elevates a simple soup and salad meal into something truly special․ The rich, melted cheese and buttery toast provide a delightful textural contrast to creamy soups like tomato or potato․
It’s particularly good with bolder flavors, cutting through the richness․ Alongside a crisp garden salad, the toast adds a satisfying heartiness․ Consider pairing it with a French onion soup for an extra indulgent experience, or a light vinaigrette salad to balance the flavors․
As a Side Dish for BBQ
Texas Cheese Toast is a quintessential accompaniment to classic Texas barbecue! The smoky, savory flavors of brisket, ribs, or pulled pork are wonderfully complemented by the cheesy, buttery goodness of the toast․
It provides a comforting contrast in texture and a delightful flavor boost․ The toast soaks up delicious BBQ sauce, creating an extra layer of flavor․ It’s a crowd-pleaser that perfectly embodies the spirit of a Texas BBQ feast․
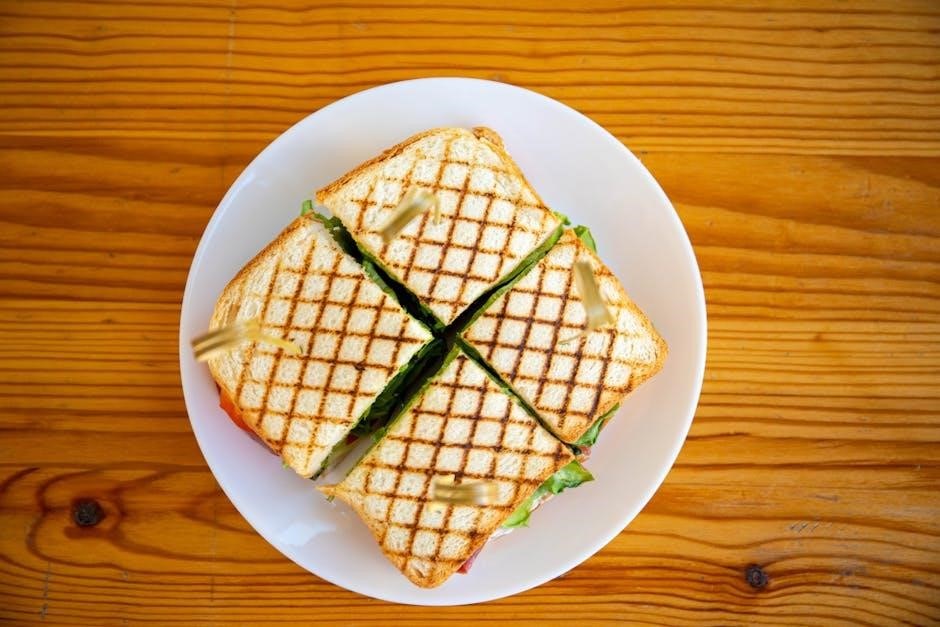
Texas Cheese Toast as an Appetizer
Texas Cheese Toast makes a fantastic and incredibly easy appetizer for gatherings! Cut into smaller, bite-sized pieces, it’s perfect for parties, game days, or casual get-togethers․
Its warm, cheesy appeal is universally loved, and it requires minimal preparation time․ Serve with a variety of dips, like ranch or salsa, for added flavor․ It’s a guaranteed hit that will disappear quickly from the appetizer spread!
Troubleshooting Common Issues
Common problems include uneven melting, burning, or soggy toast․ Adjust broiler distance, cooking time, and bread thickness to achieve perfect Texas Cheese Toast results․
Cheese Not Melting Properly
If your cheese isn’t melting, several factors could be at play․ First, ensure your broiler is adequately preheated; a lower temperature won’t effectively melt the cheese․ Secondly, the cheese itself might be too cold – allowing it to sit at room temperature briefly can help․
Consider the cheese type; some varieties melt more readily than others․ Pre-shredded cheese often contains cellulose, hindering melting, so freshly grated is preferable․ Finally, extending the broiling time (while carefully watching for burning) can encourage complete melting, ensuring a gooey, delicious finish to your Texas Cheese Toast․
Bread Burning Before Cheese Melts
Preventing burnt toast while achieving melted cheese requires careful broiler management․ Lower the oven rack position to increase the distance between the toast and the broiler element․ Reducing the broiler power (if your oven allows) is also beneficial․
Consider briefly covering the edges of the bread with foil to shield them from direct heat․ Monitoring closely and removing the toast promptly when the cheese is melted, even if the bread isn’t deeply browned, is crucial for perfect Texas Cheese Toast․
Toast is Soggy
Soggy Texas Cheese Toast often results from excessive butter or moisture in the cheese․ Ensure butter is applied in a thin, even layer, avoiding pooling․ Using freshly grated cheese, rather than pre-shredded, minimizes added moisture․
Broiling for a sufficient duration is key to evaporating excess liquid and achieving a crisp texture․ If sogginess persists, briefly increase the broiling time, closely monitoring to prevent burning, for truly delightful Texas Cheese Toast․

Nutritional Information
Texas Cheese Toast is calorie-dense due to bread, butter, and cheese․ It contains carbohydrates, fats, and protein; allergen concerns include dairy and gluten․
Calorie Count and Macronutrients
A single serving of Texas Cheese Toast, approximately one slice, typically contains between 300-450 calories, depending on bread thickness, cheese quantity, and butter usage․ Macronutrient breakdown generally includes 30-40 grams of carbohydrates, 15-25 grams of fat, and 10-15 grams of protein․
These values can fluctuate significantly based on ingredient choices; using whole-wheat bread or reduced-fat cheese will lower the calorie and fat content․ Portion control is key, as the rich ingredients contribute to a substantial caloric intake․
Potential Allergens
Texas Cheese Toast commonly contains several potential allergens․ Wheat is present in the bread, posing a risk for those with gluten intolerance or celiac disease․ Dairy, from both butter and cheese, is a significant allergen for many individuals․ Depending on seasoning blends, soy or other ingredients may be present․
Carefully review ingredient labels to identify potential allergens․ Cross-contamination is also a concern during preparation, especially in shared kitchen spaces․ Always inform guests of potential allergens․
Texas Cheese Toast Recipes from Popular Food Bloggers
Recipe Runner and Simply Recipes offer diverse takes on this classic․ Explore their approaches for unique flavor profiles and preparation techniques!
Recipe Runner Inspiration
Recipe Runner’s Teriyaki Chicken recipe, while not directly Texas Cheese Toast, showcases their dedication to flavorful, approachable cooking․ This translates well when considering variations! Their focus on balanced seasonings and clear instructions inspires a similar approach to crafting the perfect toast․
Imagine adapting their seasoning techniques – perhaps a touch of smoked paprika or garlic powder – to elevate the cheese toast․ Recipe Runner’s emphasis on quality ingredients also suggests using a premium cheddar or Monterey Jack for optimal melt and taste․ Their style encourages experimentation!
Simply Recipes Approach
Simply Recipes consistently delivers straightforward, reliable recipes, focusing on technique and clear explanations․ Applying this philosophy to Texas Cheese Toast means prioritizing even cheese distribution and careful broiler monitoring․ Their detailed guides on melting cheese effectively are invaluable․
Expect a focus on achieving a perfectly golden-brown, bubbly top without burning the bread – a common pitfall․ Simply Recipes’ emphasis on understanding why a step is necessary, rather than just how, empowers cooks to adapt and troubleshoot effectively, resulting in consistently delicious toast․
Regional Differences in Texas Cheese Toast
Texas Cheese Toast variations abound, with cities boasting unique twists – from spicier blends to different bread types, reflecting local palates and traditions․
Variations Across Texas Cities
Houston often favors a blend of Monterey Jack and cheddar, sometimes incorporating a hint of jalapeño for a subtle kick, reflecting the city’s diverse culinary scene․
San Antonio leans towards a more traditional approach, emphasizing a generous layer of sharp cheddar on thick-cut white bread, mirroring its historical roots․
Dallas showcases a sophisticated take, with restaurants experimenting with artisan breads and gourmet cheese blends, appealing to a discerning palate․
Austin embraces a playful spirit, frequently adding bacon, pico de gallo, or even a drizzle of hot sauce, embodying the city’s eclectic vibe․
Home-Style vs․ Restaurant Style
Home-style Texas Cheese Toast typically prioritizes comfort and simplicity, utilizing readily available ingredients and generous cheese portions, often prepared for family gatherings․
Restaurant style often showcases a more refined presentation, employing higher-quality breads, gourmet cheese blends, and precise broiling techniques for optimal melt and color․
Restaurants may also incorporate signature seasonings or toppings, elevating the dish beyond the basic recipe, and offering unique flavor profiles․
Both styles share the core essence of cheesy, toasted goodness, but differ in execution and presentation, catering to varying preferences․
Storing Leftover Texas Cheese Toast
Leftover Texas Cheese Toast is best stored in an airtight container at room temperature for up to two days to maintain crispness․
Reheating Methods
To revive leftover Texas Cheese Toast, the broiler is your best friend! Briefly broil for a minute or two, watching closely to prevent burning, restoring that golden-brown crispness․ Alternatively, a toaster oven works wonderfully, offering more even heating․ For a softer texture, a quick zap in the microwave is acceptable, though it won’t regain the initial crunch․
Avoid prolonged heating, as it can make the cheese tough․ A sprinkle of fresh cheese during reheating can enhance the flavor and appearance, mimicking the freshly-broiled experience․
Maintaining Crispness
Preserving the delightful crunch of Texas Cheese Toast requires careful storage․ Once cooled, store leftover toast in an airtight container, ideally with a paper towel to absorb any moisture․ Avoid stacking pieces directly on top of each other, as this can lead to sogginess․
Reheating methods significantly impact crispness; broiling or a toaster oven are preferred over microwaving․ A quick reheat is key – prolonged exposure to heat softens the bread․
Texas Cheese Toast, a true taste of Texan hospitality, is best enjoyed fresh and warm, offering a satisfying crunch and gooey cheese pull․ This simple yet flavorful dish elevates any meal, from hearty BBQ spreads to comforting soups․
Experiment with variations to personalize your experience, and don’t hesitate to share this delightful treat with friends and family․