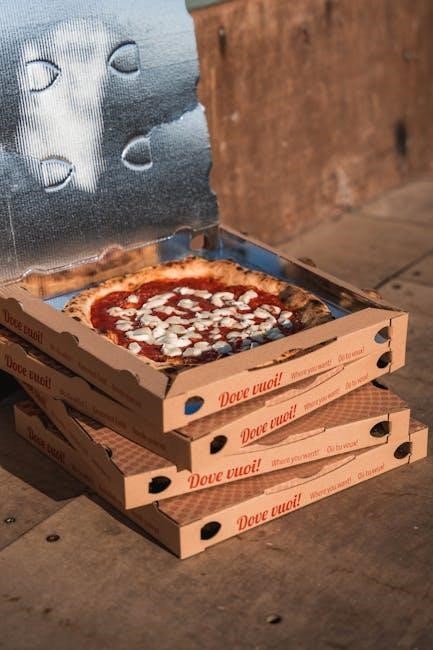
rao’s pizza instructions

Rao’s Pizza is renowned for its authentic homemade pizzas‚ crafted with premium ingredients․ Follow our guide to create a pizzeria-quality experience at home with ease․
Overview of Rao’s Pizza and Its Popularity
Rao’s Pizza has gained a stellar reputation for its authentic‚ homemade-style pies․ Its popularity stems from the use of premium ingredients like San Marzano tomatoes‚ fresh herbs‚ and high-quality cheeses․ The sauce‚ made with crushed tomatoes‚ garlic‚ and olive oil‚ offers a rich‚ tangy flavor․ Rao’s pizzas are known for their perfectly balanced taste and crispy crust‚ achieved through precise cooking methods․ Whether baked in a conventional oven or a brick oven‚ the result is a delicious‚ pizzeria-quality meal at home․ Its widespread availability in stores and versatility in toppings have made Rao’s a favorite among pizza lovers;
Importance of Following Instructions for Optimal Results
Following the instructions for Rao’s Pizza is crucial to achieve the perfect balance of flavors and textures․ Each step‚ from preheating the oven to baking times‚ ensures a crispy crust and evenly melted cheese․ Deviating from the guidelines can result in undercooked or overcooked crusts‚ affecting the overall quality․ Proper handling of dough‚ precise measurements for toppings‚ and adhering to temperature settings are essential․ This attention to detail guarantees a pizzeria-quality experience at home‚ making every bite flavorful and satisfying․ By sticking to the instructions‚ you ensure a delicious‚ authentic Rao’s Pizza every time․
Ingredients for Rao’s Pizza
Rao’s Pizza uses high-quality ingredients like San Marzano tomatoes‚ olive oil‚ garlic‚ onions‚ fresh basil‚ oregano‚ kosher salt‚ and fresh ground black pepper for authentic flavor․
San Marzano Tomatoes
San Marzano tomatoes are the cornerstone of Rao’s Pizza‚ offering a sweet‚ low-acid flavor․ These Italian tomatoes are canned whole and crushed by hand to preserve texture and essence․ Unlike regular tomatoes‚ they have less water content‚ ensuring a richer sauce․ Their natural sweetness enhances the overall flavor profile without added sugars‚ making them essential for an authentic Rao’s Pizza experience․ Properly crushing them retains their vibrant taste and thick consistency‚ crucial for the sauce’s depth and body․ This step is vital for achieving the signature Rao’s taste in every homemade pizza․
Olive Oil
Olive oil is a fundamental ingredient in Rao’s Pizza‚ enhancing the sauce’s richness․ Use a high-quality extra virgin olive oil for its distinct flavor and silky texture․ It’s essential for sautéing garlic and onions‚ creating a fragrant base for the sauce․ The oil’s mild bitterness balances the sweetness of San Marzano tomatoes‚ resulting in a harmonious taste․ Properly heating the oil before adding aromatics ensures even extraction of flavors․ This step is crucial for developing the sauce’s depth and ensuring a smooth‚ velvety consistency․ Quality olive oil elevates the overall flavor profile‚ making it indispensable for an authentic Rao’s Pizza experience․
Garlic
Garlic plays a pivotal role in Rao’s Pizza‚ adding depth and aromatic complexity to the sauce․ Mince 3 cloves of garlic finely and sauté them in olive oil until fragrant but not browned; This step is crucial for developing the sauce’s foundation‚ as garlic enhances the natural sweetness of the tomatoes․ Overcooking can lead to bitterness‚ so monitor the heat and time carefully․ The subtle pungency of garlic balances the herbs and tomatoes‚ creating a harmonious flavor profile․ Proper preparation ensures the garlic infuses evenly‚ contributing to the sauce’s signature taste without overpowering other ingredients․
Onions
Onions add a sweet and savory dimension to Rao’s Pizza sauce․ Finely chop 2 tablespoons of onion and sauté it with garlic until translucent but not browned․ Overcooking can introduce bitterness‚ so monitor the heat and time․ The onions soften and meld with the garlic‚ creating a smooth base for the sauce․ Their mild sweetness complements the tomatoes and herbs without overpowering them․ Properly cooked onions enhance the overall flavor profile‚ ensuring a balanced and aromatic sauce that pairs perfectly with the pizza’s other ingredients․ This step is essential for achieving the signature Rao’s taste․
Fresh Basil
Fresh basil is a cornerstone of Rao’s Pizza‚ providing a vibrant‚ herbaceous flavor․ Use 3-4 leaves‚ chopped finely‚ to ensure the sauce retains its aromatic essence․ Add the basil toward the end of simmering to preserve its delicate flavor and color․ This herb complements the sweetness of the tomatoes and the savory notes of garlic and onions‚ creating a balanced taste profile․ Fresh basil’s brightness elevates the sauce‚ making it a key component of Rao’s signature flavor․ Its subtle yet impactful presence ensures the pizza’s sauce is both authentic and delicious‚ just like the original recipe․
Fresh Oregano
Fresh oregano adds a pungent‚ earthy flavor to Rao’s Pizza sauce‚ enhancing its depth․ Use 1-2 teaspoons of finely chopped fresh oregano‚ depending on taste preferences․ Add it toward the end of the simmering process to preserve its aromatic properties․ Fresh oregano complements the sweetness of the tomatoes and the brightness of basil‚ creating a harmonious flavor profile․ Unlike dried oregano‚ fresh oregano provides a more vibrant and nuanced taste․ This herb is essential for achieving the authentic‚ bold flavor that Rao’s Pizza is known for․ Its subtle yet impactful presence ensures the sauce remains balanced and aromatic․
Kosher Salt and Fresh Ground Black Pepper
Kosher salt and fresh ground black pepper are essential for seasoning Rao’s Pizza sauce‚ enhancing its natural flavors․ Use kosher salt for its mild‚ clean taste and texture‚ which allows for precise seasoning․ Freshly ground black pepper adds depth and a subtle kick without overpowering the dish․ Both are added during the simmering process to ensure balanced flavor․ Season lightly‚ as these ingredients should complement‚ not overwhelm‚ the tomatoes and herbs․ Adjust to taste‚ ensuring the sauce remains harmonious and aromatic‚ a hallmark of Rao’s Pizza’s iconic flavor profile․
Preparing the Sauce
Preparing Rao’s Pizza sauce involves crushing San Marzano tomatoes‚ sautéing garlic and onion‚ and simmering with herbs to create a rich‚ balanced flavor profile․
Crushing the Tomatoes
Start by removing the tomatoes from their cans‚ reserving the juice for later use․ Gently crush the tomatoes by hand or using a blender‚ ensuring a chunky texture․ Remove any cores‚ stems‚ or excess skin to achieve a smooth consistency․ This step is crucial for developing the sauce’s rich flavor and texture․ San Marzano tomatoes are preferred for their sweet‚ low-acid taste‚ making them ideal for Rao’s Pizza sauce․ Crushing them properly balances the sauce’s texture‚ creating a foundation for the other ingredients to meld together seamlessly during simmering․
Sautéing Garlic and Onion
Heat olive oil in a large saucepan over medium heat․ Add minced garlic and finely chopped onion‚ sautéing until fragrant‚ about 30 seconds to 1 minute․ Be careful not to burn them‚ as this can bitter the sauce․ This step enhances the aromatic depth of the sauce‚ blending the sweetness of the onions with the pungency of garlic․ Stir constantly to ensure even cooking․ Once fragrant‚ proceed to add the crushed tomatoes‚ incorporating the reserved juice for added moisture and flavor․ This foundational step sets the stage for a rich‚ well-balanced sauce․
Simmering the Sauce
After sautéing garlic and onions‚ add the crushed tomatoes and their reserved juice to the saucepan․ Bring the mixture to a gentle boil‚ then reduce the heat to low․ Simmer for about 2 hours‚ stirring occasionally‚ allowing the flavors to meld and the sauce to thicken․ This slow-cooking process enhances the natural sweetness of the tomatoes and infuses the sauce with the aromatic essence of garlic and onions․ During the last 30 minutes of simmering‚ add fresh basil and oregano to elevate the sauce’s herbal notes․ Season with kosher salt and black pepper to taste‚ ensuring a perfectly balanced flavor profile․
Adding Herbs
Once the sauce has simmered for about an hour‚ stir in fresh basil and oregano․ These herbs add a vibrant‚ aromatic flavor that complements the tomatoes․ Use 3-4 chopped basil leaves and a teaspoon of finely chopped oregano․ Avoid overloading the sauce with herbs‚ as this can overpower its delicate balance; The slow-cooked tomatoes and herbs meld together‚ creating a rich‚ authentic Italian flavor․ Season with kosher salt and freshly ground black pepper to enhance the overall taste․ The herbs infuse the sauce with a bright‚ herby note that pairs perfectly with mozzarella and other pizza toppings․
Cooking Methods
Rao’s Pizza offers versatile cooking options‚ including conventional ovens‚ brick ovens‚ and alternative methods like air frying or grilling․ Choose your preferred method for a crispy‚ flavorful crust․
Conventional Oven Instructions
Preheat your conventional oven to 425°F (220°C)․ Remove the pizza from its packaging and place it directly on the middle rack․ Bake for 12-14 minutes‚ or until the crust is golden and the cheese is melted and bubbly․ Rotate the pizza halfway through baking to ensure even cooking․ Once baked‚ let the pizza stand for 2-3 minutes before slicing․ This method ensures a crispy crust and well-cooked toppings‚ delivering a pizzeria-quality experience at home․ Always follow the recommended temperature and time for optimal results․
Brick Oven Instructions
Preheat your brick oven to 700°F (371°C)․ Remove the pizza from its packaging and place it on a pizza peel or directly on the oven rack‚ positioned 10-12 inches from the heat source․ Bake for 7-8 minutes‚ or until the crust is golden and the cheese is fully melted․ Rotate the pizza halfway through cooking to ensure even browning․ Keep an eye on the pizza to prevent burning․ Once cooked‚ let it stand for 2-3 minutes before slicing․ This method achieves a crispy‚ well-cooked crust with a smoky flavor‚ perfect for an authentic pizzeria experience at home․
Alternative Cooking Methods
For a crispy crust without a brick oven‚ try using a skillet or air fryer․ Preheat a skillet over medium-high heat and cook the pizza for 3-4 minutes on each side․ In an air fryer‚ set the temperature to 400°F (200°C) and cook for 8-10 minutes․ Both methods yield a golden‚ well-cooked crust․ Ensure the pizza is placed on a lightly floured surface or parchment to prevent sticking․ These alternatives provide a convenient way to achieve delicious results without traditional oven setups‚ making Rao’s pizza accessible to all home cooks․
Toppings for Rao’s Pizza
Classic toppings include fresh mozzarella‚ uncured pepperoni‚ and fire-roasted vegetables‚ while the five-cheese combination offers rich‚ creamy flavor․ Each topping enhances the pizza’s authentic‚ homemade taste and quality․
Fresh Mozzarella
Fresh mozzarella is a cornerstone of Rao’s Pizza‚ offering a creamy‚ milky flavor․ Opt for high-quality‚ whole-milk mozzarella for the best taste․ Slice the mozzarella thinly and pat it dry with paper towels to remove excess moisture‚ ensuring it melts evenly without releasing too much water․ Fresh mozzarella adds a soft‚ velvety texture and a touch of sweetness‚ balancing the savory flavors of the sauce and other toppings․ For an authentic Rao’s experience‚ use mozzarella that’s as fresh as possible‚ as it melts beautifully under high heat‚ creating a golden‚ bubbly crust that enhances the pizza’s overall appeal․
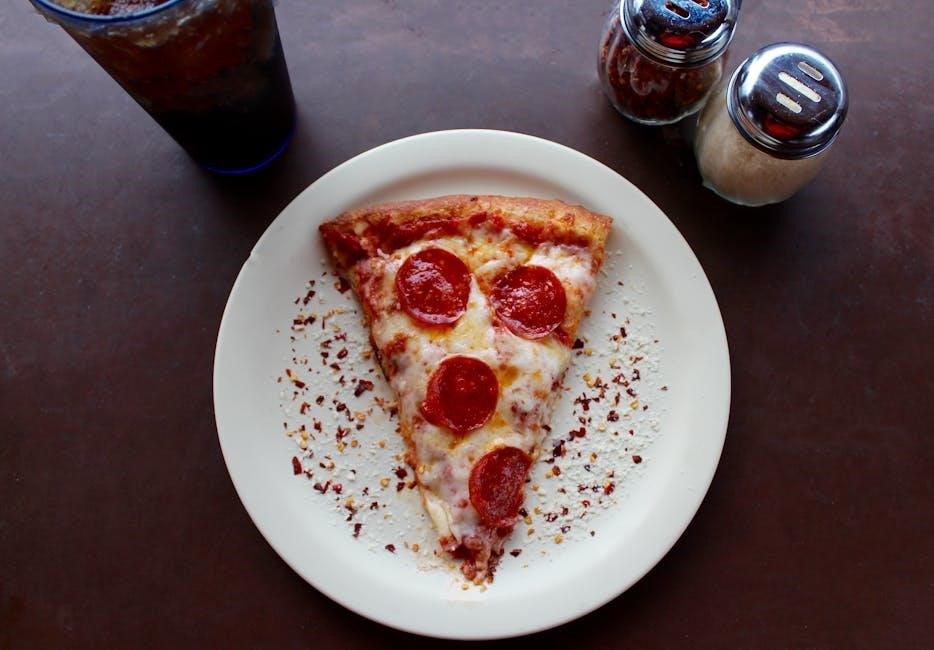
Uncured Pepperoni
Uncured pepperoni adds a vibrant‚ meaty flavor to Rao’s Pizza․ Made without preservatives‚ it offers a cleaner‚ more natural taste․ Opt for thinly sliced rounds to ensure even cooking․ Baked in the oven‚ the pepperoni develops a crispy edge while retaining its juicy interior‚ creating a delightful texture contrast․ Pair it with fresh mozzarella and Rao’s homemade sauce for a classic combination that balances spice and richness․ This topping is a staple for those seeking a traditional pizza experience with bold‚ authentic flavors․
Fire-Roasted Vegetables
Fire-roasted vegetables bring a burst of natural sweetness and smoky flavor to Rao’s Pizza․ Roasting enhances the texture and depth of ingredients like zucchini‚ bell peppers‚ and eggplant․ Chop vegetables into bite-sized pieces‚ toss with olive oil‚ and season with salt and pepper․ Roast in the oven until caramelized and slightly charred․ This method intensifies their flavor‚ adding a vibrant contrast to the savory sauce and cheese․ Fire-roasted vegetables create a colorful‚ wholesome topping that complements Rao’s Homemade Pizza Sauce and fresh mozzarella‚ offering a deliciously balanced and nutritious pizza option․
Five Cheese Combination
Rao’s Five Cheese Combination offers a rich‚ creamy‚ and indulgent flavor profile․ This blend typically includes fresh mozzarella‚ Parmesan‚ Ricotta‚ Gorgonzola‚ and Provolone‚ each contributing unique textures and tastes․ Fresh mozzarella provides creaminess‚ while Parmesan adds a salty‚ sharpness․ Ricotta brings a light‚ airy texture‚ Gorgonzola offers a tangy bite‚ and Provolone adds a smooth‚ buttery note․ Together‚ they create a harmonious balance that enhances the pizza’s overall flavor․ This combination pairs perfectly with Rao’s Homemade Pizza Sauce‚ creating a deliciously layered taste experience․ For a finishing touch‚ sprinkle fresh herbs like basil or oregano for added freshness․
Assembling the Pizza
Begin by prepping the dough‚ ensuring it’s evenly rolled out․ Spread Rao’s Homemade Pizza Sauce thinly‚ leaving a small border․ Add cheese and toppings‚ finishing with fresh herbs for a perfect pizza․
Prepping the Dough
Start by bringing the pizza dough to room temperature for pliability․ Lightly flour a clean surface and gently roll or stretch the dough into your desired shape and thickness․ Ensure the dough is evenly spread‚ forming a smooth base․ For a crispy crust‚ sprinkle a pinch of cornmeal on the surface before placing the dough․ This step ensures the pizza cooks evenly and prevents sogginess․ Properly prepping the dough is essential for achieving that perfect balance between chewy and crispy crust‚ setting the foundation for a delicious Rao’s Pizza experience․
Spreading the Sauce
The foundation of Rao’s Pizza lies in its sauce․ Using a ladle‚ spread a thin‚ even layer of Rao’s Homemade Pizza Sauce over the dough‚ leaving a small border around the edges․ Avoid over-saucing‚ as this can make the pizza soggy․ The sauce should be spread gently‚ ensuring consistent coverage without overwhelming the other ingredients․ This step is crucial for balancing flavors and maintaining the pizza’s structure․ By keeping the sauce layer sparse yet evenly distributed‚ you preserve the delicate harmony between the crust‚ sauce‚ and toppings‚ creating a true Rao’s Pizza experience․
Adding Cheese and Toppings
Once the sauce is evenly spread‚ layer fresh mozzarella slices over the pizza․ For an authentic Rao’s touch‚ use high-quality‚ thinly sliced mozzarella to ensure even melting․ Add toppings sparingly to avoid overwhelming the pizza‚ as Rao’s emphasizes simplicity and flavor balance․ Popular choices include uncured pepperoni‚ fire-roasted vegetables‚ or a five-cheese combination․ Each topping should complement the sauce and cheese without overcrowding the crust․ Finish by sprinkling a pinch of Parmesan for added depth․ Let the toppings breathe to maintain the pizza’s crispy texture and prevent sogginess․ This step ensures every bite is a perfect harmony of flavors and textures․
Final Touches
Before baking‚ add a few fresh basil leaves for aromatic freshness․ Drizzle a light layer of olive oil around the crust to enhance crispiness and flavor․ Sprinkle a pinch of Parmesan cheese for a salty‚ nutty note․ Allow the pizza to stand for 2-3 minutes after baking to let the cheese set and the sauce distribute evenly․ This ensures a clean slice and prevents sogginess․ These final touches elevate the pizza to a restaurant-quality dish‚ balancing flavors and textures for an authentic Rao’s experience․ The result is a perfectly cooked‚ flavorful pizza that retains its crisp crust and vibrant toppings․

Baking Instructions
Preheat the oven to 425°F․ Place the pizza directly on the middle rack and bake for 12-14 minutes‚ or until the crust is golden and cheese is bubbly․
Preheating the Oven
Preheating your oven to the correct temperature is essential for achieving a perfectly cooked Rao’s Pizza․ For a conventional oven‚ set the temperature to 425°F (220°C) and allow it to preheat for at least 10-15 minutes to ensure even heat distribution․ If using a brick oven‚ preheat it to 700°F (371°C) for optimal results․ Proper preheating ensures the crust cooks evenly‚ the cheese melts thoroughly‚ and the flavors meld together․ Always place the pizza on the middle rack to avoid burning and achieve a crispy‚ golden-brown crust․
Baking Time and Temperature
Baking time and temperature are critical for achieving the perfect Rao’s Pizza․ For a conventional oven‚ bake at 425°F (220°C) for 12-14 minutes‚ or until the crust is golden and the cheese is bubbly․ In a brick oven‚ bake at 700°F (371°C) for 7-8 minutes‚ ensuring the crust is crispy and well-cooked․ Monitor the pizza closely to prevent burning‚ especially in a brick oven․ The cheese should be fully melted‚ and the crust should have a golden-brown appearance․ Proper baking time and temperature ensure a crispy crust and a flavorful‚ well-cooked pizza․
Letting the Pizza Stand
Letting the pizza stand for a few minutes after baking is crucial for achieving the perfect texture․ Allow the pizza to rest for 2-3 minutes before slicing․ This allows the cheese to set slightly‚ preventing it from stretching or oozing excessively․ It also helps the crust retain its crispiness and prevents the sauce from becoming too runny․ During this time‚ the flavors will meld together‚ enhancing the overall taste․ Use this brief period to gather your toppings or prepare serving utensils․ A well-rested pizza ensures a clean‚ even slice and a more enjoyable dining experience․
Tips and Tricks
Enhance your Rao’s pizza experience with these expert tips:
- Use cornmeal on the crust to prevent sticking and add crunch․
- Monitor the pizza while baking to avoid overcooking․
- Avoid overloading with toppings for a balanced flavor and texture․
These simple tricks ensure a perfect homemade pizza every time!
Using Cornmeal for Crust
Using cornmeal for the crust is a simple yet effective technique to enhance your Rao’s pizza․ Lightly sprinkle fine or medium-grind cornmeal onto the pizza peel or baking sheet before placing the dough․ This prevents the crust from sticking and ensures a crisp‚ well-textured base․ For an extra crunchy crust‚ preheat the baking sheet or pizza stone with a thin layer of cornmeal in the oven for a few minutes before adding the dough․ This step not only improves the crust’s texture but also adds a subtle nutty flavor‚ making your homemade pizza even more delicious and authentic․
Avoiding Overloading Toppings
Avoiding overloaded toppings is crucial for achieving a perfectly cooked Rao’s pizza․ Too many toppings can weigh down the crust‚ making it soggy and unevenly cooked․ Instead‚ focus on balanced‚ high-quality ingredients that complement the flavorful sauce and cheese․ Overloading can also lead to a messy pizza that’s difficult to handle․ By keeping toppings moderate‚ you ensure the crust stays crispy and the flavors remain vibrant․ This approach allows each component to shine‚ creating a harmonious and satisfying pizza experience․ Remember‚ less is often more when aiming for an authentic‚ pizzeria-quality result at home․
Monitoring the Pizza While Baking
Monitoring the pizza while baking is essential to achieve the perfect crust and flavor․ Keep an eye on the pizza to ensure it doesn’t overcook or burn․ Rotate the pizza halfway through the baking time to promote even cooking‚ especially in conventional ovens․ Look for the cheese to fully melt and bubble slightly‚ and the crust to turn a golden brown․ If using a brick oven‚ watch closely as the high heat can quickly lead to charring․ Use a pizza peel or spatula to adjust the pizza’s position if needed․ Proper monitoring ensures a well-cooked‚ delicious Rao’s pizza every time․
Creating Rao’s Pizza at home is a delightful journey that combines high-quality ingredients‚ precise techniques‚ and careful attention to detail․ By following the instructions and tips outlined‚ you can craft pizzas that rival those from a professional pizzeria․ The key lies in using fresh ingredients like San Marzano tomatoes‚ fresh herbs‚ and premium cheeses‚ while adhering to proper baking methods․ Whether you’re using a conventional oven or a brick oven‚ the result is a flavorful‚ authentic Italian pizza experience․ Enjoy the satisfaction of a homemade meal that brings family and friends together‚ savoring the taste of tradition in every bite․