integrative manual therapy training
Integrative Manual Therapy (IMT) combines diverse diagnostic and treatment methods to address pain, dysfunction, and disease, promoting healing through a holistic, patient-centered approach.
1.1 Definition and Scope of IMT
Integrative Manual Therapy (IMT) is a holistic, patient-centered approach combining manual techniques with diagnostic tools to address physical, emotional, and psychological dysfunction. It integrates diverse therapies, promoting healing through a comprehensive understanding of the body’s interconnected systems. IMT’s scope extends to treating pain, disease, and disability, emphasizing the restoration of balance and function. It is applied in various clinical and therapeutic settings, offering adaptable treatments tailored to individual needs and fostering long-term well-being.
1.2 Historical Background and Evolution
Integrative Manual Therapy (IMT) emerged in the late 20th century, influenced by various therapeutic traditions. The Minster Centre, founded in 1978, became a pioneer in integrative training, blending diverse approaches. Over decades, IMT evolved by incorporating manual techniques, diagnostic tools, and holistic principles. This approach gained recognition for its comprehensive methodology, addressing physical, emotional, and psychological aspects of health. Its development reflects a growing understanding of the interconnectedness of body systems, leading to its application in pain management, rehabilitation, and chronic disease support.
1.3 Key Principles and Philosophies
Integrative Manual Therapy (IMT) is rooted in a holistic approach, emphasizing the interconnectedness of the mind, body, and spirit. It prioritizes patient-centered care, focusing on the unique needs of each individual. IMT integrates diverse therapeutic modalities, combining manual techniques with diagnostic tools to address the whole person. Central to its philosophy is the belief that healing occurs when the body’s natural systems are balanced and functioning optimally. This approach encourages collaboration between therapist and patient, fostering empowerment and self-awareness in the healing process.
Core Concepts and Principles of IMT
IMT blends manual techniques with holistic philosophies, focusing on mind-body connection, patient-centered care, and addressing the root cause of dysfunction for optimal well-being.
2.1 Holistic Approach to Therapy
IMT emphasizes a holistic approach, treating the whole person—mind, body, and spirit. It integrates manual techniques with other therapies to address physical, emotional, and psychological factors. By focusing on the interconnectedness of body systems, IMT aims to restore balance and promote overall well-being. This approach encourages collaboration between therapist and patient, fostering a personalized and comprehensive healing process that targets the root cause of dysfunction, not just symptoms.
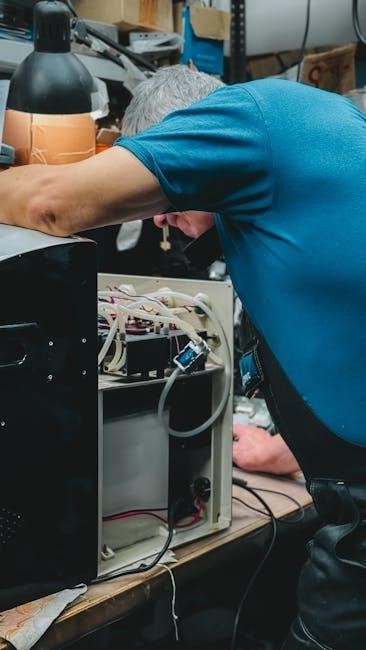
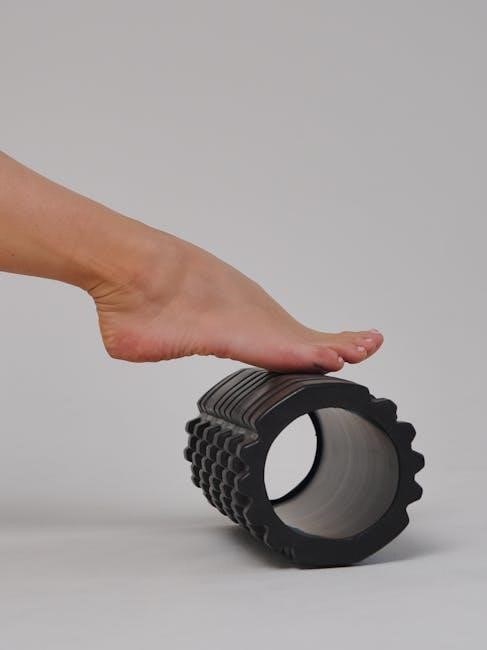
2.2 Integration of Manual Techniques
IMT seamlessly integrates various manual techniques, such as massage, soft tissue work, joint mobilization, and myofascial release, to address a wide range of physical and functional issues. By combining these methods, therapists can tailor treatments to individual needs, promoting optimal outcomes. This approach allows for a comprehensive assessment of the body’s interconnected systems, enabling precise and effective interventions. The integration of these techniques enhances flexibility, reduces pain, and supports the body’s natural healing processes.
2.3 Diagnostic and Treatment Methodologies
IMT employs a comprehensive diagnostic approach, assessing the entire body to identify underlying causes of dysfunction. Treatment methodologies combine manual techniques with individualized care, addressing physical, emotional, and systemic imbalances. By integrating advanced assessment tools and therapeutic interventions, IMT promotes healing, restores function, and enhances overall well-being. This holistic methodology ensures personalized treatment plans, making it adaptable to diverse patient needs and conditions.
Benefits of Integrative Manual Therapy
IMT offers physical healing, emotional well-being, and long-term health improvements, addressing pain, dysfunction, and chronic conditions through a holistic, patient-centered approach.
3.1 Physical Benefits for Patients
IMT provides significant physical benefits, including pain reduction, improved mobility, and enhanced functional abilities. It addresses musculoskeletal issues, reduces inflammation, and promotes tissue repair. By targeting the root causes of dysfunction, IMT helps restore balance and optimize bodily systems, enabling patients to achieve lasting physical well-being and improved quality of life through natural, non-invasive methods.
3.2 Emotional and Psychological Benefits
IMT fosters emotional and psychological well-being by reducing stress, anxiety, and depression. It promotes relaxation, enhances self-awareness, and supports emotional release, empowering patients to manage their mental health effectively. The therapy’s holistic approach helps individuals develop resilience and cope with trauma, leading to improved mental clarity and overall emotional balance. By addressing both body and mind, IMT contributes to a deeper sense of calm and long-term psychological well-being.
3.3 Long-Term Health Outcomes
IMT promotes sustained improvements in physical function, reducing chronic pain and enhancing mobility. It supports long-term recovery by addressing underlying causes of dysfunction, improving overall well-being, and empowering patients to maintain health independently. The therapy’s holistic approach fosters resilience, reducing the risk of recurring issues and improving quality of life. Patients often experience lasting benefits, including better management of chronic conditions and enhanced mental-physical alignment, leading to improved health outcomes over time.
Training and Certification in IMT
IMT training programs offer a comprehensive curriculum, blending theoretical knowledge with practical skills, enabling therapists to integrate diverse modalities and deliver holistic, patient-centered care effectively.
4.1 Overview of Training Programs
IMT training programs provide a comprehensive education, combining theoretical foundations with hands-on practice. These programs are designed to equip therapists with the skills to integrate various manual and non-manual techniques. The curriculum often includes courses on anatomy, physiology, and advanced diagnostic methods. Practical experience is emphasized, allowing trainees to apply their knowledge in real-world settings. Many programs, such as those offered by The Minster Centre, focus on developing holistic, patient-centered approaches. This ensures graduates are well-prepared to address diverse patient needs effectively.
4.2 Certification Process and Requirements
Certification in IMT typically involves completing a rigorous training program, such as those offered by The Minster Centre. Trainees must master a range of manual and non-manual techniques, demonstrating proficiency through practical exams. Requirements include completing all coursework, passing clinical assessments, and submitting case studies. The process ensures therapists are skilled in holistic, patient-centered care. Certification reflects a deep understanding of IMT principles and the ability to integrate diverse therapies effectively.
4.3 Role of Practical Experience
Practical experience is vital in IMT training, allowing therapists to refine their skills in real-world settings. Hands-on training enables the application of diagnostic and treatment methodologies, ensuring mastery of techniques. Working with diverse patient cases enhances clinical reasoning and adaptability. Practical experience fosters confidence, as therapists observe positive outcomes and develop a deeper understanding of patient needs. It is through this experiential learning that IMT practitioners become proficient in integrating manual and non-manual therapies effectively, delivering comprehensive, patient-centered care.

Techniques and Modalities in IMT
IMT incorporates diverse techniques, including assessment methods, manual therapies, and non-manual interventions, to address physical and emotional dysfunctions, promoting holistic healing and functional restoration.
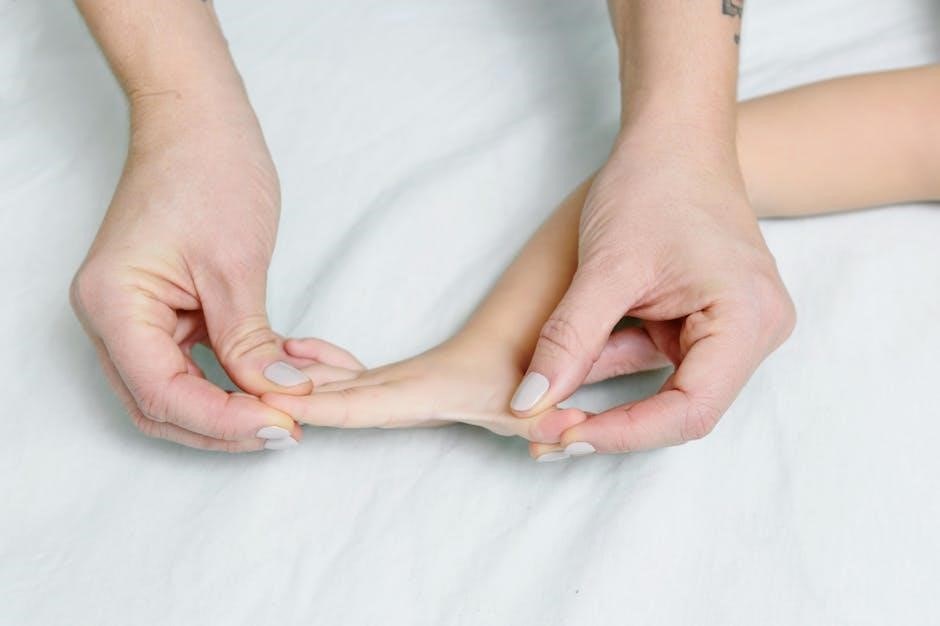
5.1 Assessment and Diagnostic Techniques
IMT employs comprehensive assessment techniques, including palpation, observation, and patient history analysis, to identify structural and functional imbalances. These methods allow practitioners to detect areas of tension, restricted mobility, and systemic dysfunction. Advanced diagnostic tools, such as movement analysis and manual testing, are integrated to create a detailed treatment plan. This holistic approach ensures that both physical and emotional factors are considered, enabling personalized and effective interventions tailored to each patient’s unique needs and conditions.
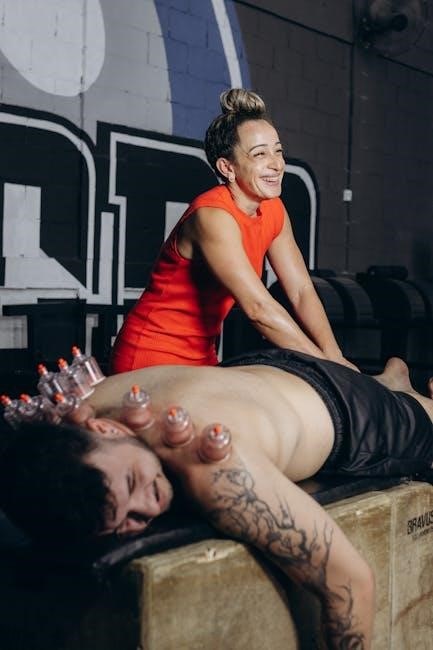
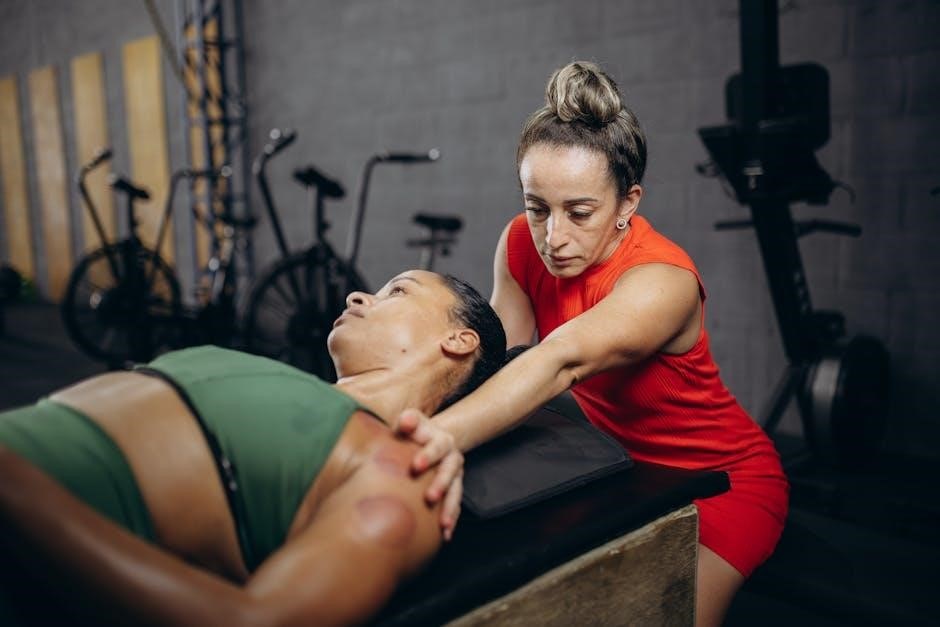
5.2 Treatment Modalities and Interventions
IMT incorporates a variety of manual techniques, including soft tissue mobilization, joint mobilization, and myofascial release, to restore optimal function. Craniosacral therapy, visceral manipulation, and lymphatic drainage are also employed to address specific dysfunctions. These interventions target pain reduction, improved mobility, and enhanced overall well-being. By integrating these modalities, practitioners tailor treatments to individual needs, promoting systemic balance and supporting the body’s natural healing processes. This approach fosters long-term recovery and functional improvement.
5.3 Combination of Manual and Non-Manual Therapies
IMT seamlessly integrates manual techniques with non-manual approaches, such as mindfulness, breathwork, and energy-based therapies, to create a comprehensive treatment plan. This blend addresses not only physical dysfunctions but also emotional and mental imbalances. By combining hands-on methods with complementary therapies, practitioners enhance the body’s innate healing potential, fostering a deeper, more holistic approach to wellness and recovery. This integrative model ensures a balanced and personalized treatment experience for patients.
Applications of IMT in Healthcare
IMT is widely applied in pain management, rehabilitation, sports medicine, and chronic disease support, offering versatile solutions to enhance patient outcomes across diverse healthcare needs.
6.1 Pain Management and Rehabilitation
IMT excels in pain management by addressing the root causes of discomfort, reducing inflammation, and restoring functional movement; Its holistic approach combines manual techniques with therapeutic strategies to enhance mobility and strength. Patients with chronic pain or post-surgical conditions benefit from tailored sessions that promote tissue repair and neurological balance. By integrating diagnostic insights, IMT fosters personalized rehabilitation plans, empowering individuals to regain independence and improve their quality of life through sustainable, non-invasive methods.
6.2 Sports Medicine and Performance Enhancement
IMT plays a pivotal role in sports medicine by optimizing physical performance and preventing injuries; Its manual techniques enhance flexibility, strength, and coordination, while addressing muscle imbalances. Athletes benefit from improved movement patterns, reduced recovery times, and sustained peak performance. IMT also supports rehabilitation, ensuring a swift return to competition. By integrating therapeutic strategies, it empowers athletes to achieve their full potential while minimizing the risk of injury, making it an invaluable tool in modern sports medicine and performance enhancement programs.
6.3 Chronic Disease and Disability Support
IMT offers tailored support for individuals with chronic diseases and disabilities, enhancing mobility and reducing discomfort. Its manual techniques address pain and improve functional abilities, while non-manual therapies promote emotional well-being. IMT empowers patients to manage their conditions effectively, fostering independence and quality of life. By integrating personalized treatment plans, IMT provides comprehensive care for those navigating long-term health challenges, ensuring safety and efficacy in every session.
The Role of Technology in IMT
Technology enhances IMT through AI diagnostics, digital platforms, and data-driven insights, improving treatment efficacy and patient outcomes while streamlining therapeutic processes.
7.1 Artificial Intelligence and Diagnostic Tools
Artificial Intelligence (AI) and advanced diagnostic tools are revolutionizing Integrative Manual Therapy (IMT) by enhancing accuracy and personalizing treatment plans. AI algorithms analyze complex patient data to identify patterns and predict optimal interventions, allowing therapists to address root causes more effectively. These technologies also streamline diagnostic processes, enabling real-time assessments and monitoring. By integrating AI, IMT practitioners can deliver more precise and timely care, improving overall patient outcomes.
7.2 Digital Platforms for Therapy Delivery
Digital platforms are transforming Integrative Manual Therapy (IMT) by enabling remote therapy delivery and expanding access to care. Telehealth solutions now allow therapists to conduct virtual consultations, monitor progress, and provide personalized treatment plans. These platforms also support patient engagement through interactive tools and educational resources. AI-driven systems enhance therapy delivery by offering real-time feedback and data-driven insights, ensuring consistent and effective care. Digital platforms are bridging gaps in accessibility, making IMT more convenient and widespread while maintaining high standards of patient safety and confidentiality.
7.3 Data-Driven Approaches to Treatment
Data-driven approaches in Integrative Manual Therapy (IMT) leverage patient data to personalize treatments, enhancing accuracy and effectiveness. Advanced analytics and AI tools enable therapists to track progress, identify patterns, and predict outcomes. By integrating real-time data, IMT practitioners can tailor interventions to individual needs, improving therapeutic results. This evidence-based methodology ensures treatments are adaptive, precise, and aligned with patient goals, fostering better long-term health outcomes and standardized care delivery.

Safety and Contraindications in IMT
IMT prioritizes patient safety by identifying contraindications and precautions for vulnerable populations, ensuring treatments are adapted to individual health conditions and needs.
8.1 Understanding Contraindications
Contraindications in IMT involve conditions where manual therapies may worsen symptoms or pose risks, such as acute fractures, severe inflammatory diseases, or certain systemic illnesses. Practitioners must assess individual health statuses to avoid exacerbating conditions like osteoporosis or recent injuries. Pre-existing medical conditions, such as cardiovascular instability or neurological impairments, require careful consideration. Open communication with healthcare providers is essential to ensure safe and effective treatment planning, adapting techniques to patient needs and avoiding potential harm.
8.2 Precautions for Special Populations
IMT requires tailored approaches for special populations, such as the elderly, pregnant women, children, and individuals with chronic conditions. Techniques must be adapted to accommodate physical limitations or sensitivities, ensuring comfort and safety. Conditions like osteoporosis or recent injuries demand extra caution to prevent further harm. Collaboration with healthcare providers is crucial for high-risk patients; Informed consent and thorough assessment are essential to modify treatments appropriately, ensuring the therapy remains effective while minimizing potential risks for vulnerable groups.
8.3 Ensuring Patient Safety
Ensuring patient safety in IMT involves thorough assessment, clear communication, and adherence to treatment guidelines. Informed consent is vital, outlining risks and benefits. Techniques are adapted to avoid injury, especially for vulnerable populations. Continuous monitoring during sessions allows for immediate adjustments. Open dialogue between therapist and patient fosters trust and ensures comfort. Proper documentation of treatment plans and progress supports accountability and effective care delivery, maintaining high standards of patient safety throughout the therapeutic process.
Comparisons with Other Therapeutic Modalities
IMT stands out for its integrative approach, combining manual techniques with holistic principles, distinguishing it from traditional therapies that often focus on isolated symptoms or methods.
9.1 IMT vs. Traditional Physical Therapy
Integrative Manual Therapy (IMT) differs from traditional physical therapy by its holistic focus, addressing the whole person rather than isolated symptoms. While traditional PT often emphasizes specific exercises and modalities, IMT incorporates a wide range of manual techniques, diagnostic tools, and patient-centered approaches to restore balance and function. This comprehensive method often leads to deeper, longer-lasting results, making it a unique alternative for patients seeking more than symptom relief.
9.2 IMT vs. Alternative Healing Practices
Integrative Manual Therapy (IMT) shares similarities with alternative healing practices in its holistic approach but differs in its structured, evidence-based methodologies. While practices like acupuncture or energy healing focus on specific systems, IMT combines manual techniques with diagnostic tools to address the whole person. Its emphasis on physical and emotional balance aligns with alternative therapies, yet IMT’s systematic approach provides a more comprehensive framework for lasting healing and restoration of body function.
9.3 IMT vs. Somatic and Mind-Body Therapies
While Integrative Manual Therapy (IMT) and somatic and mind-body therapies share a holistic approach, IMT distinctively emphasizes manual techniques and diagnostics. Somatic therapies focus on body awareness and releasing tension, often through internal processes, whereas mind-body therapies highlight mental-emotional connections. IMT, however, combines hands-on methods with diagnostic tools, targeting specific physical dysfunctions. Its structured, evidence-based approach differentiates it from the more anecdotal practices of some alternative therapies, aiming to treat particular issues rather than solely promoting general well-being.
Career Opportunities in IMT
IMT offers versatile career paths, including clinical practice, private therapy, and entrepreneurship. Professionals can also pursue roles in education, research, and specialized healthcare settings, fostering growth and innovation.
10.1 Roles in Clinical and Private Practice
IMT professionals can thrive in clinical settings, hospitals, or private practices, offering tailored therapies. They may work as primary therapists, consultants, or part of multidisciplinary teams. Private practice allows autonomy, enabling therapists to specialize in niche areas like pain management or sports therapy. Clinics often integrate IMT with other modalities, enhancing patient care. These roles require strong communication skills, adaptability, and a commitment to continuous learning, ensuring impactful, patient-centered outcomes in diverse healthcare environments.
10.2 Opportunities in Education and Research
Integrative Manual Therapy (IMT) offers robust opportunities in education and research, enabling professionals to contribute to the field’s growth. Educators can develop curricula, teach at institutions like The Minster Centre, or mentor future therapists. Researchers can explore IMT’s efficacy, advancing evidence-based practices. Collaboration between academia and clinical settings fosters innovation, ensuring IMT remains a dynamic, evolving modality. These roles allow professionals to shape the future of therapy, promoting holistic healing and improving patient outcomes through education and scientific inquiry.
10.3 Entrepreneurship and Innovation in IMT
Integrative Manual Therapy (IMT) presents exciting opportunities for entrepreneurship and innovation. Practitioners can establish private practices, leveraging their expertise to offer specialized care. Innovators can develop digital platforms or tools, enhancing therapy delivery and accessibility. By integrating manual techniques with emerging technologies like AI, entrepreneurs can revolutionize patient care. These ventures not only expand IMT’s reach but also contribute to its evolution, ensuring it remains a cutting-edge, patient-centered modality in the healthcare landscape.
The Future of Integrative Manual Therapy
The future of IMT lies in integrating AI, advancing digital therapies, and expanding global accessibility, ensuring innovative, data-driven care for diverse patient needs worldwide.
11.1 Emerging Trends and Innovations
Emerging trends in IMT include the integration of artificial intelligence for enhanced diagnostics and personalized treatment plans. Digital platforms are revolutionizing therapy delivery, making IMT more accessible globally. Advances in data analytics enable practitioners to track patient progress and refine interventions. The incorporation of virtual reality and wearable technology is also being explored to improve therapeutic outcomes. These innovations underscore IMT’s evolution as a dynamic, adaptive approach to healthcare, ensuring it remains at the forefront of holistic healing.
11.2 Expanding Applications in Healthcare
IMT is increasingly being applied across various healthcare domains, including pain management, sports medicine, and chronic disease support. Its holistic approach is proving effective in rehabilitation and disability care, addressing both physical and emotional needs. The integration of IMT with other therapies, such as acupuncture and somatic practices, is broadening its reach. Additionally, its use in preventive care and wellness programs highlights its versatility in promoting long-term health outcomes for diverse patient populations.
11.3 Global Growth and Adoption
IMT is gaining recognition worldwide as a complementary approach to traditional healthcare. Its adoption is expanding across countries, driven by its holistic benefits and effectiveness in addressing diverse conditions. Training programs and certifications are becoming more accessible, fostering a global network of practitioners. The rise of digital platforms for therapy delivery has further accelerated its reach, particularly in remote areas. As research and interdisciplinary collaboration grow, IMT is increasingly being integrated into mainstream healthcare systems, solidifying its role in global health practices.
Integrative Manual Therapy (IMT) represents a revolutionary approach to healthcare, blending diverse techniques to address physical and emotional well-being. Its training programs emphasize a holistic understanding, enabling practitioners to deliver personalized care that fosters long-term health outcomes. As IMT gains global recognition, its integration into mainstream healthcare highlights its potential to transform traditional practices through innovative, evidence-based methods. Continued research and technological advancements promise to further enhance its applications, solidifying IMT’s role in modern healthcare.